Argon ONE Guide
Last Update: 8/5/2021
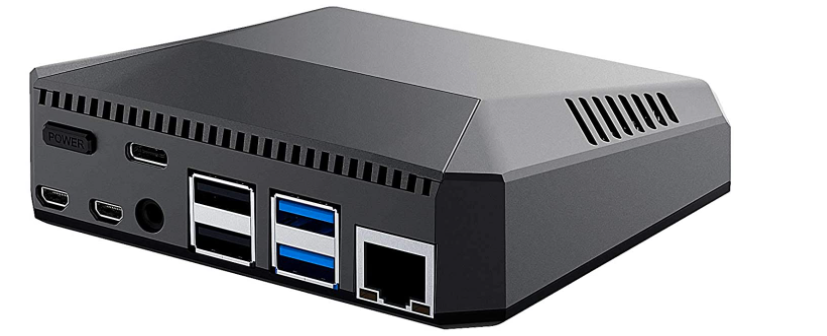
There are currently two primary models of the Argon ONE Raspberry Pi 4 case. We’ll call the first model V1 (version 1), this model does not include the M.2 SSD base. Though, you can optionally purchase just the M.2 base which will fit the V1 case and provide M.2 support. This case was very popular, one obvious difference between the V1 case and the new V2 case is that instead of two MicroHDMI connections the V2 case has full-size HDMI ports. The V2 case also includes a programmable infrared receiver (IR). Aside from that, they are very similar in construction and operation.
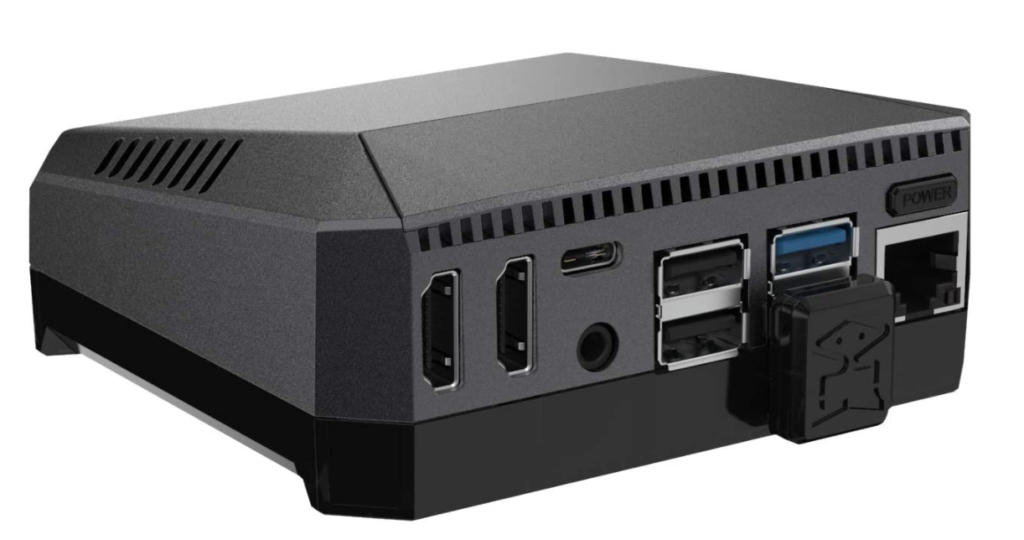
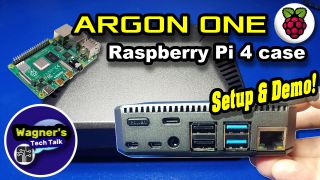
Pictured above is the new Argon ONE M.2 Case for the Raspberry Pi 4. This case can be ordered with/without an extended bottom base which will allow inserting an M.2 B-Key or B+M Key SSD. You will be able to boot directly from the SSD or microSD.
There are a few caveats I’ve found with this case that I want to make you aware of:
- No USB-C Power supply included. Not a big deal, but will add ~$10 extra to the cost if you don’t already have one.
- The MicroSD card is not accessible without removing (unscrewing) the base.
- The base attaches to the USB 3.0 port using a U-adapter which consumes one of the two Raspberry Pi USB 3.0 ports.
- Due to the size of the U-adapter, you may have difficulty attaching some USB devices to the available USB 3.0 port (a small hub or extender cable would overcome this easily).
If you already own the Argon ONE V1 case and don’t need/want the full-size HDMI ports or IR functionality, you can purchase just the Argon ONE M.2 Expansion SSD board/base separately and add it to your existing case.
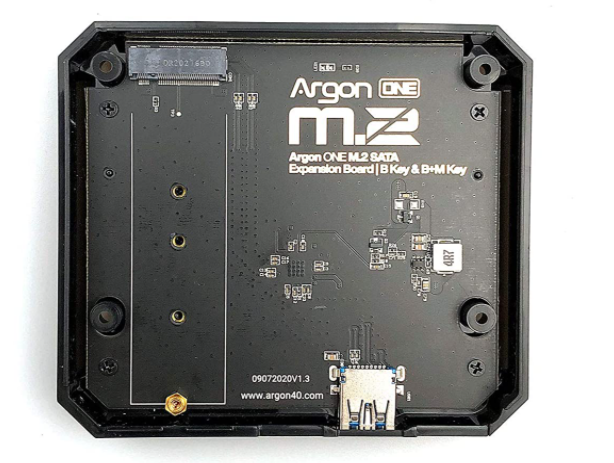
Table of Contents
Video Reviews
Below you’ll find three video reviews of the Argon ONE Case for the Raspberry Pi 4. The first video below is the most recently released M.2 SSD Version (V2) with two full-size HDMI ports and IR Receiver, the 2nd for the IR Remote. The 3rd video is a review of the original (older) Argon ONE case (V1).
If you are interested in running multiple operating systems on your Argon ONE M.2 case, you may also be interested in checking out PINN Lite or BerryBoot. These tools will boot allow booting from the MicroSD and then launch the operating system from the SSD. I used the Argon One V2 M.2 case for the creation of this video.
Also, coming soon will be a video of PINN Lite (see here). It’s similar conceptually to BerryBoot but includes it’s own set of features and limitations. The video will go into more detail.
Where to find an Argon ONE
The following are links to the various Argon ONE models and related accessories shown in the above videos.

- Argon ONE M.2 Case for Raspberry Pi 4 (Argon M.2 CASE ONLY) | SATA SSD Support | B-Key and B+M Key Compatible
- Argon ONE M.2 Raspberry Pi SSD Board (M.2 Expansion Board ONLY)
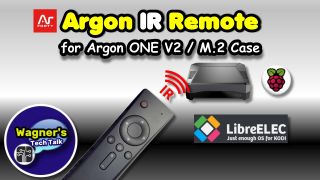
- Argon IR Remote – for the Argon ONE V2 and M.2 cases (only)
- Samsung 860 EVO SSD 500GB – M.2 SATA Internal Solid State Drive shown in the above video.
- SSK Aluminum USB 3.1 to M.2 NGFF SSD Enclosure Adapter – This item is not necessary. You can use the Argon ONE M.2 base to access the M.2 SSD using a USB 3.0 Type A-to-A (male to male) cable – see next item. See the video update video here.
- UGREEN USB 3.0 Type A-to-A Cable (Male to Male) – using this cable, you can directly connect the M.2 base to your computer without the need for a separate enclosure.
- Argon ONE Raspberry Power Supply – 18 Watts 5.25 Volts 3.5 Amps (USB-C) Power Adapter.
- Raspberry Pi Official Keyboard and Mouse Value Pack (U.S. Version Red/White)
- Logitech MK270 Wireless Keyboard and Mouse Combo
- AUZAI Portable Monitor – 15.6-Inch USB-C Portable Display, 1080P Full HD IPS Panel
This following information will assist you with installing the Argon ONE scripts for the Raspberry Pi 4 for either the V1 or V2 case (scripts are the same for both). If you haven’t seen the above videos, please watch the one you’re interested in first. It will step through the assembly of your case. Once you’ve done that, you can use the information below to assist further.
Keep in mind, after installing the Argon ONE script you won’t hear the fans kick-on until the CPU temperature reaches 55’C (the default settings). Below I’ll demonstrate how you can setup the Argon ONE scripts for different configurations. If you want to force the fans to come on (for testing), you can use the this section.
NOTE: For all steps below, you must have first connected your Raspberry Pi 4 to the internet. I hope you find the following information helpful, if so please comment in a video and let me know!
References
The following are some reference charts from the manual. These apply to the V1 and V2 Argon ONE cases.
- Argon40.com – the official Argon ONE company website.
Default ARGON ONE Pi 4 Fan Speed
After installing the Agon ONE Pi 4 script, by default the settings are as follows:
| CPU TEMP | FAN POWER |
| 55’C | 10% |
| 60’C | 55% |
| 65’C | 100% |
However, keep in mind you may change and re-configure the fan to your desired settings. Please see this.
ARGON ONE Pi 4 Power Button Functions
The following chart will help with the Power button functions. Once the script is installed, it will work with Pi OS 32/64-Bit and within RetroPie.
| ARGON ONE PI 4 STATE | ACTION | FUNCTION |
| OFF | Short Press | Turn ON |
| ON | Long Press (>= 3s) | Soft Shutdown and Power Cut |
| ON | Short press (<3s) | Nothing |
| ON | Double tap | Reboot |
| ON | Long Press (>= 5s) | Forced Shutdown |
Install Argon ONE Scripts in Pi OS (32/64-bit)
- Connect your Pi to the internet (WiFi or Ethernet).
- Boot into Pi OS.
- Open a shell-terminal.
- Copy & paste the following command and press ENTER (yes, don’t forget the ” | bash” at the end or it won’t work properly):
curl https://download.argon40.com/argon1.sh | bash
- Type exit and press ENTER.
- The scripts will become active after installation. Therefore, rebooting isn’t necessary.
Install Argon ONE Scripts in RetroPie
If you are new to RetroPie, please see my Raspberry Pi Retro Gaming page first. This page has a lot of information to help you get started with setting up RetroPie. If you want to go even further, I have a RetroPie tips page that will show you more fun and interesting tips to help get the most out of your RetroPie. Now, let’s setup the Argon ONE scripts in RetroPie:
- Install the RetroPie microSD in your fully assembled Argon ONE case. If you’re not sure how to install RetroPie, please see this.
- Connect your Pi to the internet (WiFi or Ethernet). For WiFi setup, please see this section (then proceed with the next step).
- See this section Remote connect to RetroPie from PC. Follow this procedure, including Connect with PuTTY. This will allow you to issue commands from your PC to your RetroPie for easy copy/paste in the subsequent step. You could alternatively select Start -> Shutdown -> Quit Emulation Station , however the keyboard doesn’t properly display the “|” (pipe) key on US keyboards, so I found SSH connecting easier. Once I figure out the alternative key, for the pipe “|” I’ll add it here (or please let me know in the video comment if you already know).
- Once you’ve established a connection over PuTTY, simply copy/paste the following command into the PuTTY window (and press ENTER):
curl https://download.argon40.com/argon1.sh | bash
- The scripts will become active after installation. Therefore, rebooting isn’t necessary.
- When the Raspberry Pi 4 temperature reaches 55’C, the fans will kick-in at 10% power, at 60’C 55% power, at 65’C 100% power (see chart above for more details).
Overclocking RetroPie
If you wish to overclock RetroPie, I highly recommend reading Tom’s Hardware guide on Overclocking. He has very good and detailed instructions on his page. To set this up, you can use the instructions above and use PuTTY to connect from your PC to update the /boot/config.txt or you can quit emulation station which will return you to a shell prompt. Either way will work. Keep in mind, Overclocking incorrectly can cause issues if your Pi is not properly cooled. Use caution.
Uninstall Argon ONE Script
If you wish to change cases in the future, you’ll want to uninstall the Argon ONE Scripts before doing so. If you installed the Argon ONE to Pi OS (32/64-bit), then you can simply double-click the icon on your Desktop. Otherwise, you can issue the following command from a Terminal/PuTTY SSH Connection (see above for links to setting up PuTTY):
argonone-uninstall
Customize Fan Settings
If you wish to customize when the fans come on, you can modify your configuration using the following or from the desktop icon:
argonone-config
- Press Y and ENTER.
- Select the option you want and press ENTER.
Argon ONE V2 Infrared Receiver+Remote
The only operating system that appears to take full advantage of the IR remote is LibreElec. The IR Receiver is built into the Argon ONE V2/M.2 cases but the remote is sold separately. I purchased mine from Amazon here, up until now it was very hard to find and may be in limited quantities –not sure. The following script is for the Argon ONE V2 which will allow the use of the IR remote in PiOS-based OS’s, though very limiting (see notes below).
- Boot into Pi OS, TwisterOS or other PiOS-based OS’s.
- Make sure that you’ve run the install script (above), that command also installs the argonone-ir script.
- Open a shell-terminal.
- Copy & paste the following command and press ENTER and follow the prompts.
argonone-ir
Notes about the IR Remote
The following are my notes while testing the IR Remote, you can also watch the video.
- For any OS other than LibreElec, the only features that appear to work is to power the Argon ONE V2/M.2 on/off or the volume control (while playing media). *Note – Powering off using the remote in PiOS does not perform a safe shutdown. Hopefully we’ll see an update for that.
- In LibreElec, after installing the Add On from the zip file, you MUST reboot for the remote to work (this is not in the manual).
- After the reboot of LibreElec, I was able to easily navigate Kodi within LibreElec just fine and it was a pleasant experience.
- If you are considering this remote for LibreElec/Kodi as a media center solution, you will be happy. For any other functions, perhaps not.
- Tried to get Kodi to work with the IR Remote in TwisterOS but unfortunately the argonremote.zip would not install successfully. If anyone is able to find a solution, please comment in the above video and let me know.
- I tested the range of the IR remote from about 20 feet away from the Argon One M.2 case and had no issues.
- Minor issue but the Argon website states the remote uses x2 AA batteries, but it’s actually x2 AAA batteries.
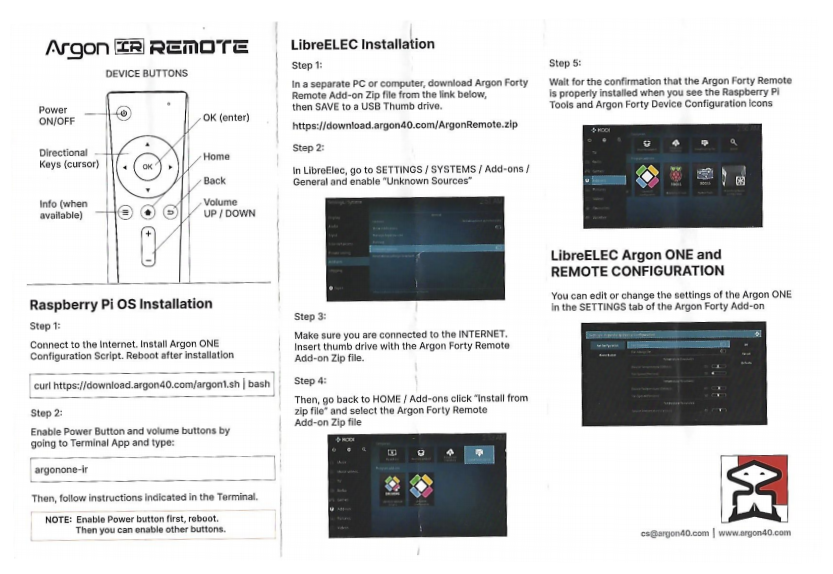
Argon IR Remote Manual
The following is a scan I made of my Argon IR Remote manual for reference. As you can see, it’s a bit lite on what functions it supports in any OS except LibreElec. Hoping we’ll see some updates to the script in the future.
LibreElec
The following are the instructions from the printed manual included with the IR Remote for adding support to LibreElec:
- In a separate PC or computer, download Argon Forty Remote Add-on Zip file from here and then save it to a USB Thumb drive. *NOTE: the printed manual shows ArgonRemote (in caps), this is incorrect. It’s all lowercase for the filename.
- In LibreElec, go to SETTINGS / SYSTEMS / Add-ons/ General and enable “Unknown Sources”
- Make sure you are connected to the internet. Insert the thumb drive with the Argon Forty Remote Add-on Zip file.
- Then, go back to HOME / Add-ons click “install from zip file” and select the Argon Forty Remote Add-on Zip file.
- Wait for the confirmation that the Argon Forty Remote is properly installed when you see the Raspberry Pi Tools and Argon Forty Device Configuration icons.
- Reboot the Raspberry Pi / LibreElec for the IR functions to activate (*NOTE: This is not in the manual, but necessary).
LibreELEC Argon ONE and Remote Configuration
You can edit or change the settings of the Argon ONE in the SETTINGS tab of the Argon Forty Add-on.
Stress Test
This section will show you how to perform a simple stress test to check that your fan will come on once the temperature reaches 55’C. This is, of course, optional but something you may be interested in trying. It does assume you’ve left the script at it’s default settings.
- Open a terminal, this may be performed by remote connecting to the Pi using PuTTY (See Connect with PuTTY).
- Issue the following command to download stress:
sudo apt-get install stress
- Within the same terminal window, issue the following command to run stress and report temperature readings to the terminal window:
while true; do vcgencmd measure_clock arm; vcgencmd measure_temp; sleep 10; done& stress -c 4 -t 900s
Troubleshooting
- Argon ONE M.2 Won’t Boot from an SSD – If the Argon ONE M.2 won’t boot from the M.2 SSD, make sure you’re using the Argon ONE Raspberry Power Supply – 18 Watts 5.25 Volts 3.5 Amps (USB-C) Power Adapter. See this thread, the official Raspberry Pi Power Supply won’t deliver enough current to operate the Pi4 & the M.2 drive and why the Argon ONE power supply is needed.
- Attempting to boot from an SSD doesn’t work, states “SD card not detected”. You may be running an older version of the Raspberry Pi firmware. Boot into PiOS from a microSD, make sure the network is connected and then issue the commands in the Terminal to update the firmware on your Pi (run each command separately):
sudo apt update
sudo apt full-upgrade
sudo reboot
sudo rpi-update
Then, shutdown the Pi and remove the microSD card and see if the SSD boots. (Thanks to Rodrigo H. for confirming this resolved his issue). - Argon ONE isn’t working on RetroPie Image XYZ – Unless you’re using the official RetroPie 4.6 image, you may have problems. Read more here.
- How to install the Argon ONE Scripts on other operating systems? If you have additional information on this, please contact me here. Everything I know is above.
Change Log
- 2021-06-27 – Minor updates to the guide.
- 2021-04-22 – Add information on the Argon IR Remote for Argon ONE V2 and M.2 cases.
- 2021-03-13 – Added the Video Updates video for using the Argon ONE M.2 base with a USB 3.0 Type A to A (Male to Male) cable and the associated update video.
- 2021-03-04 – Updated the Troubleshooting section regarding updating the firmware should you have difficulty booting from an SSD.
- 2021-02-23 – Updated page with Argon ONE M.2 (V2) information, video link and additional details.