Common Tasks Guide
Last Update: 12/31/2023
This guide covers some common activities which may be applicable to multiple device types. For example, you may want to make a backup copy of a microSD card, USB stick/thumb drive, SSD, etc. for use with another similar device. You may want to move the contents of data from a lower-capacity drive to a higher-capacity drive and expand the available space. The sections below will assist with that.
How-To link to a specific section on this page: go to the Table of Contents (below) and click a section to reference. Copy the URL from the address-bar of your browser and paste in your video description/post/blog. This will direct a viewer to a specific section in any of the guides you find here.
Table of Contents
Stuff You May Need
Below are some suggestions of items I use that you may need to create a backup image, clone your media or resize existing media:
Adapters
- Beikell Memory Card Reader – This MicroSD/SD card reader has a USB-A and USB-C adapter, allowing you to easily read/write to SD cards to a connected computer. With the USB-C end, it’s also possible to be used with many cellphones.
- SSK M.2 NVME SATA SSD Adapter – This is an inexpensive adapter that I use when I need to read/write to an M.2 NVME drive.
- SSK Aluminum USB 3.2 SSD M.2 SSD Enclosure – Check the description in the link to make sure the key matches the type of drive you wish to use it with.
- VCOM SATA to USB Adapter Cable for 2.5 inch SSD and HDD, USB 3.0 to SATA III Hard Driver Adapter – Nothing fancy here, but it works.
- RETROFLAG NES Cartridge Style 2.5-Inch SATA to USB 3.0 External Hard Drive Enclosure – Shown in the video above, this cool NES Cartridge-style enclosure and adapter is great for any device. You will need to install the 2.5″ SSD into the case to use it with this adapter.
Media
- Micro SD Cards – If you need a microSD card, here are various brands and capacities I’ve used and haven’t had any issues with:
- Gigastone 128GB 5-Pack – I buy these because they are cheap, reliable and reasonably fast.
- Lexar 1TB U3/A2 card – I use this card for higher-end devices that need more capacity, such as the Steam Deck and ROG Ally.
- Samsung MicroSD Cards [256GB / 512GB] – I’ve used these in a mix of devices over the years and are very reliable.
- USB Stick – Below are the USB sticks I most often use:
- Samsung SATA III SSD Drives [ 1TB / 2TB / 4TB / 8TB ] – I’ve only purchased/used the 1TB drive here, but it has worked perfectly.
Backup / Clone a Drive
This section will describe how to make an image backup of an existing microSD, SD, Solid State Drive (SSD), M.2 Drive, etc. Basically, any type of drive media you may wish to make a copy of or clone. I will assume you’re running Windows below (I don’t own a Mac, sorry maybe someday). This is helpful if you have an existing drive that contains games, operating systems or other data you wish to archive off for safe keeping or restoration to another drive/media. For example, for a Retro Handheld you may want to backup the microSD card and re-image (restore) it to a new microSD card or recover from a corrupted image. You may want to move data from an existing USB stick to a new (larger capacity) USB stick. The information below will assist with this process.
Create the Backup
Video:Â See how
Below is one way of how to backup your existing media drive (i.e. microSD, SSD, M.2, etc.) to an image file. Doing this will allow you to restore it (restore instructions also below) to another drive.
*NOTE: I recommend disconnecting any externally connected devices (USB, microSD, etc.) that you will not be backing up before proceeding. This is to minimize the possibility of backing up and/or restoring to the wrong drive. Use caution, data loss may occur during the restore process if you select the wrong device.
- Make sure the drive you will be writing to has enough free space before proceeding. For example, if you’re making a backup image of a microSD that is 256GB in size, you’ll need that much free space available on the destination drive for the image file.
- Insert the original media (microSD, USB drive, SSD, M.2, etc.) into an appropriate microSD sleeve, SATA Adapter, etc. and into your computer. This is your source media.
- Download and install Win32 Disk Imager.
- Create a folder structure to store the image file on your computer, NAS Drive, etc. (i.e. c:\mybackups).
- Launch Win32 Disk Imager by double-clicking the icon.
- Click the folder icon (upper-right) and select the location for the backup image file (file name which will contain your current image, example: c:\backups\mybackup.img – but use a more meaningful name including the type of device you’re backing up). Give the file a name and an extension of .img. Then click the Open button.
- Make sure the correct source Device is selected (drive letter drop-down) for the microSD, USB drive, SSD, M.2, etc. you just inserted above.
- Click the Read button to read the contents of the microSD, USB drive, SSD, M.2, etc. and save it to the c:\backups\mybackup.img file.
- Once the read is complete and successful, you’ll have an exact image copy of your original microSD, USB drive, SSD, M.2, etc. which can be restored should your existing image become corrupted or simply want a backup for restoring to separate or new media. You might even want to copy this image file to another location as a 2nd backup (NAS, Server, external hard drive, etc.) for safe keeping.
- At this point, you can safely remove the source media from your computer by right-clicking the Safely Remove Hardware icon at the lower-right of the taskbar.
Restore the Backup
Video:Â See how
If you have already made a backup image as described above and wish to restore it to a new drive, if the two drives are the same size (or destination is larger) you can use the following to restore the image. If you will be restoring to a drive that has a higher-capacity than the source media, you’ll want to resize the partition after restoring. To restore the source media to a new microSD, USB drive, SSD, M.2, etc., proceed with the following:
- Insert the microSD, USB drive, SSD, M.2, etc. card into an appropriate adapter (i.e. SATA, sleeve, USB port, etc.) and into your computer.
- Open Win32 Disk Imager.
- Select the image file by clicking the browse icon and select the location of your original backup image (example: c:\backups\mybackup.img )
- Make sure that the correct destination Device is selected in the drop-down (drive letter where the image will be written to) Keep in mind, any data on the selected Device will be REPLACED with the contents of the .img file from your selected backup.
- Click the Write button.
- The microSD, USB drive, SSD, M.2, etc. card will be re-imaged with the contents from your original backup.
- At this point, you can safely eject the microSD, USB drive, SSD, M.2, etc. (destination media) from your computer by right-clicking the Safely Remove Hardware icon at the lower-right of the taskbar.
- If the destination media is larger than the source media, see the next section on how to Expand a Partition.
Access Folders/Files from .IMG Backup
After creating a .img backup image for your media, you may wonder if there is a way to extract individual files from the image. There in fact is a way to do this and it’s pretty easy, here’s how:
- Download and install the free 7-Zip tool from here.
- Open an instance of File Explorer (in Windows).
- Navigate to the location of your .img file (in the demonstration video above, my .img files were stored in D:\archives).
- In Windows 11, right-click on the .img file that you have previously backed up. Select Show More Options → 7-Zip → Open Archive.
- Each partition may show as a separate file within the archive (i.e. 0.img, 1.img, 2.img, 3.fat, 4, etc.) depending on the number of partitions contained within the .img file. See below for an example:
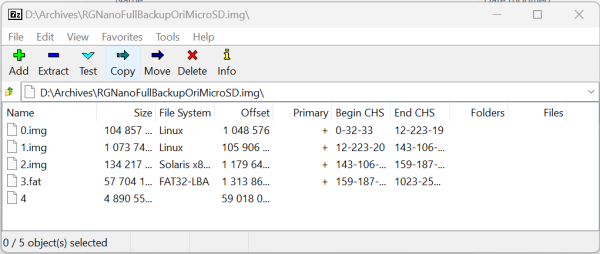
- From the archive, you can double-click on a partition, example 3.fat, and view/extract the contents of the image as-needed. For example:
- Navigate to the partition → folder/file you want to extract.
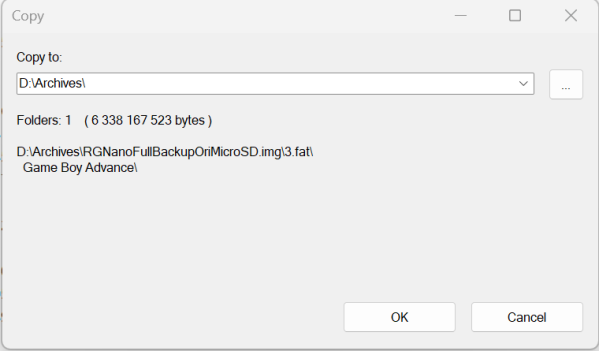
- Right-click and select the Copy To… option.
- Enter or browse to the path where you would like the folder/file to be extracted and click the OK button.
- The folder or files will then be extracted to the location you specified (see image below).
- That’s it! You can extract individual files or folders from an archived .img file as-needed. Pretty cool isn’t it?
Expand/Resize a Partition
Video:Â See how
If you are restoring an image that had a lesser-capacity than the destination drive, you will want to resize/expand the partition to make use of the new space available on the higher-capacity media. Below are some basic instructions on how to do that.
*NOTE: The folks at DiskGenius were kind enough to provide us with a 30% OFF Coupon code: DG30-YUTE-STPR for DiskGenius Professional Edition ““ if you choose to register. Registration is not necessary, but if you like the tool and want to use some of it’s more advanced features, the code will save you some money. It is a bit pricy, ~$99 USD without the coupon.
- Insert the media which contains the newly restored image.
- Download and install DiskGenius.
- When you launch DiskGenius, you’ll see on the left-hand side all the drives installed on your computer. Make sure that you only select your removable drive partition. It will typically state “RD” (removable drive) and some number plus the drive label and capacity (i.e. 16GB, 32GB, 64GB, 128GB, etc.) Make sure you select the correct partition to expand.
- You may see one (or more) individual partitions listed under your removable drive. Select the one you wish to expand. It may look something like the following image:
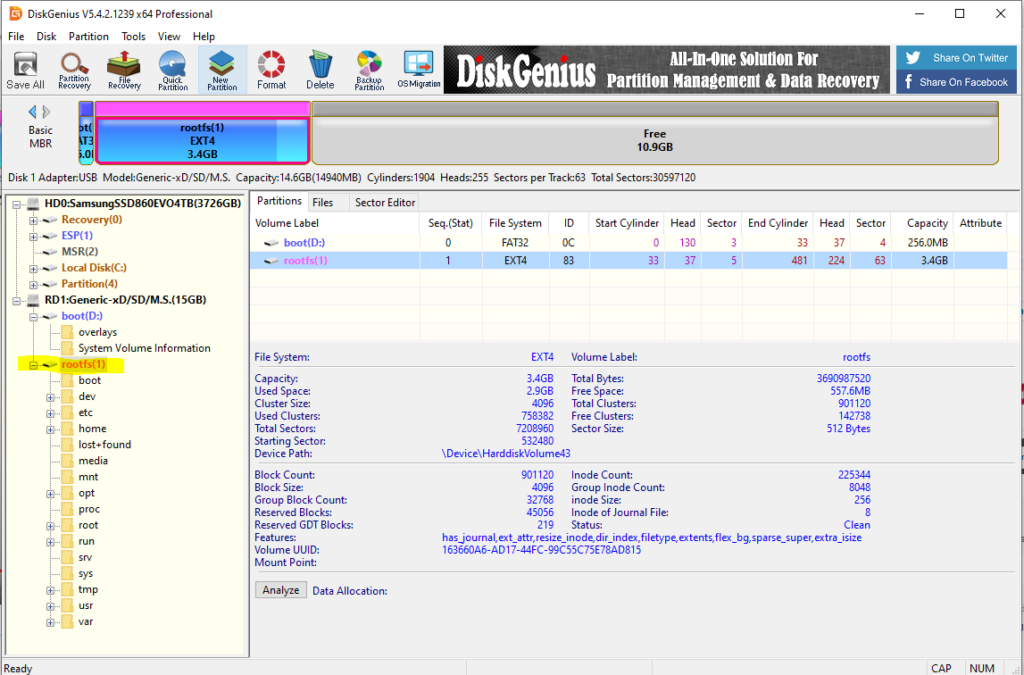
- Right-click the partition to be expanded and select Resize Partition.
- You will now see the Resize Partition dialog, using your mouse select the middle area between the main partition and the unallocated partition. See below for an example:
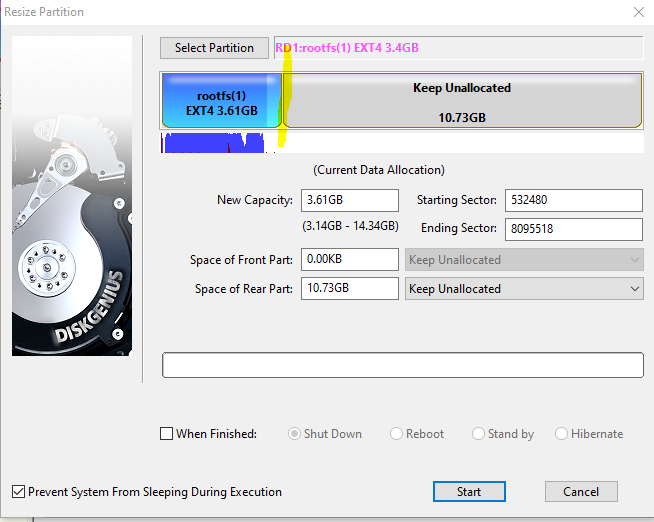
- Use your mouse to click and drag the middle section to the far-right if you want to use the full amount of available space for this partition.
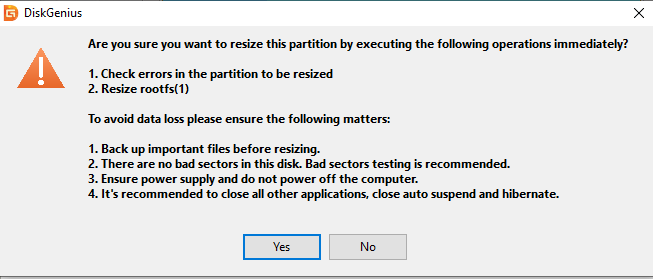
- Next, click the Start button to resize the partition. You will then be prompted with the following dialog, read what it has to say and click Yes if you agree.
- Depending on the size of the partition, this process may take some time.
- Once done, click the Complete button.
- Congratulations, the partition has been expanded. At this point, you can safely eject the microSD, USB drive, SSD, M.2, etc. (destination media) from your computer by right-clicking the Safely Remove Hardware icon at the lower-right of the taskbar.
Write Image with balenaEtcher
If you’d like to take an existing image and burn it to a microSD card, balenaEtcher is one of several ways to do it. Below we’ll step through the process.
*NOTE: I recommend disconnecting any externally connected devices (USB, microSD, etc.) that you will not be backing up before proceeding. This is to minimize the possibility of restoring to the wrong drive. Use caution, data loss may occur during the restore process if you select the wrong device. I have also had reports of some users that were unable to write an image using balenaEtcher, if you encounter an issue I recommend using Raspberry Pi Imager instead.
- First, you’ll need a new microSD card to burn the image to. There are a number of different cards available to choose from with varying capacities. Two brands that I use often and recommend are Samsung 128GB and Gigastone 128GB 5-Pack Micro SD Card. Lately, I’ve been purchasing the 5-pack of Gigastone microSD’s so I have plenty available. Pick the capacity and brand that you prefer.
- Download and install balenaEtcher from their website here.
- Double-click the balenaEtcher icon and insert your microSD card into your computer. If you don’t have a microSD slot on your PC/laptop, you can use an adapter like this one.
- Click the Select image button to select the .img/.xz image file that you wish to burn to the microSD card. Then, click the Open button on the dialog.
- Click the Select target button to select your microSD card. Verify that the correct drive letter is selected (should state SDXC and some capacity) by clicking the checkmark. Then click the Continue button.
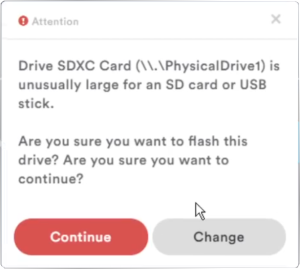
- Make sure everything looks correct and click the Flash! button to flash the image to the new microSD card. You may be prompted with the following dialog:
- If everything is correct, click the Continue button. The image will then be written to the microSD card. This process may take some time depending on the size of the original image and the speed of the microSD card.
- Once done, click the Close (X) button in the upper right of the application.
- At this point, you can safely remove the media from your computer by right-clicking the Safely Remove Hardware icon at the lower-right of the taskbar.
- You can now install the microSD card in the intended device, you’re done!
Write Image with Raspberry Pi Imager
balenaEtcher is likely one of the most popular methods of burning an existing image to some form of media, in my opinion, it’s not the most flexible. Raspberry Pi Imager is great for much more than just Raspberry Pi’s, you can use it to write a downloaded image or even re-format storage media (SSD, microSD, etc.) as a FAT32 drive. Those are just some of the benefits of using Raspberry Pi Imager, there are many more including the ability to install Raspberry Pi Imager on: Windows, macOS, Ubuntu (x386) as well a Raspberry Pi.
*NOTE: I recommend disconnecting any externally connected devices (USB, microSD, etc.) that you will not be backing up before proceeding. This is to minimize the possibility of restoring to the wrong drive. Use caution, data loss may occur during the restore process if you select the wrong device.
In the section below, we’ll discuss how you can take an existing .img (image file) and burn it to your media of choice or select/download an image from the available list (for use on a Raspberry Pi)
- Download and install Raspberry Pi Imager from here.
- Insert the storage media into your computer you wish to write the image to (microSD, SSD, etc.). I recommend disconnecting any other external storage devices to make sure you don’t accidentally write to the wrong device.
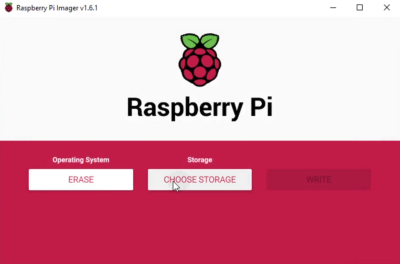
- Start Raspberry Pi Imager.
- If you will be writing an image for the Raspberry Pi, under the Raspberry Pi Device heading, click the CHOOSE DEVICE button and select the version of Raspberry Pi you will be using (*NOTE – this is a new option that was added to coincide with the release of the Raspberry Pi 5). If you will be creating an image for any other device, you can ignore this selection.
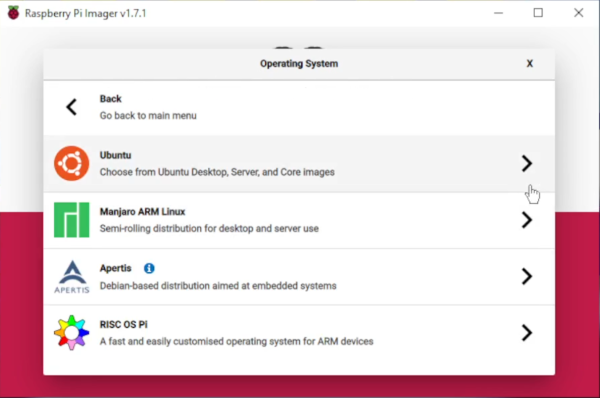
- After starting Raspberry Pi Imager, under Operating System, click the CHOOSE OS button.
- If you will be using Raspberry Pi Imager with a Raspberry Pi, there are a number of available images you can select from the list. Including: Raspberry Pi OS, Ubuntu, Manjaro ARM Linux, RISC OS Pi, RetroPie, Recalbox, etc. Any OS you select will be downloaded and installed to your storage media.
- Alternatively, you may wish to burn an existing image that you downloaded or created yourself –you can do that too!
- Look at the very bottom of the list and select Use custom.
- Browse to the location of the .img (image file) you wish to write to the storage media.
- Then, click the Open button.
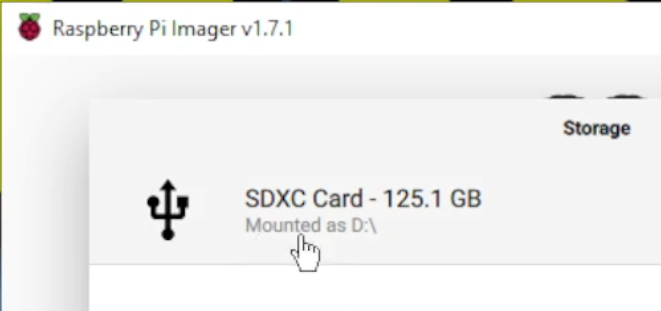
- Now that the .img (image file) or Operating System has been selected, click the CHOOSE STORAGE button under the Storage heading.
- Select the Storage media where you want the image to be written.
- Click the Next button.
- If you are writing an image that you selected from the list of available images, you can choose to EDIT SETTINGS when you see the Use OS customization dialog. If not, select NO.
- You’ll be prompted with the following dialog, after double-checking, click the YES button (after verifying everything is correct).
- After the write has completed, you’ll see [image] has been written to [device name], you can now remove the SD card from the reader. Click the CONTINUE button.
- Close Raspberry Pi Imager.
- That’s it! Your storage device is ready for use, safely eject it from your computer and install it in the destination device.
Format SD Card (SD Card Formatter)
If you want to re-format an SD Card or your card may have become corrupted, a handy tool to use to re-format the card is the SD Memory Card Formatter. Below are some general instructions on how to re-format the SD card as an exFAT formatted disk:
- Download and install the SD Memory Card Formatter from here.
- Insert the microSD card you want to format into your computer.
- Select the microSD card to form from the Select card drop-down.

- Under Formatting options, you can select one of the following:
- Quick format – quickly formats the card without overwriting the existing data on the card.
- Overwrite format – takes longer, but overwrites any data previously on the card.
- You can type in a label for the microSD in the Volume label field.
- When you’re ready to format the SD card, click the Format button.
- You will be prompted with a statement of “Formatting will erase all data on this card. Do you want to continue?”. If you’re sure, click the Yes button.
- Once the format completes, you’ll see a dialog similar to the following indicating the File system being formatted as exFAT and the capacity/free space on the card.
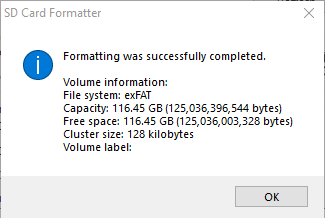
- Click the OK button on the dialog.
- Exit the SD Card Formatter window and safely eject your microSD card.
- That’s it!
Format as FAT32 (Pi Imager)
If you want to reformat a microSD, SSD, USB thumb drive or other device as FAT32, one easy way to do that is to use Raspberry Pi Imager. Raspberry Pi imager works on Windows, macOS, Raspberry Pi or Ubunu x86 and makes it a handy utility to have. Below is how to format the storage device as FAT32:
- Download and install Raspberry Pi Imager from here.
- Insert the storage media into your computer you wish to format. I recommend disconnecting any other external storage devices to make sure you don’t accidentally format the wrong device.
- After starting Raspberry Pi Imager, under Operating System, click the CHOOSE OS button (you can ignore the CHOOSE DEVICE option).
- Scroll down towards the bottom of the list until you see Erase: Format card as FAT32.
- Under Storage, click CHOOSE STORAGE and select your storage device. Verify that the capacity of the drive matches the drive you expect.
- Next, click the WRITE button to format the drive as FAT32.
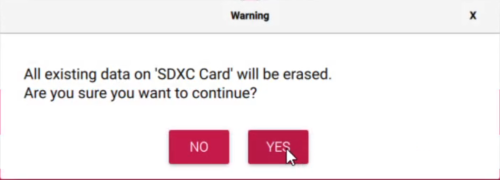
- You’ll be prompted with the following dialog, after double-checking, click the YES button.
- After the format has completed, you’ll see SDXC Card has been erased, you can now remove the SD card from the reader. Click the CONTINUE button.
- Close Raspberry Pi Imager.
- That’s it! Your storage device has been formatted as FAT32.
Change Log
- 2023-12-31 – Added a new section to describe how to access files within your archived .img file, see here.
- 2023-12-30 – Various updates to coincide with an upcoming video to explain the procedures above.
- 2023-12-10 – Updated the guide to reflect the latest version of Pi Imager changes.
- 2022-03-05 – Added a new section on using Raspberry Pi imager to burn an image.
- 2022-01-23 – Added the SD Card Formatter section.
- 2022-01-09 – Added how to format a microSD card as FAT32 (larger than 32GB)
- 2021-10-15 – Added burning an image using balenaEtcher.
- 2021-09-21 ““ Initial creation of this guide.