AtGames Legends Pinball HD Guide
Last Update: 11/13/2023
I’ve now owned the AtGames Legends Pinball HD (or ALP) for nearly three years and I am very pleased with my experience with it during that time. If you’re curious what I like about it, please see here. There have been a number of great expansion options made available during that time. Back when I received the machine on 3/26/2021, there were very few accessories available. That has changed!
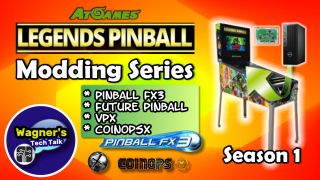
You won’t need to expand your Legends Pinball to enjoy playing all the exciting Zaccaria, Dr. Seuss, Natural History and TAITO virtual pinball tables (volumes are sold separately). The base machine is great as-is and a free update for the Gottlieb tables is available in AppStoreX (highly recommend applying it). Though, since my initial purchase, I’ve added the Arcade Control Panel, BitPixel HV, well over a hundred Zaccaria and TAITO tables and have connected a PC for playing VPX, Future Pinball and Pinball FX3. If you’re also interested in learning more about your expansion options with the Legends Pinball, a great place to start is the Legends Pinball Modding Series which will step you through many of these.
Please check back often (See Change log for recent updates) as this guide receives updates as new information is known. I also plan to add some more advanced modding projects for those that are interested.
-Jon

How-To link to a specific section on this page: go to the Table of Contents (below) and click a section to reference. Copy the URL from the address-bar of your browser and paste in your video description/post/blog. This will direct a viewer to a specific section in any of the guides you find here.
Table of Contents
What is Legends Pinball?

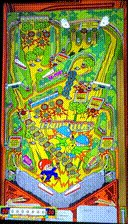
The video to the right was my early experience with the Legends Pinball HD machine. If you’re new to the ALP HD/virtual pinball, I’d recommend checking it out (clicking the thumbnail will open the video in a separate tab, you won’t lose your place here). As you may know, a full-size dedicated pinball machine can cost upwards of $5,000-$15,000. While they are typically beautifully designed, they are expensive, play one game, prone to repairs and take up quite a bit of room. However, the ALP HD is priced currently around the $750 (USD) range. Space is definitely a concern for me and why I’ve never owned a real pinball machine, as well as the cost. Not everyone has this problem, for space/price-constrained individuals having one (or more) real pinball machines may not be practical.
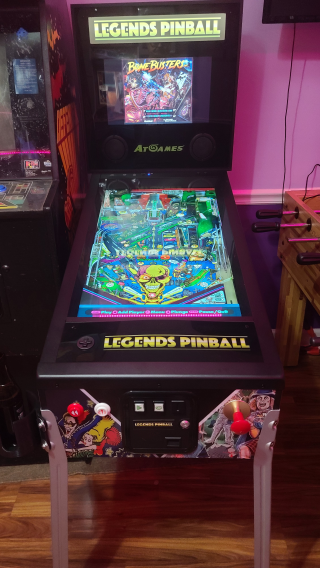
The AtGames Legends Pinball HD (ALP) isn’t small but isn’t quite a full-size pinball machine either, slightly larger than 3/4 scale. It is a Virtual Pinball machine which uses a 32″ LCD display (running at 1080p / 60fps – HD), mounted in a vertical orientation to simulate an actual pinball machine. It also provides haptic feedback which mimics the vibrations you would feel from a real machine, for the most part. There is also a 15.6″ display for the back glass which contains the scoreboard, simulated DMD (Dot Matrix Display) and additional artwork. There is also a 1st party option called the VIBS board (or Video Input Backglass Switchboard) which will allow you to utilize the backglass when playing pinball games from a PC utilizing both ALP monitors and controls. If you’re interested in setting up Zen Studios FX3 on your PC connected to the ALP, see here. Interested in playing Visual Pinball X (VPX) or Future Pinball (FP), check out this guide.
There is a lot to like with the ALP, such as the inclusion of a USB 3.0 (storage) + 2.0 port (OTG/Storage), Wi-Fi, Ethernet and Bluetooth which will allow you to add more games to the machine. There is an input for HDMI to connect other devices, such as a PC and allow playing tables that aren’t native to the machine. Essentially, this means you’ll be able to play hundreds or perhaps thousands of pinball tables on the ALP!
The machine ships in two boxes if you order it from Amazon/AtGames and one box when shipped from Sam’s Club (today). I ordered my ALP sometime ago, at that time Sam’s Club was shipping them in two boxes. After opening the box and fully assembling the unit, I’m very impressed with the build quality. It feels solid, sturdy and looks absolutely beautiful in our game room.
The 22 Gottlieb tables that are pre-installed are ok tables and they play well with the update applied (see AppStoreX). I then installed Vol 1-5 of the Zaccaria Pinball tables as well as the TAITO Vol 1-3 and these look/play much better overall. For example, with the Zaccaria tables, the balls look like they are rolling across the table, the lighting effects (shadows) look more realistic and the game play seems more accurate than the pre-installed tables.
Given what I know now, would I buy the machine again? Yes, I definitely would! In the future, I hope to see more tables. Perhaps some from Zen Studios if AtGames is able to work out such an arrangement (NOTE – This Happened! See here). I think if they were able to accomplish this, AtGames would make a massive splash in the consumer-oriented virtual pinball machine market. Titles such as Star Wars, Marvel and others would make the ALP an absolute no-brainer. But even if that doesn’t happen natively, it’s already possible. With PinUP Popper Baller Installer and a PC connected to the ALP, you can add well over a thousand community-created pinball tables. Even with the tables currently available native on the ALP, it’s the best overall value for those who love virtual pinball and don’t have the space/budget for an original pinball table or multiple competing options. After all, it’s expandable!
The information you see on this page is just a start, I’m working on ideas for future projects and guides for the ALP. My goal is always to provide honest, informative and hopefully entertaining videos. I hope you enjoy what you find here.
Why the ALP?
The following are my reasons for picking the AtGames Legends Pinball over competing options or building my own (more on that below). This isn’t meant to be a complete list, just my thought-process on what made sense to me. I thought it might be helpful for anyone else considering this machine.
- Ability to Add More Games– There are options provided by vendors which have nice looking cabinets and game selections but limited expandability. I didn’t want a machine that was locked-in to 12 or so games. If I’m going to pay $700+ USD for a machine, I wanted to have options for adding more games. It needs to have network connectivity (i.e. WiFi or Ethernet) for this and the ALP had it.
- Expandability – The ALP provides an HDMI input connector and a USB 3.0 & 2.0 port on the top panel (for OTG or On-The-Go / Storage). This allows you to connect other devices, such as PC’s or other such devices. This was a big selling point as it opens the doors to many more uses in the future.
- Back glass Display – Other options I was considering have artwork that looks nice on the back glass, but it’s static and won’t change from game-to-game. The ALP includes a 15.6″ LCD back glass, while it doesn’t fill the entire back glass, it does change from game-to-game and something I personally wanted in a vpin. A DMD (Dot-matrix display) option would also have been nice, but wasn’t a huge omission (perhaps a future mod?)
- Ease of use/setup – A couple years ago I set out to build my own vpin. I started with an older laptop that had a cracked display and a 48″ HD TV for the playfield. It was going fine, until I played the first game I had setup on it (KISS). The laptop GPU was severely underpowered, lots of frame skipping and shortly after my monitor bit the dust. I wasn’t going to spend another $1000 for a dedicated PC and monitor. I decided to wait until a viable commercial solution presented itself and was easy to use. I was up and running on the ALP within a few minutes of assembling the machine. That is exactly what I was looking for. I love to tinker and mod, but I also appreciate a smooth out-of-box experience.
- On-line Leaderboards – This was certainly not a primary reason for choosing this machine, but I was really excited to read that the ALP supports it. The ability to try to beat a high-score on any given table was a big nice-to-have feature and unique to this machine. Great that you can check the leaderboards directly on the ALP, on your phone or computer.
- Others – There were other reasons for picking this machine including ArcadeNet, CoinOps, BYOG and others. I was less interested in these features initially, but the more I learn/experiment the more I appreciate those features are available.
Detailed Guides
If you’re interested in adding a PC to your machine, play arcade games, additional Pinball tables or still have questions, the Modding Series Season 1 Guide is a great place to start. It will step you through the process.
If you’re already familiar with the AtGames Legends Pinball (ALP) and just want to get started with Pinball FX3, Visual Pinball X (VPX) or Future Pinball (FP), click on one of the images below to go directly to the respective guide for each.

AtGames News Updates
For the latest AtGames News, visit the AtGames News Updates page.

Purchase Locations
The AtGames Legends Pinball may be found at the following locations:


Specifications
Product specifications for the AtGames Legends Pinball (ALP).
- Largest, most full-featured home virtual pinball machine in its class
- Designed for players of all ages, skill levels, and play preferences
- 22 licensed arcade pinball games built-in (expandable) Game List here.
- 32″ high-definition LCD playfield (1080p/60fps)
- 15.6″ LCD backglass
- High-performance USB, WiFi, ethernet and Bluetooth support
- Real glass over embedded LCD playfield and LCD backglass
- Stereo speakers
- Real spring-loaded precision plunger
- 2 sets of arcade-quality flippers and nudge buttons
- Tactile feedback and accelerometers for real pinball feel
- Built-in D-pad for easy navigation
- Interchangeable control panel options for authentic vertical arcade gameplay
- Legends Arcade Platform: ArcadeNet®, BYOG (Bring Your Own Game), and APL
Accessories
The following are items I’ve added or will be adding to my ALP:
- Magnetic Cup Holder – This may not be perfect for every type of cup, but for a bottle of your favorite malt beverage, works just fine! It’s cheap and you can easily swap it from the left/right side of your pinball table or buy two and have one on each leg. I recommend leaving the magnet cover on, it helps slow any slipping as you insert your drink. Easy to setup and works just fine!
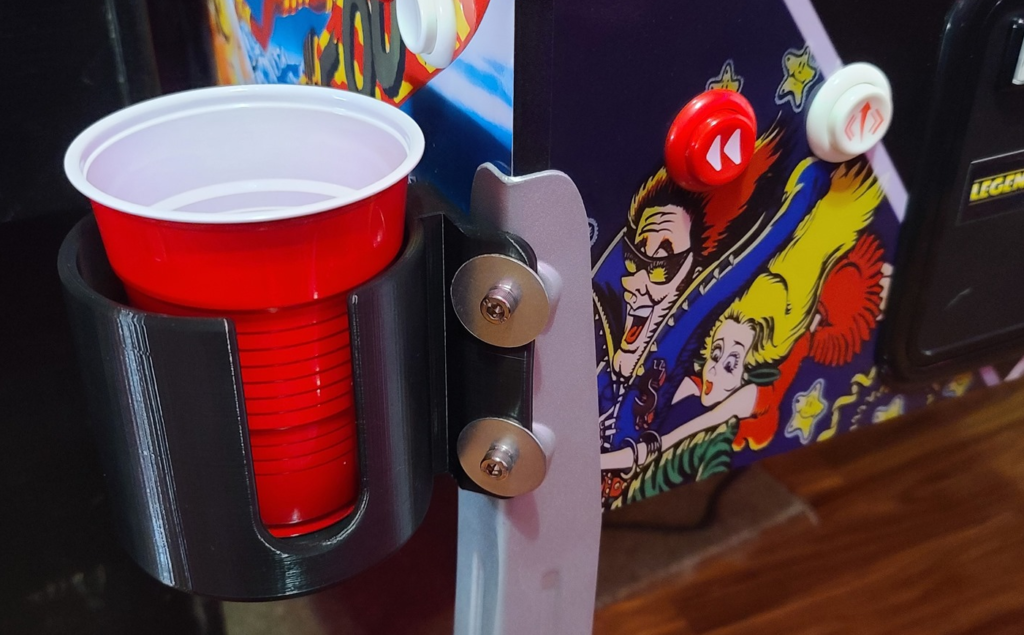
- 3D Printed Cup Holder – This worked great on the ALP. I did have to add two washers to make sure the screws were held securely to the unit. I simply 3D Printed the model from the link above, then inserted the screw through the washer and tightened both to the base of the unit. You’ll want to be careful here, screwing it in too tight on the leg can cause the cup holder to break so if you hear what sounds like plastic cracking, you’re good. Stop and move on to the next screw. If you don’t have a 3D Printer, you can buy the cup holder pre-printed from here. For more details on this Mod, check out the Show-Me Retro YouTube video for the 3D Printed Cupholder. After 6 months, it’s still doing just fine (9/21/2021).
- Samsung MUF-256AB/AM FIT Plus 256GB – USB 3.1 Flash Drive for storing the additional games.
- Risers – I have received these but still have not tried them yet. Should allow increasing the height 3″ more, but honestly I didn’t need them.
Resources
- AtGames Pinball page – AtGames website
- AtGames E-Store – Pickup the Legends Pinball and 1st-Party accessories here
- Official AtGames Legends Arcade Family Support Page – Receive direct customer support using this page. There is also a purple chat icon (lower-right) which will get you in touch with a customer service representative during normal business hours (see link for details).
- AtGames official YouTube Channel – Many helpful videos and updates
- The Official AtGames Pinball Fan Page (Facebook)
- ArcadeNet Pinball Leaderboards – See who has the high-score on your favorite pinball table here.
- Sam’s Club product page
- Official Global Arcade Fan Page (Facebook)
Manuals
The following are the official manuals from AtGames, if they are missing or lost:
- Legends Pinball Instruction Manual – The Instruction Manual included with your ALP.
- Arcade Control Panel – The Arcade Control Panel Manual.
- VIBS Instruction Manual – The official VIBS instruction manual.
Articles
- AtGames Legends virtual pinball review: The better pre-built choice€¦ mostly – Excellent article by Sam Machkovech. He even mentions Wagner’s TechTalk about 1/3 of the way.
More ALP Reviews
If you’re considering the AtGames Legends Pinball, always a good idea to get opinions from others. Here are some videos from fellow content creators that I recommend watching (don’t forget to subscribe to their channels) :
- Legends Pinball Review – Major Frenchy
- AtGames Legends Pinball : Red’View and Impressions of this feature packed virtual pinball cabinet. – TerryRed
- At Games Legends Pinball In-Depth Review – Kongs-R-Us Review
- AtGames Legends Pinball Machine Review! – CoolToy
- AtGames Legends Pinball Machine Review – MichaelBtheGameGenie
- Legends Pinball Machine Review- Awesome Virtual Pinball From At Games! – ETA PRIME
Assembly
The assembly was very simple, here’s a quick-start guide:
- There are x2 screws needed for each leg. You’ll find them in a small box that is contained in the box for the back glass (along with a few additional screws, allen wrench, connector and power cable). The bag is labeled SA.
- I removed the main unit from the box, set it on top of the box (on the side) and installed 2 of the legs. I then flipped it over and installed the other two legs. Using the box made it easier for me, however make sure it’s well balanced and won’t fall off the box. Alternatively, set a blanket on the ground and place the unit on the blanket. The key here is you want to avoid contact with anything that may scratch/damage the unit during assembly.
- Use the included key to open the back glass (in box 1 of 2) and set it on top of the main unit (aligning the screw holes at the back). Install all x4 wing nut-screw to hold the back glass to the main unit. The bag is labeled SB.
- Use the same key to open the bottom section of the main unit. Locate the two loose cables (one for the speaker, the other a flat ribbon for the display). Attach both of these cables as shown in the video.
- I decided to power on the unit to make sure everything was working prior to re-attaching the back panels. Everything looked good and the back panels were then attached to both the base and the back glass assembly. Use the key to tighten them securely, start with the bottom main unit, then the back glass.
- Plug in the power supply to the back of the main assembly and flip the power switch on the front-bottom-right of the unit.
- Have fun!
Legends Gaming
For details on all the latest available Gaming Packs (Arcade and Pinball), Flash Drive X Setup, Code Redemption, Installing/Uninstalling games, check out the Legends Gaming Guide.

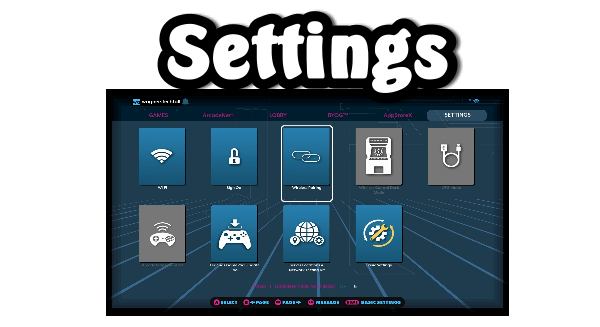
Settings
For an explanation of each of the options that are available in the Settings tab, please see the Settings Guide.
Operation
Getting into the settings and making changes to the machine isn’t difficult. The menu system makes it pretty easy to navigate. However, there are times when it doesn’t seem as intuitive as you might expect. Below are some tips to help you get started.
- Exiting a Game / Viewing Leaderboards – When in-game, press the Menu button if you want to Quit the game or check the leader boards. Use the D-Pad to navigate to your selection and always press the Red (Rewind button) to select the option here. IMO, it’s counter intuitive to select with the Rewind instead of the green select button but that’s how it currently works.
- Getting Around – Use the D-Pad (4 way controller) on the bottom top panel to navigate the user interface. There are options at the very top as well as in the main display area. When you find the option/table/game/setting you want, press the Play (green) button to select the option.
- Multiplayer Games – After loading a table and prior to starting the game, you can toggle the number of players by pressing the red Rewind button on the front of the machine to toggle between 1-4 players. Once the number of players has been selected, press the green Play/Select button to start the game.
- Favorites List – You can create a favorites list of all your favorite pinball tables by first selecting the table (don’t launch it, just browse to the table and press the Play/Select button). On the bottom, you’ll see Favorites – press the Forward nudge (white up-arrow button) to toggle Add/Remove of the table to your favorites list. Go back to the main table selection and press the menu button. Using the D-Pad/Joystick move down to the Favorites option and press the Play/Select button. Now you’ll only see your favorite tables (if nothing is there, you didn’t add a table to the Favorites list). This will not work with BYOG/AddOn tables, but great for pinball tables.
- Return to All Games (from Favorites) – To return to the All Games list, press the menu, move the d-pad up one to All Games and press the Play/Select button. You’ll then see all tables again.
- How to Update the Firmware – On the top tab bar, go to Settings †’ Version (x.y.z) and press the Play/Select button. If no update exists, press the Play/Select Button to exit. Otherwise, select the Download option. Once complete, select the Update option (this may take ~10+ min. to apply the firmware update). The machine will restart and display the status on the backglass.
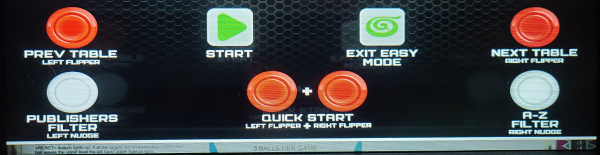
Easy Mode Explained

Easy Mode is a new option provided by the Version 5.45.0 (or higher) firmware which was released on 8/5/2021. This new feature is beta software, as a result there may be bugs and/or improvements made with newer versions of the software. The following represents an introduction to the new application. The following is what is understood about the objectives of this new navigation method:
- Easy Mode is implemented as an application (in AppStoreX), users can set Easy Mode to auto-launch on power-on of the machine via Settings †’ Startup Page. Thus making Easy Mode the default browser.
- Novice users can do PinUP Popper-style navigation.
- During the entire session both hands can stay on the pinball buttons.
- Designed as a “front-end only” so that it can run lightweight and not require deep integration.
- Menu-1 is the main menu (flipping through tables using the flipper buttons).
- Menu-2 is the left pop-up filter (All, Recent, Far Sight, Magic Pixel, AtGames, etc.) – this is a “one-level” menu so that only two buttons can navigate (hands don’t leave the 2+2 buttons design rule).
- Menu-3 is the right filter (A-Z).
- Allows power users greater efficiency when navigating tables.
Install Easy Mode
You can install Easy Mode from the AppStoreX icon (top tab). Browse to that location and perform the following:
- Select the Easy Mode icon (New) and press the Start/Play button.
- Press the Start/Play button again.
- This new feature will require 1GB of Storage on your FlashDriveX.
- The dialog will report how much free space is available prior to installation. If there is enough space on your FlashDriveX USB drive, select the Install button.
- Once installed, you’ll see a response of Application Installed!, you then have the option to Launch application or Close.
- Select, Launch application.
Basic Operation
The following are some of the primary button combinations of Easy Mode:
- The left-side navigation is performed using the Left Flipper and Left Nudge buttons.
- The right-side navigation is performed using the Right Flipper and Right Nudge buttons.
- To Exit Easy Mode, press the AtGames button.
- Table Navigation – Left / Right Flippers.
- Publisher Filter – Left Nudge button (when visible on the bottom).
- Game A-Z Filter – Right Nudge button (when visible at the bottom).
- To Start a table, press the Left + Right Flipper at the same time.
- Upon exiting a table, you will return to Easy Mode until pressing the AtGames button on the ALP. At that point, it will return to the more common menu system.
CoinOpsX
Detailed CoinOpsX Guide
CoinOpsX allows you to play those classic Arcade Games that may not be available from AtGames. For a full guide on how to setup CoinOpsX, visit the AtGames CoinOpsX Guide.

If you’re looking for the AtGames CoinOpsX Guide (saUCEy Edition) (Horizontal/Landscape), please see the guide here.
Bring your own Games (BYOG)

Legends Pinball: Vertical MAME Game Guide – detailed guide on how to set it up (companion video to the right).
The Legends Pinball will also allow adding your own classic vertical Arcade games to the machine using a USB Thumb Stick. That is, you can play games such as Pac-Man, Donkey Kong, Galaga, 1943 and thousands of others directly on your ALP! I’ve been testing this feature and it works well –for the most part. I’m finding that the included d-pad doesn’t always move the way it should. Sometimes when I press d-pad –> right, it doesn’t register. Doesn’t matter now, I’ve replaced it with the Arcade control panel (see above). However, if you notice the same please comment in the video above and let me know.
When generating the .UCE files for your games, you will be missing the samples. For some games like Donkey Kong (Mario walking), Galaga (explosion) and others this will be noticeable to those of us that grew up playing those arcade games. I’ve not yet been able to get the samples working. Comment in the video if if you know of a solution and I’ll add it to the guide.
Game-Play

The 22 built-in games are pretty good, really enjoying Gottlieb’s Haunted House and Black Hole. However, I must admit the Zaccaria & TAITO tables are the best overall pinball experience. The game-play is more realistic vs. the included Gottlieb tables. I’m hopeful in the future that AtGames is able to improve on the built-in tables through a firmware update.
The Zaccaria tables are much more polished and the game play is great! AtGames has also released several TAITO volumes, so definitely check them out as well.
You have two options for redeeming the code after purchase, you can link it to your account or the machine itself. I decided to link it to my account should any future upgrades/repairs take place, the tables should remain available in my account. When tied to the machine, if you upgrade/replace the main board or sell the machine, the games go with it.
The sections below will discuss the included tables, Zaccaria Volumes (or “Zac Paks”) and TAITO volume(s) in more detail.
Included Tables
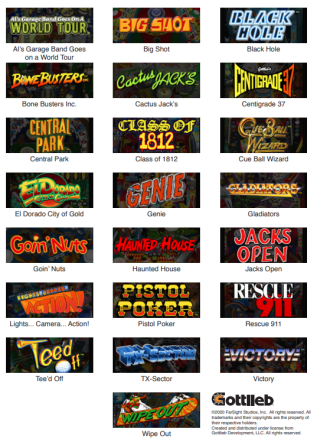
The following 22 Gottlieb tables come pre-installed on your ALP, however you can add additional volumes here. On my cabinet, I opted for them all (it was inevitable). In total, there are now 141 tables on my machine (including all Gottlieb, TAITO & Zaccaria tables)!
| Games Included |
| Al’s Garage Band Goes on a World Tour • Big Shot • Black Hole • Bone Busters Inc. • Cactus Jack’s • Centigrade 37 • Central Park • Class of 1812 • Cue Ball Wizard • El Dorado City of Gold • Genie • Gladiators • Goin’ Nuts • Gottlieb’s Haunted House • Jacks Open • Lights… Camera… Action! • Pistol Poker • Rescue 911 • Tee’d Off • TX-Sector • Victory • Wipe Out (22 tables) |
ArcadeNet
ArcadeNet is a service provided by AtGames for your ALP that lets you stream Arcade games from a virtual server in the cloud down to your machine. With ArcadeNet, you can play games by attaching a USB controller or if you have the Arcade Control Panel you can use that too. For best results, you’ll want to connect an Ethernet cable to the back of your ALP instead of WiFi. While both will work, you’ll likely get much better performance over Ethernet.
Cloud Pinball
Cloud Pinball is Virtual Pinball Games (Virtual Pinball X or “VPX” and Future Pinball) streamed over the internet to your ALP. Use the ALP flipper and nudge buttons and the down position on the d-pad (or Joystick) to launch the ball.
How to Play
Here’s how to play Cloud Pinball:
- Make sure you’re logged in to ArcadeNet.
- Press Down on the d-pad (or Joystick) to highlight one of the ArcadeNet titles.
- Press the Menu button.
- Use the d-pad/Joystick to select Cloud Pinball (on the left).
- Press the Menu button after selecting Cloud Pinball.
- Use the d-pad to select a Cloud Pinball Game and press Start.
- Have fun!
Best Practices
- Use a wired Ethernet connection.
- Once the game is started, you can adjust the performance settings. For example: Menu†’Quality†’Lowest†’Menu) to start with for faster response time. The Quality setting can then be adjusted per latency / network environment.
1st Party Expansion
Below are some expansion options provided by AtGames that you may find useful for enhancing your ALP.
BitPixel HV
The BitPixel HV is the pinball equivalent of the popular BitPixel for the AtGames Legends Ultimate arcade machine. The Legends BitPixel HV fits easily above the Legends Pinball backglass. It also includes wall-mounts if you prefer to mount it that way. The BitPixel HV only requires a power input and USB cable which attaches to the USB 2.0 port on the ALP. It can display both animated or static marquees and additional content with the PixelcadeX application.
The installation of the BitPixel HV to the ALP is very easy. There are two cables to connect, the USB-A cable from the BitPixel to the Legends Pinball and the Power Supply. You then remove the two top screws from the front of the ALP, slide HV over the top of the backbox and re-install the screws. Then navigate to AppStoreX and install PixelcadeX. After launching PixelcadeX, when you navigate to the Pinball Tables, ArcadeNet or CoinOpsX, the artwork will appear on the HV.
In my opinion, the BitPixel HV is a great accessory for the Legends Pinball. I would like to see the ability to use it as a real DMD in the future, but it is planned from what I understand. Check out the video review above for more insight into this product.
Bitpixel HV Q & A
Below are some answers to a few questions received on the Bitpixel HV. I’ll attempt to answer any that I can:
- What are the dimensions of the BitPixel HV? Slightly under 21″ wide and 7″ tall.
- Is there a manual available for the BitPixel HV on-line? Yes, you can find it here .
- When will the Bitpixel HV begin shipping to customers? BitPixel HV is estimated to become available in April 2022 for those who reserved.
- Does the BitPixel HV work as a DMD with pinball FX3 or VPX? Yes it does! For more information on the BitPixel HV setup for Pinball FX3, see here. Visual Pinball details will be coming in the future, in the meantime please see the Pixelcade website for Visual Pinball setup instructions.
- Does the Bitpixel HV replace the existing marquee at the top of the backglass? No, it is designed to be placed above it or mounted to the wall.
- Are there any options other than using USB to connect to the HV? No, the switch on the back should always be set in USB mode for use with the HV (Bluetooth functionality is not supported).
- Does the BitPixel HV turn off when the ALP is switched off? No, the BitPixel HV remains on. To turn it off, it would need to be unplugged. You could easily setup a smart plug with a small power strip to use your voice to turn both devices off without unplugging.
- Can the BitPixel HV work as a DMD? The ability to display animated artwork, scoring information or game status requires modifications to the pinball table code itself. This is planned later down the road for the AtGames-provided pinball tables and currently operates as a topper. However, it can function as a real DMD for Pinball FX3/VPX tables (see FX3/VPX answer above for links).
- How should the switch be positioned on the back of the HV? The switch should be in the position closest to the USB port on the back of the HV.
- Can two HV’s be used at the same time? No, it will only work with one at a time. The first HV found wins (confirmed by AtGames).
Those are all the questions I’ve received so far and have asked all the questions to AtGames. If I receive updates to any of the open questions, I’ll add them as soon as I receive them.
VIBS Board Installation
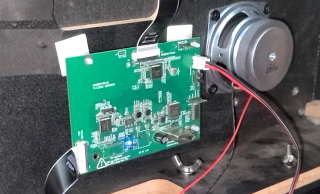
The VIBS (Video Input Backglass Switchboard – code name “Rachael”) board allows you to connect your FX3 / VPX / Future Pinball or other Pinball engine-enabled external PC tables to the Legends Pinball. It allows utilizing the Legends Pinball large dual-screen display (including the back-glass) and pinball controls with your PC. With the addition of the VIBS board, you can display relevant content on the back-glass LCD display by connecting an HDMI cable from the VIBS board to a secondary HDMI port on your PC.
To accomplish this, you’ll first need a few things:
- The AtGames Legends Pinball Machine
- The VIBS Board – These quickly sold out on May 19th, however more are on the way. Please check the AtGames News section for the latest updates.
Instructions
*NOTE: When handling sensitive equipment, such as the VIBS board, do not touch other areas. Only touch the components for installation as instructed. Use special care when connecting / disconnecting the cables/connectors as to not damage them. To prevent electrostatic discharge (or ESD – zapping chips) when handling the PCB, I personally recommend touching the metal screw heads on the ALP before handling the board. This should discharge any static electricity built up.
I recommend downloading and printing this manual to follow along during the installation process. You’ll want to be very careful with the small black tabs on the VIBS board and EDP connectors. Don’t force them or they may break.
- Instruction Manual – The official Legends Pinball VIBS Instruction manual.
Video Installation
The following videos will demonstrate the entire assembly process in detail. Please watch all videos. The last video is a live demonstration/overview.
- VIBS (Video Input Backglass Switchboard) Installation for the Legends Pinball
- Video Input Backglass Switchboard (VIBS) for Legends Pinball Live Overview (Live Stream Installation)
VIBS Troubleshooting
- Flashing Color Cycling / No Display in backglass – After installation, I see cycling colors or a black screen on my backglass when I switch to the PC signal. What is wrong?
- If you see cycling colors on your backglass screen or no display, that means your backglass monitor is not getting a signal. This could be due to:
- Make sure the adapter for the VIBS board is set to 1080p.
- Your PC HDMI cable for the backglass video is not plugged into your computer or is not properly connected to VIBS.
- The EDP out cable from the top of VIBS to the backglass screen is not properly connected. Be sure to watch the addendum video listed here, there was an error in the first video.
- Your PC may have gone to sleep and has lost recognition of the additional screen. To resolve this, perform the following steps:
- Right-Click on a blank space on your windows desktop and select Display Settings.
- On the Display Settings screen that appears, click the Detect button. This should reconnect windows to your additional display if windows has lost connection.
- If you see cycling colors on your backglass screen or no display, that means your backglass monitor is not getting a signal. This could be due to:
- Flashing colors on the back-glass using a Radeon GPU connected to VIBS Board – I ran into this issue using a mini-PC with a Radeon Vega 10 Graphics card. The VIBS board worked fine, I could tell when the PC BIOS kicked-in the video was visible briefly until Windows 10 fully booted. At that point, the flashing colors would appear on the back-glass indicating no signal. Using any of the built-in HDMI Adapters on the PC to the VIBS board would not work. There are two options described below. The 1st worked for me, the 2nd did not but has for others.
Option #1: USB 3.0 to (x2) HDMI Adapter:
- UNSTINCER USB 3.0 to Dual HDMI Adapter – This adapter has x2 HDMI ports, I used HDMI-A connected to the VIBS board. Should be possible to connect a small 2nd HDMI DMD if you want to use a 3rd monitor (I’ve tried the DMD to the back-glass only at this point).
- After connecting the USB 3.0†’ HDMI Adapter (above) into an available USB port, I then connected the HDMI-A from the adapter to the VIBS HDMI backglass input – Windows recognized the new HDMI Adapter. I then positioned the new display (the backglass) to the right of the playfield display within Windows Display Settings (make sure display 1&2 are lined up perfectly, playfield on the left/backglass on the right). Next, I copied some backglass artwork to [Your Steam installation directory]\steamapps\common\Pinball FX3\data\steam (using instructions found here).
- Through some trial-error, these are the settings that worked for me within the Zen FX3 Cabinet mode options (backglass in Display Settings set to 1920×1080 scale 100%) :
- Dot matrix repositioning: On
- Dot matrix horizontal position = 2245
- Dot matrix vertical position = 720
- Dot matrix horizontal size = 1270
- Dot matrix vertical size = 340
- Backglass repositioning: On
- Backglass horizontal position = 1921
- Backglass vertical position = 0
- Backglass horizontal size = 1920
- Backglass vertical size = 1080
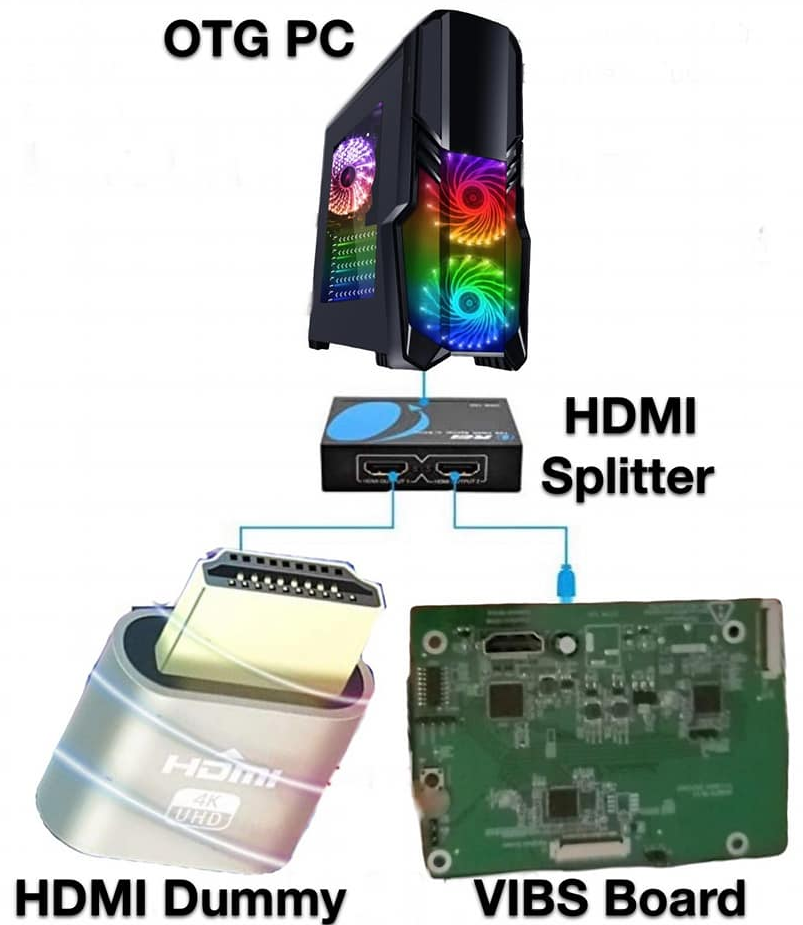
- Option #2 – HDMI Splitter and Dummy Adapter
Another option that has worked for others but, unfortunately, did not work for me:- Install this HDMI Dummy plug into one port of an HDMI Splitter and the other split HDMI connection into the VIBS board.
- Connect the main HDMI Splitter input into an available HDMI Output on your PC.
- Within the Radeon software settings, set HDMI Link Assurance to Enabled.
*Special thanks to the following individuals for figuring out this solution: Derek S., Jay S. and Coin M. (image courtesy of Coin M.)
- How can I easily mount the VIBS PCB? For my installation I used some Adhesive Insulated Standoffs (not a perfect fit). I did use a pair of needle-nose plyers to get the standoffs through the PCB. Basically insert the plastic pieces through the via holes, remove the tape backing and gently press the PCB in the location for mounting. Keep in mind, before removing the backing make sure you have identified a spot that allows all EDP cables to connect with no stress on the cables/connectors.
- No display on the backglass – Ensure all cables are properly seated and the HDMI from the VIBS board is connected to an HDMI port on the PC. Also, make sure that you pressed the button connected to the VIBS PCB to toggle from the ALP to the VIBS HDMI Input.
- Replacement Ribbon Cable – This cable was recommended to a viewer on Facebook by Bee Kong (YouTube Kongs-R-Us). Looks like a good solution, if needed.
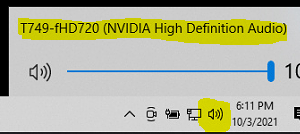
- No sound when using FX3/VPX or Future Pinball (OTG) – click the speaker icon in the lower-right of the taskbar in Windows. Make sure it’s set to output audio to the primary HDMI output (your backglass). Once set properly, the audio should play through just fine.
Arcade Control Panel Installation
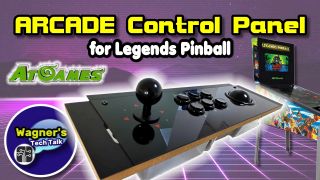
I received the retail version of the Arcade Control Panel for the AtGames Legends Pinball and overall, I’m impressed. Aside from the bottom protective cover (not visible once installed), it is a quality product. The buttons are good, but my personal preference would to have them slightly concave (they are flat). The low-profile 8-way Joystick works well and the trackball is most impressive. Check out the video to the right if you’d like to see how to install it and some game play.
3rd Party Expansion
This section will discuss 3rd Party expansion options for your Legends Pinball machine. To be clear, the options in this section are not provided/sold/endorsed by AtGames.
ALP Deluxe Haptics Upgrade Kit (by BuyStuffArcades)
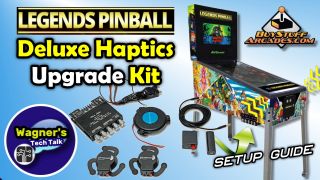
BuyStuffArcades.com has released the availability of their new ALP Deluxe Haptics Upgrade kit. This kit will significantly improve the haptics and immersion on the ALP.
You can find a full written guide and video about this new product on the ALP Deluxe Haptics Upgrade Kit Guide. Clicking the image to the right is my full unboxing, setup and installation video for this new kit. The kit is particularly impressive when used with VPX tables.
Community Expansions
If you are aware of any community-created ALP Expansions not found on this page, please contact me. Very interested in keeping this page up-to-date with the latest information and available upgrades.
PC-Based Pinball
With the ALP, you can not only play a great selection of Pinball tables directly on the machine, but you can expand to a near-infinite number of games by connecting a PC to your ALP. The following guides will help you get started :
Initial PC Setup & Preparation
Initial PC Setup / Preparation– This Guide will assist you in setting up your PC to the ALP. There is also a Quick Setup Guide which references detailed information to assist in the setup.
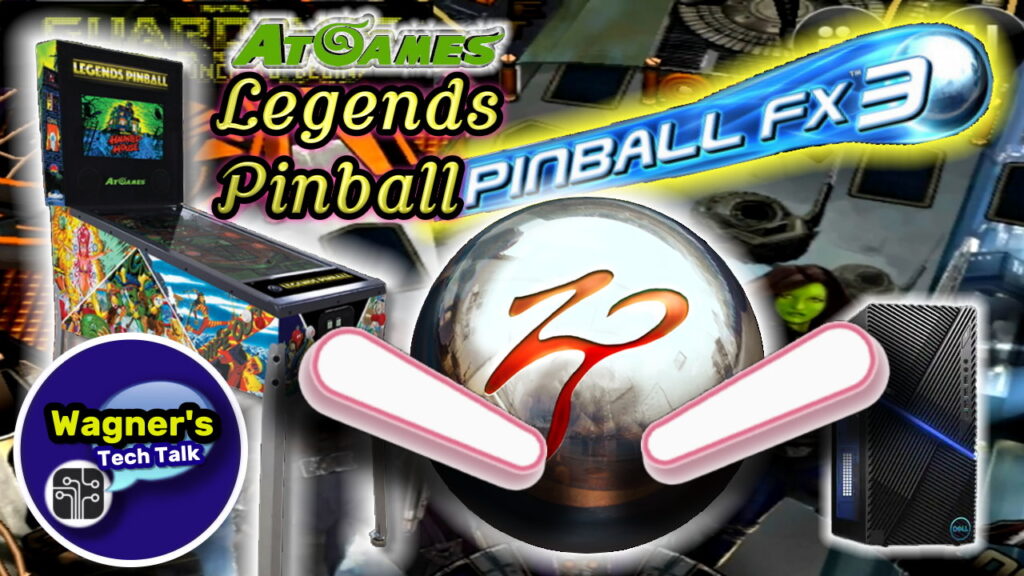
Zen Pinball FX3 Setup
Zen Pinball FX3 Setup – This Guide will help with the setup of Pinball FX3, JoyToKey and Cabinet mode in Zen Studios Pinball FX3 on your ALP.
PinUP Popper Baller Installer Setup

ALP PinUP Popper Baller Installer Setup – This Guide will assist with the installation of Visual Pinball X (VPX), Future Pinball and integration of FX3 within the PinUP Popper Front End.
Community Power Tips and Mods
Visit the ALP Power Tips Guide for more community feedback and helpful tips that have been sent to me to add here. If you have your own tips you would like to see added, please contact me (via e-mail).

WTT 3D Models
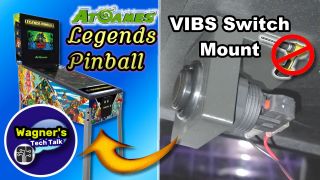
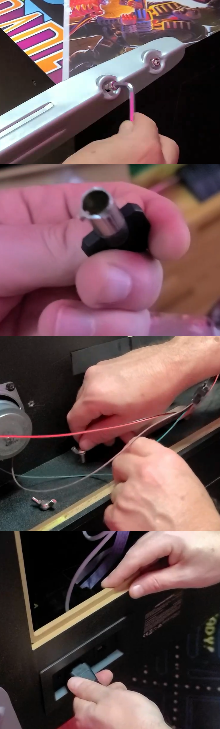
VIBS Switch Mount – The purpose of this 3D Printed model is to allow you to mount the VIBS button under your cabinet without the need to drill a hole in the bottom of the machine.
- VIBSButtonHolder_FlatV1.stl – This mount may be placed anywhere under the cabinet where there is a flat area to affix the double-sided adhesive (please see video). This is the same model shown in the video above.
- VIBSButtonHolder_FrontV2.stl (NEW) – This mount is meant to be added to the front of the ALP and fits easily under the front lip. This model is not shown in the video above. I wasn’t happy with the first version of the front-mount (briefly shown at the beginning of the video) and created this a few days after the video was made. This one, I’m pleased to report should work well for you if you want to mount the button flush to the front of your ALP.
If you’re concerned about drilling a hole in the ALP for the VIBS button switch, the above may be a good solution. I do not sell anything I design nor can I print them for you. However, your local library may print them for you at no charge! I checked with my local library and you don’t even need to pay for the PLA Filament (yours may differ). Not sure if it’s like that in other cities, but definitely check their website or call to inquire. That said, others are welcome to print/sell them as they wish. You are also welcome to improve/modify this design.
Basic instructions below:
- Slide the VIBS button into the slot.
- Screw the back nut to the button and tighten firmly.
- Insert the Switch assembly into the back of the button.
- Run the wire to the VIBS board and to the back of the button. You could use a clip like this one to secure the wire underneath the pinball cabinet.
- Add strong double-sided tape to the top flat areas of the print and position the assembly where you want it on your ALP.
Troubleshooting

If you are having issues with your ALP, see below for some possible solutions. If you don’t see your particular issue listed, please comment in one of my ALP videos and I’ll try to find a solution. You may also contact the Official AtGames Legends Arcade Family Support Page.
- OTG Connection / JoyToKey not responding – This issue has come up a few times. First, make sure that Windows recognizes the ALP as a controller. If it doesn’t, I recommend the UGREEN USB to USB Cable (on Amazon). This cable worked well during my testing and has resolved this issue for multiple people.
- Right Flipper is slow to respond or intermittently responds – I encountered this issue as well. In my case, I swapped the button for the right-nudge with the right-flipper until a replacement can be located. Remove the 3 side bars using a philips head screwdriver, slide the top control panel to the side, unscrew the nuts to the button. Press in on the middle clips and gently slide each connector out. Swap/replace the buttons, re-attach the nuts, re-connect button wires, re-install the control panel and side bars. (*Note: If you encounter a good replacement button set, please let me know)
- Firmware not Updating – If you go to Settings †’ Version and see the version is reporting 40.50, you’ll have to perform a factory reset to get the latest updates. This will erase all your local high-scores on your machine, but at least you will be able to get back to the most recent firmware updates. To perform the factory reset, see the next bullet below. Once the factory reset has been performed, login to the ALP and select the option to update the latest firmware update under the Version tile. You will then need to re-install any purchased tables, applications, etc.
- How to Perform a Factory Reset – If you have severe audio issues or firmware that is not updating you can perform a Factory Reset. This will reset your machine to the state it was when you received it. That is, you’ll need to re-install any purchased tables, apps., etc. This may also be useful if you sell the unit. Here’s how to perform the Factory Reset:
- Power the ALP on while holding the left flipper and the left nudge buttons.
- Then, follow the on-screen prompts to update the device.
- Sound / Haptic Distortion – If you’re having audio / haptic distortion issues, here’s something you can try that may fix it. This tip comes from Show-Me Retro (be sure to like his video to say thanks) where he was able to resolve the majority of his issues with these simple steps:
- On the top tab go to Settings †’ Page 3 †’ Pinball Settings
- Set Master Volume to 40.
- Set FX Volume 25.
- Set Music Volume 3, this may not sound right, but it does work.
- Move Down to Reset All Tables to Default and click the button.
- When prompted if you’re sure, select Yes.
- All tables will be reset and the haptics set to very low/low. If it doesn’t work on the 1st try, power-cycle the machine.
- Set volume using the + / – (upper right of the machine) to 75 and then adjust to your preference.
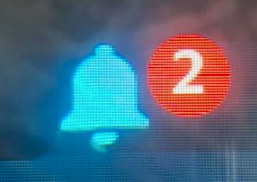
- How to view Notifications – If you see a bell with a red circle, this indicates you’ve received notifications from AtGames. To view these notifications, press the front nudge button (button to the right of the red rewind button). You’ll then be able to read the notifications you’ve received.
- Problems with Steam recognizing your ALP as a Controller – I had this same problem. I initially tried an Amazon basic (powered) USB hub and this did not work. I then purchased the two items below, issue was resolved:
- Powered USB Hub, Cabepow 4-Port USB 3.0 (on Amazon)
- UGREEN USB to USB Cable (on Amazon)
The above was recommended to me to try, it fixed my issue!
- Beelink GTR Mini PC won’t display to the VIBS/ALP Back-glasswhile in Windows – I tried this device and I don’t recommend it. There were a few issue:
- The GPU performance was not great with FX3 and noticed screen tearing during transitions (launching the ball to game-play). FPS was definitely below 60.
- Random / Odd USB disconnect issues between the PC and the OTG connection. In some cases, when in FX3, the USB controller would disconnect and acted as-if the Joystick was being held in the down position causing scrolling.
- The 2nd HDMI port connected to the VIBS board would show up on the initial boot of the PC, but once in Windows would show the multi-color sequencing indicating no-signal. Uninstalled drivers, re-installed the drivers and the same thing occurred. See here for a solution to this problem.
- I wound up returning this PC due to all the issues above and am currently using this PC instead 2021 Newest DELL G5 Gaming Desktop PC. The Dell has not demonstrated any of the above issues.
- CoinOpsX Exciters Too Loud – (from a WTT channel subscriber) when I launch the CoinOpsX app, the exciters turn way back up and vibrate through the roof. It is so powerful that it sounds like the tiny woofers on them are about to burst. I don’t want to damage my pinball machine, so I’m holding off playing CoinOpsX even with an external controller. I was wondering if you knew how to turn down, or disable/turn off the exciters altogether, when using the CoinOpsX app on the Legends Pinball?
- WTT Response: Had a few discussions regarding this issue, last discussion was that it appears to be a hardware issue with the Arcade Control Panel. If I receive any further updates, I’ll add them here.
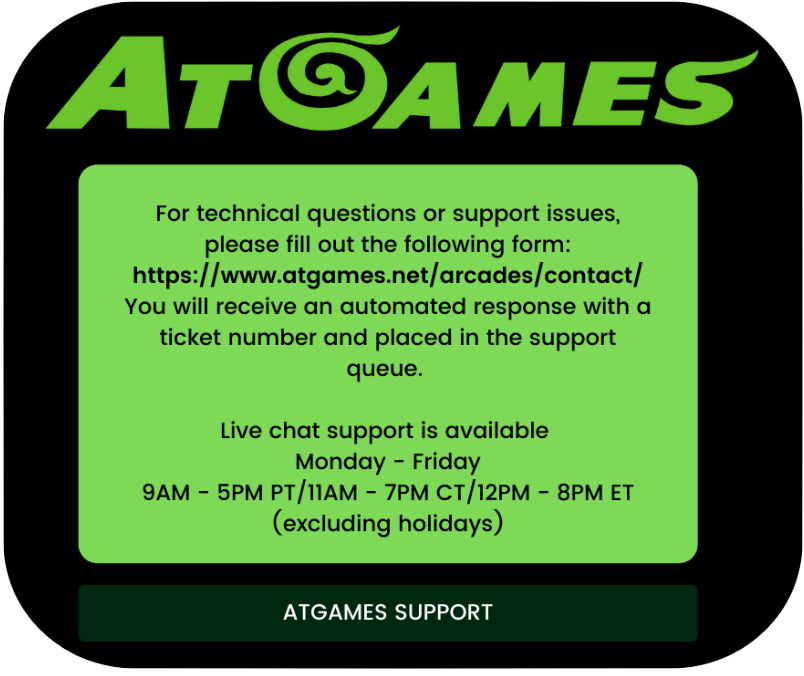
If the above Troubleshooting information did not help resolve the issue, you can also contact AtGames for assistance by clicking the image below.
Recommendations
The ALP is great, but with a few minor modifications to the built-in tables, it could be even better :
- Gottlieb tables forget the last player initials – The Zaccaria tables remember the previous initials at the end of a game, just requires 4 taps on the rewind button to enter the initials from the previous time initials were entered. On the Gottlieb tables, you have to scroll through and enter each time which is disappointing. Both sets of tables should work consistently.
- Gottlieb table scoreboards too small – Several of the Gottlieb tables have small scoreboards and plenty of artwork. I think better use of the space on the back glass would be great.
- Customer Requests – The following is based on feedback from this Reddit thread on what it is that reddit ALP customers want to see improved (I will be providing this feedback to AtGames):
- Inconsistent Selection – Reverse and play button uses make no sense to me. They need one button to be €œselect€. It is almost as if the play button is €œselect€ sometimes and the rewind button is €œselect€ other times. WTT comment: Fully agree with this, it’s unnecessarily confusing and keeps coming up.
Change Log
- 2023-11-13 – Minor changes, now the AtGames Legends Pinball HD Guide, etc.
- 2023-02-16 – Minor formatting changes; Removed section that is no longer being maintained by the author.
- 2022-09-15 – Added the new Legends Gaming guide to replace duplicated sections in this guide.
- 2022-07-05 – Update broken links.
- 2022-06-23 – Added manual code redemption section.
- 2022-06-11 – Added new 3rd Party section and new haptics upgrade kit from BuyStuffArcades.
- 2022-06-05 – Added Major Frenchy’s ALP Review.
- 2022-06-02 – Cleaned up the Game-Play section which needed a refresh.
- 2022-05-09 – Noticed the ALP is being sold on Amazon now, added as a purchase location.
- 2022-04-16 – Updated News heading.
- 2022-04-05 – Minor corrections; revised intro. paragraph as it has been 1 year owning the ALP. Added AtGames support graphic and link.
- 2022-03-07 – Added Legends Pinball Modding Series Season 1 guide.
- 2022-02-24 – Updated CoinOpsX section to the new WOPR Guide.
- 2022-02-04 – Added BitPixel HV/FX3 info.
- 2022-01-31 – Added Settings Guide.
- 2022-01-29 – Addition of the BitPixel HV, Q & A , HV manual and more FX3/VPX HV info., estimated shipping added.
- 2022-01-10 – Minor edits.
- 2021-12-29 – Added Flipper issue to troubleshooting section.
- 2021-12-16 – Received a recommendation from Peter S. to add to the troubleshooting section if your machine is stuck at firmware v50.50. Added it.
- 2021-12-5 – Added TAITO Volume 3 details.
- 2021-11-26 – Minor updates; Fixed some broken links during NOD-A for TAITO Volumes.
- 2021-10-15 – Added latest VIBS installation video from AtGames.
- 2021-10-13 – Minor edits.
- 2021-10-02 – Misc. edits., update Code Redemption section using the Digital Locker. Updated the Operation Section to make it easier to read. Also, added How to Install/Uninstall applications as well.
- 2021-09-12 – Minor edits to the VIBS Troubleshooting section to also cover the case where the adapter is not set for 1080p.
- 2021-09-02 – Minor edits; added TAITO Vol. 2 tables.
- 2021-08-25 – Improved the code redemption section to include setting up FDX.
- 2021-08-24 – Minor edits. Move News to a separate page. Added purchase locations now that Sam’s Club appears to have stock again.
- 2021-08-10 – Added Season 2 news received from AtGames.
- 2021-08-05 – Added TerryRed’s Review of the ALP here. Added Easy Mode Explained.
- 2021-07-31 – Added a new guide, AtGames CoinOpsX Guide.
- 2021-07-30 – Added a link to the new PinUP Popper Baller Installer Video Guide.
- 2021-07-28 – Added Detailed Guides section to make it easier to locate the new guides for FX3/Baller Installer. Added an Articles section for ALP-related articles. Minor edits.
- 2021-07-23 – Added a new guide the ALP PinUP Popper (PUP) Baller Installer Setup.
- 2021-07-19 – Additional updates. Preparing for more here.
- 2021-07-14– Added TAITO Volume 1 Video, a play-thru of all 4 tables. Updated info. regarding availability of the new TAITO tables. Added ALP Power Tips page (community provided tips). Minor edits.
- 2021-07-07 – Added a new VIBSButtonHolder_FrontV2.stl for anyone who wants to mount their VIBS button flush under the machine. Additional minor updates/cleanup.
- 2021-07-03 – Added a list of Steam OTG Games that will play well on your ALP here.
- 2021-07-02 – Added the VIBS Button Switch Holder Video and Thingiverse model which is available for 3D Printing. Added VIBS Live Stream video from 6/29/2021.
- 2021-06-26 – Added Zen Pinball FX3 Setup for the ALP under PC-Based Pinball. Additional VIBS Troubleshooting added. Minor edits.
- 2021-06-16 – Additional updates / corrections. Beginning to fill-in the PC-Based expansion in more detail. Added news updates.
- 2021-05-29 – Added Table Code Redemption instructions. Added 1st Party Expansion section. Added start to ArcadeNet section. Added start to Cloud Pinball section. Added start to PC-based Pinball section. Adjusted some sections for a more logical flow.
- 2021-05-19 – In the Operation section, added how to add games to the Favorites list. Other updates relating to products released today.
- 2021-05-17 – A few corrections were made including: incorrect table count for Vol 5, missing “Deluxe” at the end of one of the game names, new page image, etc.
- 2021-05-15 – Added news updates from AtGames, added full game-list under the Zaccaria Volumes section, expanded troubleshooting section, various other edits/improvements.
- 2021-05-14 – Minor edits and missing information added.
- 2021-05-07 – Added the Arcade Control Panel section.
- 2021-04-19 – Added More ALP Reviews section; various updates.
- 2021-04-15 – Minor updates.
- 2021-04-14 – Added a detailed guide for setting up Vertical (MAME) Arcade Games here.
- 2021-04-13 – Start to the BYOG Section / minor updates.
- 2021-04-09 – Various updates.
- 2021-04-05 – Took a brief vacation with the family to Florida, back now and resuming work on the review video.
- 2021-03-30 – Added top high scores, my son LAN got a high score on Pool Champion 2018 (Remake). How many ways can I mis-spell Gottlieb (corrected).
- 2021-03-28 – Updated with an Issues Found section.
- 2021-03-27 – Updating many sections and adding more information that I’ve learned.
- 2021-03-26 – It has Arrived! It’s now fully assembled and I’ve added two Zaccaria Volumes. In my opinion, the Zaccari volumes play much better/nicer than the stock 22 games. More in my review video.
- 2021-03-25 – Added a 3D Printed cup holder.
- 2021-03-21 – Start to this page.