RetroFlag GPi Quick Setup
Document Version 1.12
Last Updated: 9.1.2019
Table of Contents
Introduction
These instructions will help you get your RetroFlag GPi up and running quickly. You won’t find much fluff here, just what you need to know to start playing Retro Games on the GPi case. I highly recommend watching the above video to make you aware of all the steps before you begin.
These instructions may change, so be sure to check back from time-to-time for any updates. Let’s get started!
© 2019 by Wagner’s TechTalk – you may link to this page, if you wish, but please do not copy/paste to your website as your own work. This took several hours to write and will be changing with more helpful content.
What You Will Need
- Retroflag GPi Case for Raspberry Zero W (Amazon) – This is the case that contains the buttons, screen and other components already pre-assembled with the exception of the Pi Zero W (small computer that fits in the cartridge slot). The instructions below will walk you through the install of the Pi Zero W and the needed software. *Note – If your Pi Zero came with header pins, do not solder them to the Pi.
- Pi Zero W (Adafruit Link – btw the “W” means it supports Wireless/WiFi) – Adafruit seems to have the best price on the Pi Zero W, you can find it here. If you want to get it on Amazon, the price is higher and comes with some extra stuff you can’t use nor need for this case (power supply, heat sink, official RPi case, etc.). But, here’s the Amazon link if you want it just for the extra stuff. (I bought mine from this link, just because I could get it within 2 days).
- microSD Card – The microSD card is used to store the operating system, games, hi-scores, etc. There are a number of brands of microSD cards and capacities to choose from and I certainly can’t list them all here. You will also need the small sleeve (most microSD cards come with them) to install the microSD card into an SD card reader on your PC/Laptop (make sure you have one). The capacity of your microSD card really depends on how many games you want to install to your GPi. Many of the older games are small and don’t take up much space on the card. I prefer to have lots of room for expansion, so I opted for the Samsung 128GB card which is less than $25 USD. You could go much smaller than that: 16Gb/32Gb/64Gb are all fine options too. You’ll have to decide what’s best for you. Just make sure you have a computer with an SD card reader (same thing used by most digital cameras these days), if not you’ll need one of those too.
- 3 AA batteries – You can use any AA batteries you want, but considering you will, most likely, be going through a lot of them you may save money over the next few months by buying rechargeable batteries instead. You can usually find them cheaper at your local discount/dollar store, but if you want a nice kit of rechargeable batteries and charger, here’s a link to what I use currently.
- It is assumed you have a WiFi Router, PC/Laptop (running Windows) and have some basic understanding of your computer. If you need help, you can comment in the video above and we’ll try to assist.
- 10 foot USB to 2.5mm barrel jack (Optional) – may be useful if yours breaks or if you want a longer cable while playing in the living room, bed, etc.
Links and Resources
- RetroPie Site – The official source for downloading the latest build of RetroPie.
- Retroflag GPi site – The official Retroflag website documentation and downloads
- Reddit Retroflag GPi forum – A great resource to ask questions or learn more about your GPi. Our post introducing this page may be found here.
- SinistersSpatula Retroflag GPI Case User’s Guides – Links to additional information of a more technical nature for specific emulators, cloud-syncing and much more! Definitely check it out.
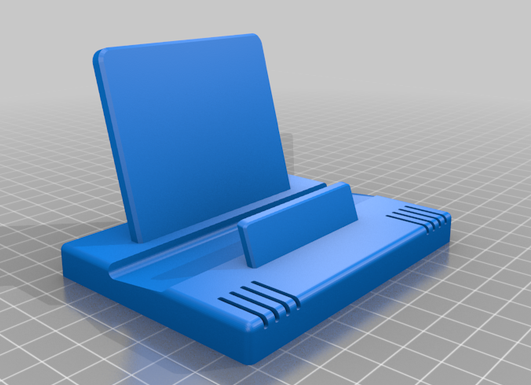
NEW – Handheld Retro Gaming Stand (3D Print) – check it out here.
Setup the Retroflag GPi Case (from RetroPie Distribution / Longer Method)
*IMPORTANT*
For an even faster method of setting up your GPi case, please see the Super RetroPie installation method.
Yay!! Your GPi has arrived and you’re not exactly sure where to start, right? Well, these steps will help you get there quickly and as painlessly as possible. These instructions are meant for Windows users, but Mac/Linux users should be able to follow along pretty closely as well. If you’re a RetroPie Veteran, this will take ~15 min. Also, check out the above video for a walk-through there too.
Prepare the microSD Card
- Download the Retropie image from here (Pi 0/1). The download page can be accessed here as well. Make sure to select the download link for the Raspberry Pi 0/1. *Note – Download is about 700Mb, extracted is 2.6Gb so make sure you have at least 4Gb of storage space on the destination drive available just to be safe.
- Extract the retropie-4.4-rpi1_zero.img.gz file. If you don’t have a program that can extract the .gz file, download 7-zip from here and install it. Then, extract the file mentioned above.
- Once the file has been extracted you’ll see a file called retropie-4.4-rpi1_zero.img . You’ll want to burn this image to the microSD card (8Gb minimum is recommended).
- There are a few options for burning the microSD. I recommend downloading balenaEtcher (or Etcher) from here. If you’re running Windows, and prefer, you can also use Win32 Disk Imager. Either is fine, but the following steps will assume you are using balenaEtcher (steps are similar for Win32 Disk Imager) but I will call it “etcher” from here on out.
- Install your microSD card into the sleeve that came with it and install it into your SD card reader in your computer/laptop.
- Launch etcher.
- Click the Select image (blue) button and browse to the location where you extracted the retropie-4.4-rpi1_zero.img file and click Open (in Windows, not sure what the Mac/Linux dialog states).
- The middle icon will identify where you want the image burned (or installed). *Note – Please take great care to make sure you select the right location to burn the image. If you have any USB storage devices currently connected, make sure you remove them or select the correct drive. Selecting the wrong drive will completely erase anything you have on that device. Make sure only one green check mark is assigned to the expected destination drive, then click the Continue button.
- When you are absolutely positive you have selected the correct drive to burn the Retropie image to, click the Flash! button.
- The length of time it takes to burn the image will vary based on the speed/size of the microSD card and speed of your computer. Typically, it will take under 10 minutes, so be patient. Grab your favorite beverage and come back for the next section but be sure to read the Important Note below. Once the flash has completed, simply close etcher and proceed to the next step.
*Important Note - If you see any dialogs stating "You need to format the disk in drive xx: before you can use it", just click the Cancel button (in Windows). You definitely don't want to reformat the microSD card or you'll need to repeat all of the above steps you just performed.
Setup Wi-Fi on the microSD
The following steps will walk you through preparing the first-boot of the microSD card to connect to your Wi-Fi network.
- Remove the microSD card from your PC/Laptop, wait a couple of seconds and re-install it. If you see those pesky dialogs mentioned above to reformat the drive, just click Cancel.
- You should now see a drive letter (mine is F:) called boot. There is another drive letter/partition which your PC cannot access and that is the one that will contain the games you will install later. Don’t worry about that at this point. Just know, there is only one drive accessible to you at this point and that is good.
- Using File Explorer (not a browser, the yellow File Explorer icon), go to the root of the “boot” drive (again, in my case it’s F:) and create a file called wpa_supplicant.conf. In my example, right-click in the F: folder that has about 26 files and select New –> Text Document.
IMPORTANT: Be sure you enabled the option to see file extensions in Windows and make sure there is no “.txt” extension! Windows will try to add that for you, just delete that portion. You should only see
wpa_supplicant.conf for the name of the file, nothing else. - Using File Explorer, create another file just called “ssh” with no file extension. This will enable ssh (ability to remotely connect from your computer). We won’t edit this file, just leave it as-is.
- Right-click the wpa_supplicant.conf file and select Open With and open it with your favorite text editor (i.e. Notepad, Notepad++, etc.)
- Copy and paste the following text into that file:
country=US
ctrl_interface=DIR=/var/run/wpa_supplicantGROUP=netdev
update_config=1
network={
ssid="wifi_id"
psk="wifi_password"
key_mgmt=WPA-PSK
priority=1
}- Change the “country=” to your country code if outside the United States. You can find a list of country codes here.
- Change the ssid=”wifi_id” to the name of your Wi-Fi SSID/Router, keep the name within double-quotes (“)
- Change the password for your Wi-Fi SSID/Router in the psk=”wifi_password” section within the double-quotes (“).
- Save the file. Important Note : Once you boot from the microSD card with this file, it will setup the Pi to your network and delete the wpa_supplicant.conf file. Therefore, it won’t be a security concern by modifying this file after you’ve booted from the Raspberry Pi.
Install the GPi Case Patch (for buttons and Display)
Great, you’re almost done setting up the microSD card for use with the Retroflag GPi case. This last step is important to make sure that your buttons and display are responsive. The instructions below will step you through this process.
- Download the patch from here.
- Extract the file contents to a location on your computer.
- Using File Explorer (in Windows), browse to the folder C:\GPi\GPi_Case_patch\GPi_Case_patch (where C:\GPi is where I copied my file, yours may differ).
- Copy the last \GPi_Case_patch folder to the root of your microSD card. In the example above, I copied the bold folder to F:\
- In File Explorer, navigate to <drive>:\ GPi_Case_patch and double-click the install_patch.bat file. This will patch the microSD as-needed to allow the display and buttons to work under RetroPie.
- If everything went well, you should see the following :
        1 file(s) copied.
        1 file(s) copied.
        1 file(s) copied.
        1 file(s) copied.
        1 file(s) copied.
.
-----------------------Successful configuration-----------------------
.
Press any key to continue . . .- Simply press any key in the window to close it.
- You’ve now patched your microSD card with everything you need, at this point.
- Remove your microSD card from the sleeve and install it into the microSD slot on the Raspberry Pi Zero W.
- Now Power-on the GPi case!
First Boot & Setup Controls
- The first time you power-on your GPi with the microSD card installed, you’ll see a blue screen stating it will reboot in 5 seconds. This is normal. You may also see some odd lines appearing vertically on the screen, this is also normal. That’s because the Raspberry Pi has rebooted and is no longer supplying power to the display. Do not be concerned about it.
- After a short amount of time, you’ll see the Raspberry Pi running various startup commands, then finally it will launch Emulation Station.
- Once Emulation Station is launched, you’ll notice it states 1 GAMEPAD detected. We will now setup the buttons in the next step.
Setup the GPi buttons
- Press and hold any button, I’ll use the “A” button in some of the steps below.
- You’ll now see a Dialog stating CONFIGURING GAMEPAD1
- Press the up/down/left/right buttons on the small black controller button on the left.
- Now press the Start and Select button on the GPi.
- Now press A/B/X/Y buttons on the GPi.
- On the back of the GPi (while facing you), press the LEFT SHOULDER button, followed by the RIGHT SHOULDER button.
- Press, hold and release the “A” button again for all button selections until you see HOTKEY ENABLE. For this button, press the SELECT button.
- Press the “A” button one more time to exit the dialog (may take about 3-6 seconds)
- Congratulations, your buttons are now setup!
Run the Safe Shutdown and Safe Reset scripts
This step is necessary for the GPi to properly shutdown RetroPie when you turn off the GPi using the switch on the top-left of the device. Not doing this step may result in file corruption or long boot times while the disk check is being performed. So, you definitely don’t want to skip this step!
- Make sure your GPi is still powered on, don’t power it off you’ll need it on for this step! In-fact, you may want to plug in the USB cable that came with your GPi to the small DC power-in port on the top-left of the GPi to make sure you don’t loser power.
- In Windows, we’ll use a program called PuTTY to connect to your Raspberry Pi Zero W (now inside your GPi case) and run a setup script.
- If you don’t already have Putty, you can download and install it from here.
- After installing, launch PuTTY.
- For the Host Name (or IP Address) enter retropie (all lower-case)
- Click the Open button. *NOTE: If you have any issues connecting, please see the section (above) Setup Wi-Fi on the microSD to make sure you have properly set the SSID/Wifi Password. You can also navigate to the RetroPie option and click the “A” button and select the “Show IP” option to check your IP Address. If you don’t see anything, you have likely mis-configured it. Worst-case, you may have some odd networking issue. In that case, see the Troubleshooting section below (Problem 2).
- After clicking the Open button, you may get a dialog indicating a POTENTIAL SECURITY BREACH! No worries, just click Yes to proceed (looks scary though).
- You will be asked to enter the Login As: into your Pi, enter “pi” as the Login and press enter.
- For the password, enter “raspberry” and press enter.
- Yay, we’re now connecting from our PC to our little GPi computer! Let’s finally setup the shutdown script.
- Copy the following text to your PC’s clipboard:
wget -O - "https://raw.githubusercontent.com/RetroFlag/retroflag-picase/master/install_gpi.sh" | sudo bash- In the PuTTY window, simply right-click anywhere in that window and it will paste the above contents in the window.
- Press the Enter key.
- At this point, the Raspberry Pi Zero W will go out to the internet to Github and download and install the scripts to your RPi. Once it’s done, don’t freak out – It WILL REBOOT! You may see some odd screen effects during this process but don’t worry it will boot back up and with your scripts enabled for safe shutdown.
- Also note, PuTTY will be disconnected once the reboot occurs so you may hear a beep/sound indicating it was disconnected.
- After the reboot completes, you’re now ready to install your games (ROMs).
- You’re done!
Super RetroPie (Alternative-QUICK Setup Method)
As with most things tech-related, sometimes new ways of reaching your goal can be accomplished easier/faster as more people get a hold of the the tech. Nothing can be further from the truth, with the help of the Super RetroPie image (No ROMs are included in this image). This image has most of the steps already covered in a single image that you can easily download and burn to your microSD card.
The RetroPie setup instructions are far from obsolete, some are going to choose the official path to setup their RetroFlag GPi case. Yet, others still will want a quicker-easier route that is very well-done and saves a lot of time tweaking/configuring. I’ve recently installed and tried the Super RetroPie image and can say it does save a lot of time. Below are some quick instructions to get you up and running with it.
- Download the Super RetroPie image from their Facebook Group link here. You’ll need to join their group and await acceptance to the group before continuing.
- Extract the file ( download 7-zip from here and install it, if needed)
- Burn the image to your microSD card (see Prepare the microSD card if you’re unsure how to do this or what you need).
- Once the image has been burned to the microSD card, remove/re-insert the microSD card, ignore/cancel any prompts to re-format the microSD card.
- Using File Explorer (not a browser, the yellow File Explorer icon), go to the root of the “boot” drive and create/edit a file called wpa_supplicant.conf. In my example, right-click in the F: folder (or whatever drive letter indicates “boot”) and select New –> Text Document. IMPORTANT: Be sure you enabled the option to see file extensions in Windows and make sure there is no “.txt” extension! Windows will try to add that for you, just delete that portion. You should only see
wpa_supplicant.conf for the name of the file, nothing else. - Right-click the wpa_supplicant.conf file and select Open With and open it with your favorite text editor (i.e. Notepad, Notepad++, etc.)
- Copy and paste the following text into that file:
country=US
ctrl_interface=DIR=/var/run/wpa_supplicantGROUP=netdev
update_config=1
network={
ssid="wifi_id"
psk="wifi_password"
key_mgmt=WPA-PSK
priority=1
}- Change the “country=” to your country code, if outside the United States. You can find a list of country codes here.
- Change the ssid=”wifi_id” to the name of your Wi-Fi SSID/Router, keep the name within double-quotes (“).
- Change the password for your Wi-Fi SSID/Router in the psk=”wifi_password” section within the double-quotes (“).
- Save the file. Important Note : Once you boot from the microSD card with this file, it will setup the Pi to your network and delete the wpa_supplicant.conf file. Therefore, it won’t be a security concern by modifying this file after you’ve booted from the Raspberry Pi.
- Remove your microSD card from the sleeve and install it into the microSD slot on the Raspberry Pi Zero W.
- Now, Power-on the GPi case!
- If you don’t already have Putty, you can download and install it from here.
- After installing, launch PuTTY.
- For the Host Name (or IP Address) enter retropie (all lower-case) .
- The login is pi and the password is raspberry.
- Connect to the GPi using SSH and issue the following command to expand your microSD card to it’s full size (copy the following text to the clipboard and right-click in the PuTTY/SSH window and press enter):
sudo raspi-config --expand-rootfs
- All scripts, button configuration, etc. have been done for you. You can simply skip here for questions on installing games. Keep in mind, using the mame-mame4all emulator will give you much better performance for most games in MAME. See the Troubleshooting section for more details or if you run into any difficulties.
- You’re done!
Installing ROMs
First, please don’t ask anyone where to get ROMs. They can’t, or shouldn’t answer you. They don’t mean to be rude, but it’s not an appropriate topic for discussion. There are places where you can download legal ROMs for installation into your GPi. My recommendation is to search google (or your favorite search engine) and locate whatever it is you want to install. Once you do that, here are some basic instructions:
- In most cases, you don’t need to unzip the file/rom you downloaded.
- Browse your UNC Network (network path) to \\retropie , this should find a series of shares on your GPi. That is, right-click Start -> Run and type in \\retropie then press enter.
- The obvious one you may be interested in is \\retropie\roms , this is where the games will be copied on the GPi.
- Using File Manager, copy the .zip (or other file) from your local computer to the \\retropie\roms\[Emulator] sub-folder. The ROM you have must match the version of the emulator you copy it to (paste it into). Most of the problems users have installing ROMs has to do with the fact that the ROM they downloaded didn’t match the correct emulator version they tried to run it under or the rom copied is dependent on another file that was not copied/missing.
- Once all associated ROMs are copied, press the Start button on the GPi, scroll to the very bottom of the list and select Quit. Then select RESTART EMULATIONSTATION. Any new ROMs you installed will now show up under Emulation Station with the Emulator visible and the games should be available to you.
- This is the most help I can provide on this topic.
Troubleshooting
Problem 1: A disk check is performed on every boot of the Raspberry Pi.
Solution 1: Some will certainly disagree with this step, and here’s a link to an approach that states that what I’m about to tell you is unwise. My only hesitation for recommending it is that the sub folder mentioned is not accessible under Windows. If you have mis-configured your network and your buttons aren’t working at this point, you will have no choice but to power-off without the shutdown script installed and the disk check will run for quite some time (in my case, I gave up waiting for it to complete after 10 minutes). Keep in mind, you likely won’t run into this problem if you go by the above instructions. But in case you need this, here is what I have tried and worked well for me:
Using File Manager, locate the /boot/cmdline.txt change “fsck.repair=yes” to “fsck.repair=no” and save. At least temporarily, until you’ve installed the shutdown scripts, then set it back to “fsck.repair=yes” once the scripts have been installed. The reason is, if you setup anything incorrectly and the network is inaccessible and buttons don’t work, you will be forced to power-off the GPi (dirty shutdown). After rebooting, the SD card may be corrupted and you may have to start from the beginning anyways. Just saving you some time after having this issue a few times myself.
Problem 2 : Can’t connect to my GPi when I know I’ve setup my SSID/WiFi password correctly.
Solution 1: After you’ve setup the buttons in RetroPie, press “A” to go into the RetroPie menu. Scroll down until you see RASPI CONFIG and press the “A” button. After a 10 second delay, press the down arrow button to “InterfacingConfigure…” option. Press the right-arrow on the controller and press the “B” button. Arrow down to “P2 SSH…” and press the right arrow button followed by the “B” button. You will be prompted with “SSH Server to be enabled?”, select “<YES>” and press the “B” button. Press the “B” button again on the “<OK>” button. Press the right arrow button twice to highlight “<FINISH>” and press the “B” button. You’ll now be back at the RetroPie menu, from here you can press the “B” button (to go back) to the main Emulation Station menu. At this point, you should be able to SSH into the GPi using PuTTY. Resume the Run the Safe Shutdown and Safe Reset scripts section (above).
Solution 2: Be sure you enabled the option to see file extensions in Windows and make sure there is no “.txt” extension! Windows will try to add that for you, just delete that portion. You should only see
wpa_supplicant.conf for the name of the file, nothing else.
Problem 3: RetroPie is exiting at random points, hanging or displaying BUS errors. What do I do?
Solution 1: I had this issue as well, turned out to be a faulty Raspberry Pi Zero W and had nothing to do with the GPi case. I re-installed a new RPi 0 W in it’s place and this corrected the problem. I would highly recommend you repeat these instructions from the beginning if this happens to you as it’s likely your microSD card is corrupted at this point. At least, it was for me.
Problem 4: How can I run the RetroPie Setup from SSH/PuTTy?
Solution 1: On your computer, launch PuTTY, enter retropie for the Host (or IP). Then, type and enter the Login of pi and the password of raspberry. Then, copy this command (without the quotes): “sudo ~/RetroPie-Setup/retropie_setup.sh” and right-click in the SSH window and press Enter. After a brief delay, the RetroPie setup screen will appear and can be configured as-needed.
Problem 5: Some games run very slow in MAME (libretro), how can I improve the speed?
Solution 1: I’ve also found some games particularly slow in mame-libretro on the GPi. I tried installing those same games in the emulator mame-mame4all and they run MUCH faster! For example, the late 70’s Asteroids ROM was virtually unplayable in libretro, but runs smoothly in mame4all. If you have a rom/set compatible with mame4all, I recommend trying that emulator out. I think you’ll be impressed with the difference!