Manny Flores Dual-Stick Build
Check out this beautiful job on his custom Robotron dual-stick build! It looks absolutely stunning! The artwork design looks amazing and the details below will be helpful for anyone wanting to do the same.
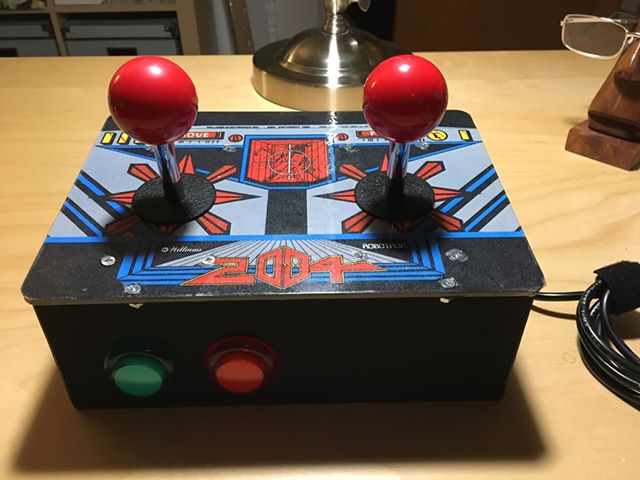
Table of Contents
How it was Built
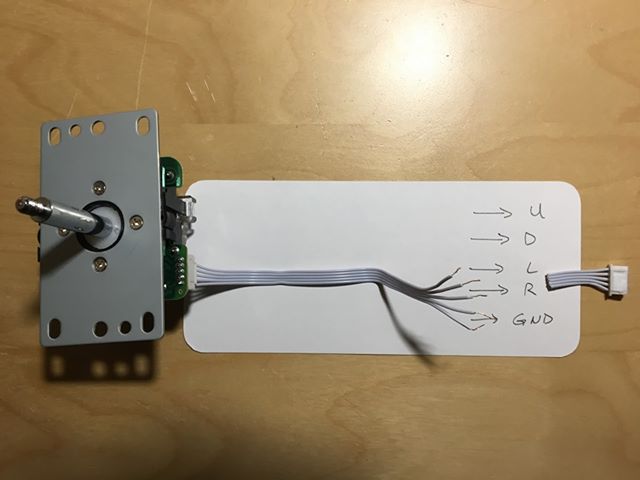
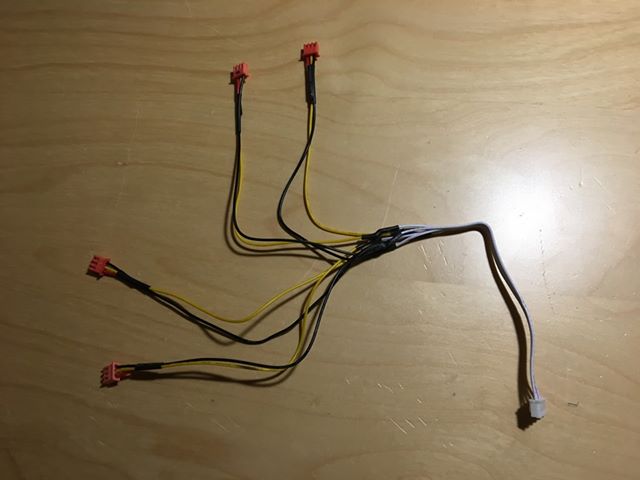
Manny also sent the following pictures and information to demonstrate his build. He managed to use a single encoder for both controllers. It required a custom cable which he describes and also included pictures below.
It worked! Learned a few things. You can’t use the 2pin ports when the 5pin joystick port is in use. So I just used the K7, K8, K11, and K12 buttons for the second joystick. A little splicing, solder, and heat shrink got the job done!
He continues by stating he then added a green LED button for the coin and a red LED button for player 1 start. The white buttons are smaller than the other buttons or I would have used a white one for player 1.
Testing
100,000 on my first game of Robotron!!!
Suggestions
- After sending him a link to the video on the GRS Trackball+Spinner, he mentioned it would be cool to have a trackball with 3 buttons for Missile Command. WTT: Great idea Manny!
Recommendations for Improvement
- How about using non-metric screws?
- Make tapped holes in the bottom to screw in the suction cup feet.
- Add “plugs” to the suction cup feet holes to secure the cups. Could glue them in place. Might make for a nicer finish.
- Maybe add a button or two right in the middle to play more games. At least one. I might just try drilling a hole.
- Add a cable tie to the inside of the USB cable for strain relief.
His Conclusion
I may need to make another one for more games! Thanks again for posting all the info on OpenCADE and thank you for all of the resources you provide that allows us mere mortals to make these controllers. OpenCADE rocks! I have the artwork in Inkscape format if anyone wants it. 🙂
WTT Comments
Excellent recommendations / suggestions! I used electrical tape for the strain relief on the cable but cable ties are also a great idea.
Button holes can be easily added by importing the control panel into an app. like tinkercad and subtract out the button holes. This would allow you to orient them exactly how you want them without drilling. Though, this would require re-printing the control panel, re-applying artwork and re-installation of the sticks.
Regarding the button holes, there is another option that I’m planning on designing. You’ll notice 4 screw holes on the back of the base (near the notch for the cables). Those are to provide mounting points for an extended (top) panel for adding buttons above the control panel. They would be slanted for improved ergonomics/accessibility. It’s on my to-do list of things to add and something I wanted to mention. Let me know if it’s something you’re interested in and I’ll bump up the priority a bit 😉
I’ll put more thought in how to better incorporate the suction cups. Wasn’t sure if you had seen the suction cup holders I designed somewhat separately but intended for OpenCADE? I had thought about doing something like you suggested (screw-in), but it would require me to make the base thicker. I’ll think more about it and see what can be done to make it easier. Let me know if the above link is/isn’t helpful for you.
You’ve done an awesome job with your build! I now want to totally re-work mine after seeing yours 🙂