How to Install n8n on a Raspberry Pi 5
Last Update: 7/26/2025

If you’re looking to automate tasks and try out your own self-hosted workflows, n8n is a powerful tool worth checking out. In this guide, I’ll walk you through the exact steps I used to install n8n on a Raspberry Pi 5. This is ideal for personal use, testing, or just learning how automation tools work. It is only intended for use within your own local network and not exposed directly on the internet.
Let’s get started!
Table of Contents
Helpful Resources
- n8n Official Website – The official n8n website.
- n8n Community Forums – Discuss n8n with others and see what others are doing.
- Official n8n YouTube channel
- Workflow Templates
Q&A
Below are some common Question and Answers that you may find helpful. If you have additional suggestions, recommendations, etc. please comment in the YouTube video above.
- Q: How secure is running n8n on a Pi 5?
- A: Running n8n on a Raspberry Pi 5 can be reasonably secure for personal or small-scale use — if you follow basic best practices. However, by default, it’s not hardened for public exposure. Here’s a breakdown of the security considerations:
- Secure If:
- Your Pi is only accessible on a local network (e.g. behind a home router).
- You don’t expose port 5678 to the public internet without proper protections.
- You use strong passwords and limit physical access to the Pi.
- Not Secure By Default If:
- You allow open internet access to
http://<your-pi-ip>:5678without HTTPS. - You haven’t configured authentication or access restrictions (n8n is open by default).
- You rely on OAuth flows (e.g., Google Sheets) without secured redirects.
- You allow open internet access to
- Secure If:
- A: Running n8n on a Raspberry Pi 5 can be reasonably secure for personal or small-scale use — if you follow basic best practices. However, by default, it’s not hardened for public exposure. Here’s a breakdown of the security considerations:
- Q: I really have no idea what a Raspberry Pi 5 is, where can I learn more about it?
- I have a guide dedicated to the Raspberry Pi 5 here. The video at the top of the page will show you all the basics on getting setup. In the sections below that, it will go into more detail with additional content. One section in particular (and discussed in the video above) is Raspberry Pi Connect which is used for remotely accessing the Pi from anywhere.
- Q: Can I import my workflows from the n8n trial and run them on the Pi 5?
- A: Yes, that’s exactly why this guide was created. I was running the 14-day trial and was absolutely blown away by what n8n can do. I looked at different hosting options and was about to bite when I wondered if a Pi 5 could run n8n. After some research (and help from ChatGPT), I tried a few things and was extremely pleased with the results. For now, using a Pi 5 made the most sense until I improve my n8n skills and create more automations using the tool.
- Q: Why would you deploy it locally on your raspberry pi 5 instead of your laptop?
- I wanted something that could run 24/7 without needing to keep my laptop powered on. The Raspberry Pi 5 is perfect for that, it’s low power and always online. My automations keep working in the background.
- Running it on the Pi keeps everything isolated and uninterrupted. If I reboot or shut down my laptop, it doesn’t affect my workflows at all.
- Q: What database is being used by n8n?
- A: By default, when you install n8n on a Raspberry Pi 5 using npm or Docker without custom configuration, it uses the built-in SQLite database. From a terminal on the Pi, you can issue this command and will see database.sqlite: ls -lh ~/.n8n
- Q: Why is PM2 a good option for running n8n in the background?
- A: Primarily because it’s lightweight, reliable, and easy to manage.
- PM2 ensures that your
n8nprocess keeps running, even if it crashes or your Pi reboots. This is ideal for automation tools like n8n that are expected to run continuously. - Unlike setting up a
systemdservice, PM2 doesn’t require root access or editing service files. - n8n is a Node.js app, and PM2 is specifically built for managing Node processes. That means less overhead and more compatibility compared to generic process managers.
- PM2 ensures that your
- A: Primarily because it’s lightweight, reliable, and easy to manage.
- Q: What are some useful commands for PM2, if I decide to use it?
- A: Start, stop, restart, and view logs
- pm2 start n8n
- pm2 stop n8n
- pm2 restart n8n
- pm2 logs n8n
- A: Start, stop, restart, and view logs
What Do I Need to Get Started?
You basically just need a Raspberry Pi 5 (8GB recommended), a power supply, active cooler, a case, MicroSD card and a keyboard + mouse | HDMI display (for the initial setup). If you already have a Pi 5, you’re good to go. If you don’t, below are the items I recommend for someone new to Raspberry Pi’s:
- CanaKit Raspberry Pi 5 Essentials Starter Kit (8GB RAM) – This kit includes the Pi 5 (8GB), the active cooler, case, power supply, microHDMI to HDMI cable, microSD card, etc. With this one kit, you can do everything shown in this video. Keep in mind, you will need a keyboard+mouse and an HDMI display for the initial setup. *NOTE – If you want one right away, you may also find them at your local Best Buy.
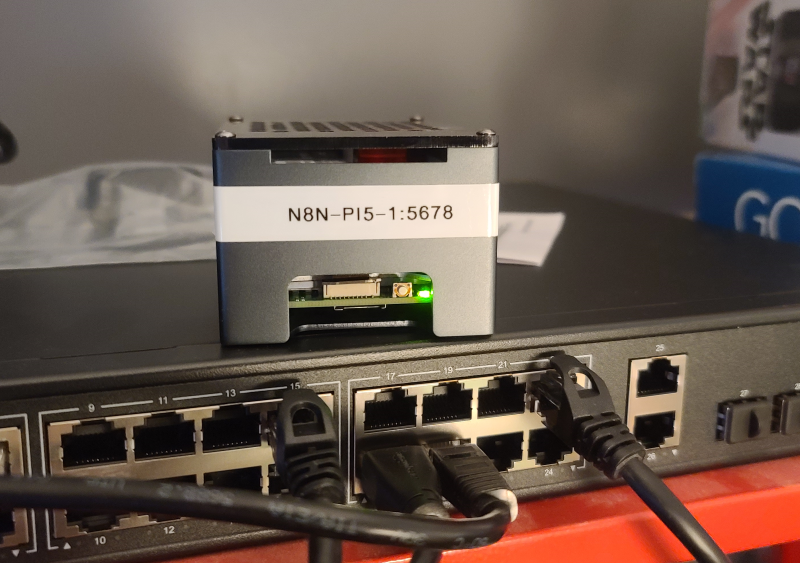
PoE+NVMe Upgrade
If you have a PoE Switch on your network and have n8n already setup, you may want to also consider adding a PoE HAT (powers the Pi over Ethernet, no power supply needed) and an NVMe drive. A microSD card is fine, but NVMe is much faster and more durable than running from a microSD card. If you go this route, the CanaKit case (mentioned above) won’t work as the Pi+HAT won’t fit in that case. Below is what I’m now using with n8n :
- GeeekPi P33 M.2 NVME M-Key PoE+ Hat for Raspberry Pi 5 – This kit is a small board that you install to your Pi 5 which expands functionality to include PoE (Power over ethernet – you do need a PoE Switch to use it) as well as a slot for an NVMe SSD drive. That is, once installed you can power your Pi exclusively over the internet cable and add an NVMe drive. *NOTE – when installing the PCIe cable, pay attention to the markings (Pi end and HAT end), I didn’t at first and installed it backwards. The documentation isn’t clear at all on this.
- GeeekPi Aluminum Case for Raspberry Pi 5 – This kit works great with the PoE HAT.
- 512GB NVMe M.2 PCIe Gen3x4 2280 SSD – NVMe M.2 SSD, much faster and durable than using a microSD.
The following video will demonstrate how to setup the above components.
n8n Installation on the Raspberry Pi 5
REMINDER: The following steps are intended only for a local network installation of n8n for your own personal testing. It is not intended for hosting outside your local network as that would require additional setup and not covered in this tutorial.
Below are the steps I used for installing n8n on the Raspberry Pi 5.
🛠️ Step 1: Update Your Raspberry Pi
Before installing anything, make sure your Pi is fully up to date:
sudo apt update && sudo apt upgrade -yThat pulls in the latest security updates and software packages.
🌐 Step 2: Install Node.js
n8n runs on Node.js, so let’s get the correct version installed:
curl -sL https://deb.nodesource.com/setup_18.x | sudo -E bash -
sudo apt install -y nodejs
Check to make sure it installed correctly:
node -v
npm -v
You should see something like Node v18.x and npm v9 or above.
⚙️ Step 3: Install n8n Globally
Now for the good part—installing n8n!
sudo npm install -g n8nThat will install n8n as a global command so you can run it from anywhere.
▶️ Step 4: Start n8n (For Testing)
You can run n8n immediately just to test it out:
n8nBy default, it’ll launch on port 5678. In your browser, visit:
http://<your-pi-ip>:5678Use hostname -I to find your Pi’s local IP address.
🔁 Step 5: Run n8n in the Background with PM2
If you want n8n to keep running after you close your terminal, I recommend using PM2. It’s a simple process manager that makes this easy.
Install PM2:
sudo npm install -g pm2Start n8n with PM2:
pm2 start n8nSave your PM2 configuration so it restarts on boot:
pm2 save
pm2 startup
PM2 will give you a command to run next—copy and paste that to finish setting it up.
🔐 Optional: Fix “Secure Cookie” Error for Local Testing
If you see a message about “secure cookies” when running locally (without HTTPS), disable the secure cookie check:
export N8N_SECURE_COOKIE=falseTo make that setting permanent, you can add it to your ~/.bashrc or PM2 environment.
✅ You’re Done!
That’s it! You’ve now got a self-hosted version of n8n running on your Raspberry Pi 5. You can build automation workflows, test webhooks, and explore what this tool can do—all without relying on a cloud service.
Bonus Tip: Stop or Restart n8n Anytime
With PM2, it’s easy to manage:
pm2 stop n8n       # Stops the process
pm2 restart n8n    # Restarts the process
pm2 logs n8n       # View logs
🧹 Optional: Uninstalling n8n Completely
If you decide you no longer want to run n8n on your Raspberry Pi, here’s how to fully remove it.
1. Stop and Remove n8n from PM2
If you used PM2 to manage n8n:
pm2 stop n8n
pm2 delete n8n
pm2 save
(Optional) If you’re not using PM2 for anything else, you can remove it:
sudo npm uninstall -g pm22. Uninstall n8n
Remove the n8n global installation:
sudo npm uninstall -g n8n3. (Optional) Remove Node.js (if you no longer need it)
Only do this if you’re not using Node.js for anything else:
sudo apt remove nodejs -y
sudo apt autoremove -y
4. Clean Up Environment Variables
If you previously added any N8N_ environment variables (like N8N_SECURE_COOKIE=false) to your ~/.bashrc or PM2 ecosystem file, you can remove those manually.
OAuth2 from Another Machine
You may find authentication of Google and other services won’t work unless registered directly on the Pi. This is a common issue when authenticating with OAuth2 from another machine’s browser — the key problem is that Google is redirecting back to http://localhost:5678, which refers to your local machine, not the Pi 5, and of course, the browser you’re using can’t connect to the Pi’s localhost.
✅Authenticate Directly on the Pi
You can open a browser on the Pi itself (via Raspberry Pi Connect / VNC or using a monitor/keyboard) and complete the auth there. Since localhost will match, it’ll work. Once credentials have been added directly on the Pi, you’ll be able to reference those credentials for the current and future workflows. Therefore, it will only need to be setup once on the Pi 5. If I find a better solution, I’ll update this section.
Change Log
- 2025-07-26 – Minor updates.
- 2025-05-31 – Added PoE+ NVMe HAT and Case video.
- 2025-05-25 – Misc. updates.
- 2025-05-24 – Guide cleanup prior to public availability.
- 2025-05-18 – Start to this guide.