AtGames Legends Ultimate Mini Guide
Last Update: 7/12/2023

Welcome to the AtGames Legends Ultimate Mini (ALUM) Guide here at Wagner’s TechTalk! This machine arrived at the WTT studio on 9/17/2021 and was one of very few in existence at the time. I’m honored that AtGames was kind enough to provide this machine early enough such that this guide could be made available to you quickly. This is the first guide ever created before large-scale availability. Both the ALP / ALU had already been around for several months when those guides were created.
In the sections below, I’ll share exactly what I’ve learned about this machine, any issues that I encounter and my personal experiences to help you along the way. I hope you find this guide educational and helpful as you learn more about the capabilities of the Legends Ultimate Mini! -Jon
How-To link to a specific section on this page: go to the Table of Contents (below) and click a section to reference. Copy the URL from the address-bar of your browser and paste in your video description/post/blog. This will direct a viewer to a specific section in any of the guides you find here.
Table of Contents
What is the Legends Ultimate Mini?

The AtGames Legends Ultimate Mini (or ALUM for short), has a very unique design that allows you to rotate the display in either horizontal (landscape) or vertical (portrait) orientations. This makes the machine ideal for playing the classic horizontal arcade games but well-suited for vertical games. Including a vast library of pinball tables available through AppStoreX (~125 at the time of this writing).

The machine is about 2/3rds the width of the Legends Ultimate and roughly 4 inches shorter. The height of the machine stands nearly level to that of my Arcade1UP Star Wars cabinet (with the riser installed).
The ALUM ships with a 150 licensed games pre-installed and the control panel is swappable with the Legends Gamer Mini. Even more impressive is that additional games can be added using BYOG (bring your own game) or through an application called CoinOpsX. You can easily add many more games to the ALUM and this guide will help you with that. The versatility of the machine doesn’t stop there, you can also use the HDMI input and OTG connection to connect to other devices you may already own (i.e. Raspberry Pi’s, Retro Gaming Handhelds, Super Console X models, etc.)
The bezel to the monitor may be removed using the 4 twist-off bolts and rotated with ease. There is a non-contact magnetic switch built into the bezel which determines the orientation of the monitor. Read more about the display rotation here.
The ALUM also includes the Pinball Kit which consists of two side button assemblies and attaches to left/right sides of the cabinet. Each assembly includes a button for the flipper and nudge button. This makes the ALUM an excellent pinball gaming experience. Read below to learn more about this truly unique machine!
Why the ALUM?
I love Retro-Gaming, it’s been a passion of mine since the late 1990’s when I first heard about a new emulator called MAME (Multiple Arcade Machine Emulator). Fast-forward twenty something years and now you can own home arcade cabinets that will allow you to play many of those classic arcade and console games you grew up with. Below are some reasons why the ALUM is worth considering:
- Expandability – The ALUM includes 150 Arcade and console games. However, you’re not limited to the included games. There are a number of expansion options such as BYOG and CoinOpsX which may be installed to a USB drive (no additional hardware needed). Additionally, you can connect a number of other devices via HDMI (input) and OTG, devices such as Raspberry Pi’s, Retro Gaming Handhelds, a PC, Super Console X devices and more.
- Horizontal & Vertical Game Play – One unique feature about the ALUM is that you can play games in horizontal or vertical mode. This makes the machine perfect for situations where you don’t have room for an ALU and/or an ALP but still want to be able to enjoy the best of both in a smaller form-factor.
- Virtual Pinball – With the ability to rotate the display from horizontal (landscape) to vertical (portrait) mode, this makes playing virtual pinball tables on this arcade-style cabinet very enjoyable. For example, on the ALU the pinball tables play well, however the horizontally-oriented display is not ideal for pinball. While I still prefer playing pinball tables on the ALP, the pinball experience on the ALUM is superior to that of the ALU.
- Ease of use/Setup – The ALUM was very easy to assemble, it will likely take around 45min. total to get it all put together and start playing. The control panel is a simplistic design which provides a single joystick and 6 action buttons. This is great for the majority of games which just need a joystick and buttons. If you’re looking for a machine with spinners and a trackball, you may find the ALU another option.
- On-line Leaderboards – The ability to submit high scores to the AtGames servers works well and is easy enough on the ALUM. I have a few scores uploaded at this point (none particularly close to the top scores). This is a very nice feature which is shared by most all AtGames connected devices.
- Lobby/ArcadeNet – The lobby is another reason for picking up the ALUM. While I’ve not been able to play anyone on-line yet, I understand how it works and look forward to playing a co-op game very soon.
Reviews
If you’re considering the AtGames Legends Ultimate Mini, always a good idea to get opinions from others. Below are some videos that I recommend watching (don’t forget to subscribe to their channels) :
- The Legends Ultimate Mini Is A Pretty Solid Arcade Machine! Hands-On Review [ ETA Prime ]
- Legends Ultimate Mini is the Arcade that Fits in ANY Home [ JohnRiggs ]
- AtGames Legends Ultimate Mini Home Arcade Review [ MichaelBtheGameGenie ]
- AtGames Legends Ultimate Mini Review – What To Know Before You Buy! [ COOLTOY ]
- AtGames Legends Ultimate Mini Arcade: Setup, Game Play & Review [ Wagner’s TechTalk]
Assembly
The assembly of the ALUM was pretty easy, below are a few highlights. You should be able to assemble the machine in about 30-45 minutes.
- Install the 16 screws into each of the two side panels.
- Insert the 16 cam locks into each of the support boards, align the arrow facing towards the outside of the board.
- Tighten each of the support boards into the screws. Keep in mind, the grooved sides face inside the cabinet and the two boards with the grooves are mounted at the base of the cabinet.
- Align the other side panel and tighten to the assembly.
- Slide in the front and back panel to the assembly.
- Install the 3 screws to the matching holes at the back.
- Install the two wooden dowels into each side-top of the control panel area, place the panels over the dowels and install the two screws to each.
- Attach the bar top to the bottom portion of the cabinet.
- Connect the 3 wires (Output, USB and Power) to the control panel.
- Insert the control panel into the cabinet.
- Install the 6 screws to the side of the cabinet.
- Install the two longer screws through the two holes on the top of the control panel.
- Remove the pinball button spacer and install the two included screws and the pinball button assembly to each side of the control panel (the connections are spring-loaded on each side and make contact with the control panel inputs).
- Attach the security brackets, if needed (definitely do this if you have small children).
- Plug in the power, have fun!
Display Rotation
Perhaps one of the most unique and impressive features of the AtGames Legends Ultimate Mini is that it allows rotating the display from horizontal/landscape to vertical/portrait display orientations. A vertical orientation is very useful for playing any of the pinball tables (and some arcade games), while a horizontal orientation is ideal for many arcade games. With the ALUM, you can use either orientation. Below is an animation demonstrating how easy this process is.

How to Rotate the Display
- Remove the four screws in each corner of the display.
- Use the suction cup to remove the acrylic panel. *Note: I just use the end of one screw and simply pull one corner of it out.
- Remove the monitor out from the machine, rotate it counterclockwise (vertical to horizontal) or clockwise (horizontal to vertical) and place it back into the machine.
- Replace the acrylic cover in the proper orientation.
- Re-install the four screws in each corner.
- The ALUM can auto-orient the display in Portrait or Landscape mode (no need to power-cycle the machine). *NOTE: Using a pre-release firmware for the auto-rotation which works. Not sure if this firmware will be immediately available or in an upcoming firmware update.
- The new orientation will take effect, you’re done!
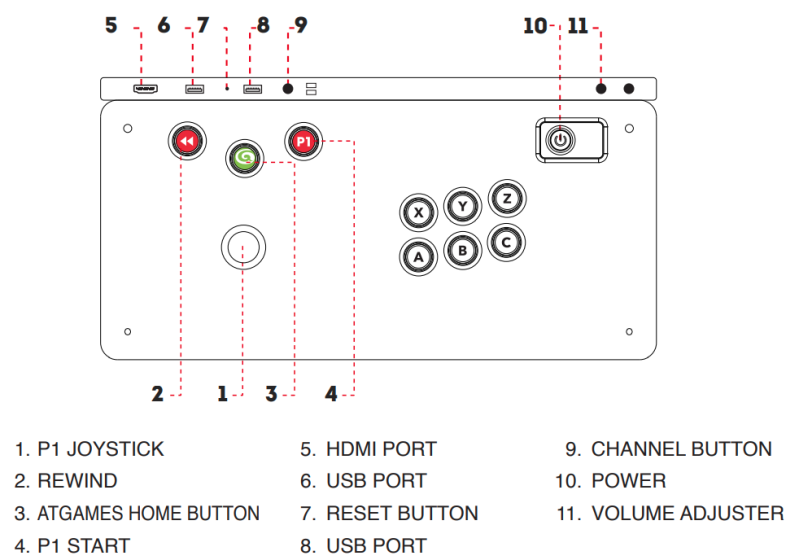
Control Panel
The diagram below represents the joystick and button layout found on the AtGames Legends Ultimate Mini.
Specifications
The following are the specifications and features of the AtGames Legends Ultimate Mini:
- 18″ high-definition LCD monitor (rotatable to either horizontal or vertical orientations).
- 150 built-in games.
- Pinball Kit is included.
- Includes 1 joystick, 6 action buttons, rewind, P1 and Menu/AtGames button. Back panel includes inputs for HDMI, USB 2.0 (OTG), USB 3.0 (for Storage), Channel button, Volume +/- and a power button.
- Designed for players of all ages, skill levels and play preferences.
- Games can be enjoyed from the authentic arcade-style control panel
- Top licensors include Atari, Disney, Star Wars, The Tetris Company and more.
- Save, rewind and load games.
- HDMI/USB connectors allow users to connect to AtGames devices like the Blast!â„¢ and Boom!â„¢ (via APL), Raspberry Pi, Super Console X and more.
- Bluetooth, Wi-Fi and Ethernet connectivity.
- Product size: 19.4 x 19.3 x 60.9 (inches).
Resources
The following are a collection of ALUM resources that may be helpful:
- AtGames Legends Ultimate Mini – AtGames website product page.
- Official AtGames Legends Arcade Family Support Page – Receive direct customer support using this page. There is also a purple chat icon (lower-right) which will get you in touch with a customer service representative during normal business hours (see link for details).
- AtGames official YouTube Channel – Many helpful videos and updates.
- ArcadeNet Pinball Leaderboards – See who has the high-score on your favorite pinball table here.
- Official Global Arcade Fan Page (Facebook)
Manuals
Below is the manual and full game listing for the AtGames Legends Ultimate Mini.
- ALUM Instruction Manual – This is the same manual that was included with your ALUM when it shipped. Incase it’s lost or damaged.
- Full ALUM Game List – Full list of games included on the ALUM. Don’t see the one you’re looking for, you can add over 7.5k more with a single USB stick (See the CoinOpsX Guide for more details).
AtGames News Updates
For the latest AtGames News, visit the AtGames News Updates page.

Purchase Locations
The AtGames Legends Ultimate Mini may be found at the following locations:


Game Play
There are 150 included arcade and console games which ship with the ALUM. These games include many popular titles such as: Bad Dudes, Burger Time, Elevator Action, QIX, Space Invaders, Tetris, Tron and many others. It is a nice selection of games, though not as many games are available compared to the ALU.
Playing Tron
You may be wondering how would you be able to play Tron on a control panel which has no spinner or trackball? It’s actually impressive how AtGames was able to accomplish it. The 3 bottom buttons A/B/C and the joystick are all that is needed to play. Your fire button is B, for those controls that require a spinner you can use the A/C buttons to rotate left/right respectively. I actually prefer this method of game-play for Tron over using the spinner on the ALU.
Pinball
The AtGames Legends Ultimate Mini (ALUM) is an excellent choice for playing pinball and arcade games. After rotating the display into vertical mode, the full screen becomes your virtual pinball playfield. The ALUM includes the Pinball Kit which easily attaches to the sides of the cabinet to support both flippers and left/right table nudge. The available pinball table library from AtGames continues to grow with new volumes (collections of tables) being released every few months.
If you’re looking for an arcade machine that can double as a pinball machine, Legends Ultimate Mini may be for you. Below are some game-play examples from the ALUM (not high-res animations to allow this guide to load quickly).
I’ve played many tables on the ALUM, including those from the Zaccaria volumes, Gottlieb and TAITO Vol 1. In my opinion, the Gottlieb tables aren’t as polished (unrealistic physics). However, the Zaccaria and TAITO Volumes play very well – I highly recommend those volumes for the best pinball experience on the ALUM.
Upload High Scores
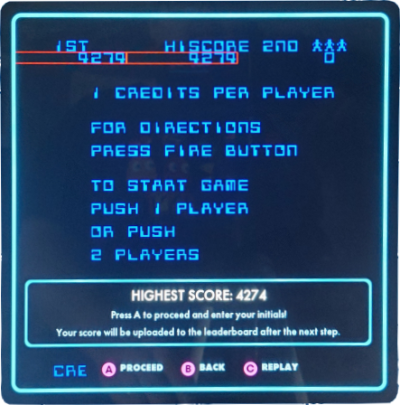
Many of the included games support the ability to upload your high-score to the on-line leaderboards. Here’s how:
- Once your game is finished, click the AtGames/Menu button and select Save High Score.
- You’ll then see the results of your game with your score highlighted, press A to Proceed.
- Use the Joystick to enter your initials (left/right and up/down).
- Press A to submit your score. When you exit the game, your score will be uploaded to the AtGames servers.
CoinOpsX
Detailed CoinOpsX Guide
CoinOpsX allows you to play those classic Arcade Games that may not be available from AtGames. For a full guide on how to setup CoinOpsX, visit the AtGames CoinOpsX Guide.

If you’re looking for the AtGames CoinOpsX Guide (saUCEy Edition) (Horizontal/Landscape), please see the guide here.
Legends Gaming
For details on all the latest available Gaming Packs (Arcade and Pinball), Flash Drive X Setup, Code Redemption, Installing/Uninstalling games, check out the Legends Gaming Guide.

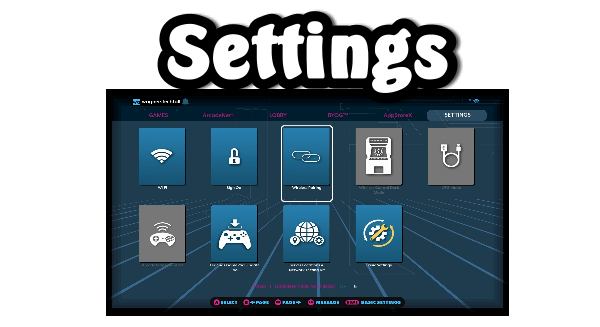
Settings
For an explanation of each of the options that are available in the Settings tab, please see the Settings Guide.
Operation
Mastering the settings on the ALUM isn’t difficult. Though, when you’re first getting started knowing how to navigate the UI may be a little challenging. Below we’ll cover some basics to get you going.
- Navigating the Menus – Use the joystick to move up/down/left right to select the tiles or the menu/tabs at the top. You will typically press A to select an option or B to go back. However, check the bottom of each screen as it will provide more tips on other options/buttons that are available.
- Favorites List – You can create a favorites list of all your favorite games using the following:
- Select the game from the list and press A (don’t launch it, just browse to the game menu).
- Then press the C button to toggle the Favorite selection.
- Press B to go back to the Game selection.
- Press the AtGames/home button.
- Using the Joystick move down into to the Favorites option and press the A button.
- Now you’ll only see your favorite games (if nothing is there, you didn’t add a game to the Favorites list).
- Return to All Games (from Favorites) – To return to seeing All Games:
- Highlight one of the games in the list.
- Press the AtGames/Menu button.
- Select All Games and press A.
- Now you should see All Games.
- Filtering Game List – Using the same technique shown above for Return to All Games, you can also filter by other categories: All Games, Featured, Favorites, Leaderboard, Recent, Channels (Atari, Data East, Disney, etc.), Platforms (Arcade, Atari 2600, Genesis, etc.)
- Updating the Firmware – Login using your ArcadeNet account first, then: On the top tab bar, go to Settings → Version (x.y.z) and press the A button. If no update exists, press the B Button to exit. Otherwise, select the Download option. Once complete, select the Update option (this may take ~10+ min. to apply the firmware update). The machine will restart and display the status on the display while updating, then it will reboot once more when the firmware update has completed.
- Factory Reset the ALUM – Power off the device. Press and hold the recovery button with a pin. Power on, then press and hold the P1 START + MENU buttons while you continue to hold the recovery button. Once you see the factory reset prompt, release all buttons. Follow the on-screen instructions.
ArcadeNet
ArcadeNet is a service provided by AtGames for your ALUM which provides a number of features which consist of both free (basic) and paid for (standard) services. For details about the creation of your ArcadeNet account, please see the AtGames ArcadeNet page here (scroll towards the bottom).
In addition to leaderboards, ArcadeNet also lets you stream games from a virtual server in the cloud to your machine. There is no need to install anything. For the best results, you’ll want to connect an Ethernet cable to the back of your machine instead of WiFi. While both will work, you’ll get much better performance with an Ethernet cable attached. When you play a multi-player game from the Lobby, you’re accessing a remote server to play your opponent.
1st Party Expansion
Below are expansion options provided by AtGames that will allow you to get more out of your AtGames Legends Ultimate Mini. Including:
- Arcade Play Link (APL) – allows you to easily connect and play prior AtGames products directly on your ALUM.
Arcade Play Link (APL)
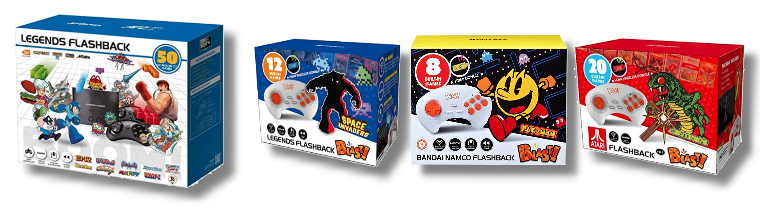
The ALUM is compatible with prior AtGames products such as the Legends Flashback, Blast!, etc. which utilize the Arcade Play Link (APL). Using APL with the ALUM, you can instantly upgrade the ALUM by connecting the device.
3rd Party Expansion
This section will discuss 3rd Party expansion options that you may be interested in trying.
Accessories
The following are some accessories that you may find interesting or to enhance your experience with the ALUM:
- Samsung MUF-256AB/AM FIT Plus 256GB – USB 3.1 Flash Drive for adding additional applications (CoinOpsX, Pinball Tables, etc.)
- Flawless Screen Cleaner Spray with Microfiber Cleaning Cloth – It’s likely you’ll at some point accidentally get finger prints/dust on the inside of the plexiglass or the monitor display itself. I used this kit to spray the included cleaning cloth, then wipe the display/plexiglass and it works extremely well. Just one minor recommendation you may want to have available.
Connect External Devices
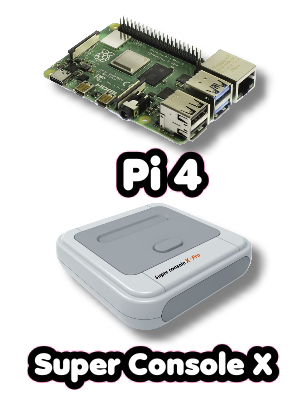
You can also connect other devices such as a Raspberry Pi 4 Model B or a Super Console X to your ALUM, or pretty much any other device with an HDMI and USB adapter.
Here are the basic steps:
- If the monitor is in portrait/vertical mode, rotate it to landscape/horizontal mode first and power-cycle the machine.
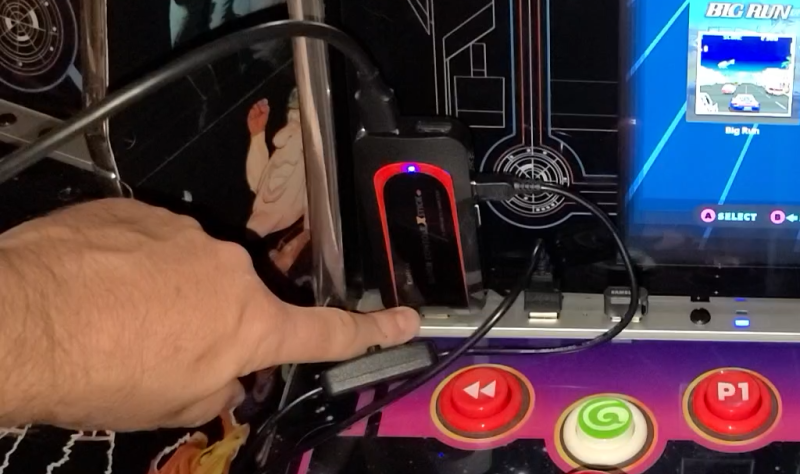
- Connect the HDMI cable from your device (Pi4, Super Console X, etc.) to your ALUM, then power on the device. Give the device time to boot.
- Plug in the USB (OTG) cable from the device to your ALUM into the USB 2.0 port (the far-left port)
- On the ALUM, go to the Settings tab.
- Select the tile, OTG Mode.
- You’ll then see a message USB connected, LEGENDS ULTIMATE can not be used.
- Press the Channel button on the top panel (near the USB ports on the ALUM).
- At this point, you should be able to map your controls on the ALUM to the device you connected. I used Rewind for the SELECT/Hotkey button and P1 for Start. For assistance with the Raspberry Pi 4 running RetroPie, please see the Pi4/400 Retro Gaming Guide. For general operation of the Super Console X, please see the video here (or the Super Console X Stick). To exit a game from the Super Console X Stick, press Rewind and P1 twice (to exit RetroArch).
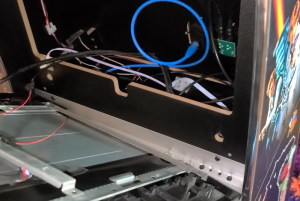
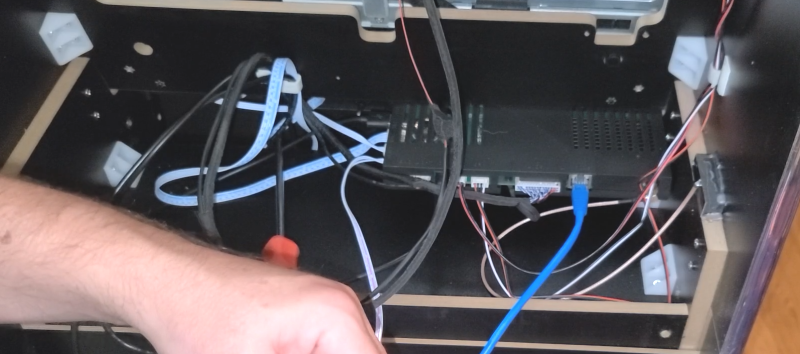
Inside View
Received a question if the PCB is the same as the ALU, it appears so. I’m sure there are some software differences to allow identifying the machine model, etc. From what I see, they appear to be the same internals (aside from the monitor).
Troubleshooting
This section will provide answers to common issues.
- I have rotated the monitor, however the display didn’t change – You may need to power the machine off and back on for the change to take effect. However, under normal circumstances it should no longer be necessary to power-cycle the machine (recent firmware update corrected this behavior).
- I have connected a Raspberry Pi 4, Super Console X or other device and the display is sideways – When using OTG mode, you’ll need to rotate the display into horizontal/landscape mode.
- Using CoinOpsX, the up/down on the Joystick won’t work -This issue has been corrected in firmware v5.64.1. Please update to a recent firmware release to correct the problem.
- There is a blue LED blinking constantly, why? The blinking blue LED indicates it’s searching for another device to connect to over Bluetooth. You can press+hold the P1 button for ~10 seconds and it will stop blinking
If the above Troubleshooting information did not help resolve the issue, you can also contact AtGames for assistance by clicking the image below.
Quick Tips
More tips are coming, this is just a start. If you have your own, please share them by adding a comment in any of my AtGames YouTube videos.
- How to Pause a Game – A quick and easy way to pause a game is to simply press the AtGames/Menu button. Just press it again to resume.
- Firmware Updates – AtGames typically releases new firmware every Thursday. It’s a good idea to download the updates frequently. They often include new features, fixes and overall improvements to the system.
- Can I add More Games? – Yes you can! If you want to play thousands of classic Arcade Games (in addition to the included 150 games) check out the CoinOpsX guide here. It will step you through how to partition your USB drive, copy the files and run the AddOnX tool. Once done, several thousand games can be easily played and you only need a USB drive (128GB or larger recommended).
Change Log
- 2023-07-30 – Minor updates.
- 2022-12-19 – Removed APL video link which is no longer valid.
- 2022-09-15 – Added the new Legends Gaming guide to replace duplicated sections in this guide.
- 2022-07-05 – Update broken links.
- 2022-06-11 – Updated Resources with CS information.
- 2022-06-02 – Updated News heading.
- 2022-04-05 – Added AtGames support graphic and link.
- 2022-03-30 – Minor updates.
- 2022-02-24 – Added the CoinOpsX WOPR Vertical guide.
- 2022-01-31 – Added Settings Guide.
- 2022-01-11 – Added ETA Prime’s review of the Legends Mini.
- 2022-01-09 – Updates regarding CoinOpsX controls in the latest firmware.
- 2021-12-9 – Minor updates.
- 2021-11-01 – Added new Setup, Game Play and Review video for the ALUM.
- 2021-10-30 – Final preparation for release.
- 2021-10-02 – Corrected areas that mention microswitches, now replaced with non-contact magnetic switches. Added cleaning cloth under accessories (works great for me). Added CoinOpsX Joystick up/down not working in Vertical mode to Troubleshooting. Added connect external devices section.
- 2021-09-17 – 2021-09-25 – Getting ready!