AtGames Settings Guide
Last Update:7/26/2024
A new feature has been implemented by AtGames which allows haptic feedback support (rumble) while playing Zaccaria or TAITO Pinball volumes with the Legends GamePad on the Legends Core. If this feature sounds interesting, check out the Legends GamePad Update procedure. Now you can now have a more immersive pinball game-play experience with your Legends GamePad!
The Settings across most AtGames Legends Pinball, Ultimate, Ultimate Mini or Core/Gamer series of products are implemented consistently. That is, if you are familiar with the settings for one machine, you’ll find the same or similar settings when moving to another product. There are a few minor differences, where it makes sense, depending on the machine. For example, the Legends Core has the ability to rotate the display between Portrait/Landscape Mode. The Legends Ultimate Mini handles this rotation automatically. While this feature doesn’t make sense for the Legends Pinball or Legends Ultimate, as an example.
You can access the settings by navigating to the far-right tab at the top of the menu system. On the Settings tab, you will find multiple pages of settings that may be categorized, depending on the device and installed firmware. The goal of this guide is to help familiarize you with what each of the settings do and how you can use them to enhance your AtGames product.
It is a lot of work creating and maintaining the guides on this site. I appreciate any support from the community by subscribing to the YouTube channel. Commenting on/and liking the videos all help tremendously in growing the content you’ll find here. –Jon
How-To link to a specific section on this page: go to the Table of Contents (below) and click a section to reference. Copy the URL from the address-bar of your browser and paste in your video description/post/blog. This will direct a viewer to a specific section in any of the guides you find here.
Table of Contents
Legends GamePad Update
If you own the AtGames Legends GamePad, either purchased separately or as part of a Legends Core Plus bundle, you may find this section helpful. There is a firmware update available for the Legends GamePad (as of 1/27/2022 and firmware v5.65.0 or higher) which will allow haptic support (or rumble) while playing Zaccaria or TAITO Pinball tables using the Legends GamePad. Your GamePad won’t automatically receive this update. You will need to perform the following steps to update the Legends GamePad to take advantage of the new feature.
A few quick points about this update:
- It works with Zaccaria and TAITO pinball volumes (only).
- It does not currently support FarSight/Gottlieb tables for haptic feedback.
- Once this update is applied to the GamePad, there is not currently a setting to disable it. This may change in a future update.
- GamePad haptic feedback is supported on the Legends Ultimate, Legends Ultimate Mini, Gamer Pro, Gamer Mini, Core and Core Plus. Haptic feedback with the GamePad is not currently supported on the Legends Pinball.
- I have ONLY tested and documented this feature for use with the Legends Core.
Non-Haptic related side-notes
- I did test a few games with CoinOpsX using the wireless Legends GamePad + Legends Core and happy to report, all games I tested worked fine with this firmware on the GamePad. The L/R bumper buttons are used to cycle through #-Z. When at the main CoinOpsX menu, press Select to exit CoinOpsX. When in-game, press Select to insert a credit, Start to start a game. Games tested: Galaga, Time Pilot, Donkey Kong, Ms. Pac-Man, among others.
Pair the Legends GamePad
The following steps will assist you in pairing the Legends GamePad to your Legends Core. The GamePad will need to be paired prior to updating the Legends GamePad firmware :
- Power on the Legends Core.
- On the controller, press + hold the green AtGames/Menu button and X Button for a couple of seconds to enter wireless pairing mode. The 3rd LED will begin to flash rapidly.
- If using a Legends Core: Press the wireless pairing button on the Legends Core (the “puck”), the pairing window will show on the screen. A quick press will allow cycling through all the found devices in the list, one at a time. Press the wireless pairing button (on the Core) until the Legends GamePad is highlighted. Then, press and hold the wireless pairing button on the Legends Core until the pairing is confirmed. Give it a little bit of time to pair. Once successfully paired, you’ll see “Device connected successfully“. Press A on the Dismiss button and B to return to the Settings menu.
- If using a Legends Ultimate/Mini/Gamer (untested by me): Go to Settings → Wireless Pairing. You should see Legends GamePad in the list, highlight the Legends GamePad and press A. Press A on the Connect button. You will see a screen that shows Pairing 1st, 2nd and 3rd, give it time to complete the pairing process. Once successfully paired, you’ll see “Device connected successfully“. Press A on the Dismiss button and B to return to the Settings menu.
- You should see the blinking LED turn to a solid red color once connected. Give it a few more seconds, then you should be able to navigate the menu.
- To update the GamePad firmware, see the following section to Apply GamePad Firmware Update.
Apply GamePad Firmware Update
Below are the steps to update the Legends GamePad firmware to include the haptic/rumble feature:
- If you haven’t already paired the Legends GamePad to your Legends Core, please see here.
- Make sure your Legends Core has firmware version 5.65.0 (or higher) installed. If not:
- Login using your ArcadeNet account first using your Legends Id, then on the top tab bar, go to Settings → Version (x.y.z) and press the A button. If no update exists, press the B Button to exit. Otherwise, select the Download option. Once complete, select the Update option (this may take ~10-15+ minutes to apply the firmware update). The machine will restart and display the status on the display while updating, then it will reboot once more when the firmware update has completed.
- Make sure that your Legends GamePad is paired to your AtGames product and turned on (Press the green AtGames button for ~1-2 seconds to turn it on).
- Using the Legends GamePad, navigate to Settings → Legends GamePad Update Tool option and press the A button on your device.
- You will be prompted with, “Do you want to update your Legends GamePad?“. Highlight the Yes button and press A on the GamePad. See below for the GamePad update dialog:
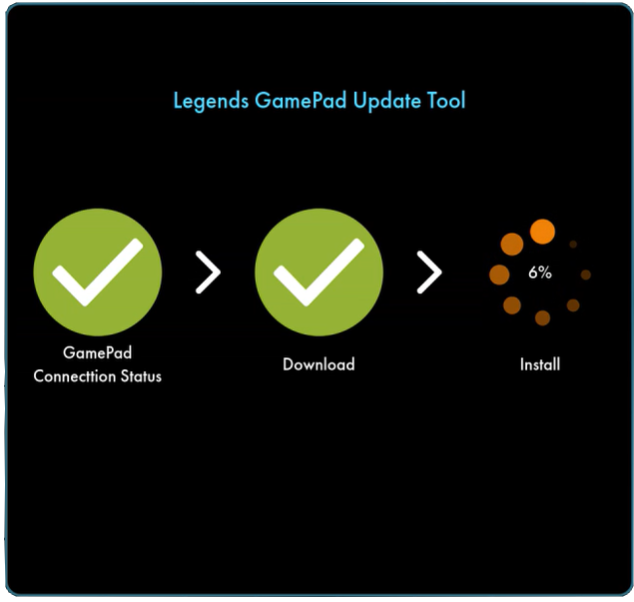
- The GamePad firmware update will take approximately 4.5 minutes.
- Once finished, you’ll see “The update is complete. Your Legends GamePad now supports Haptic feedback in all Zaccaria and Taito digital pinball tables“.
IMPORTANT: Follow the steps below exactly as written for a smooth update process. - Once the update is complete, power on the GamePad (press and hold the green AtGames Menu Button). Then, power it off by pressing and holding the green AtGames Button. Repeat this two times.
- Next, Press and hold the green AtGames button AND X button at the same time (this enters pairing mode).
- Press the Wireless button on the Legends Core (one quick press).
- At this point, the GamePad will be connected to the Legends Core. You can press the B button to go back.
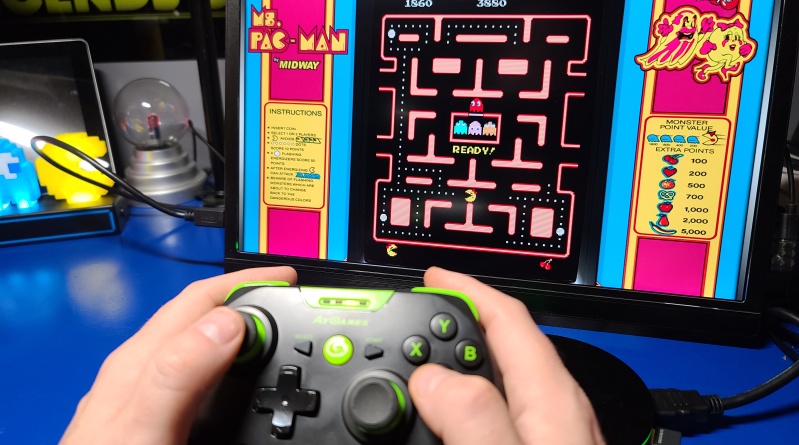
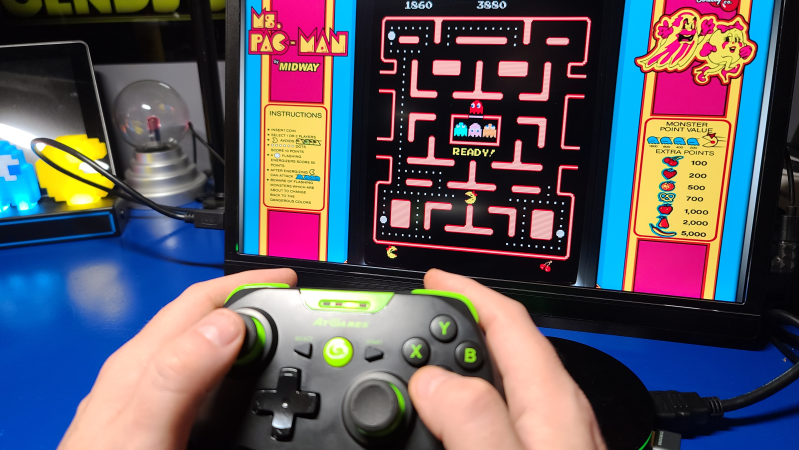
- You may now launch the Zaccaria or TAITO pinball table of choice and enjoy the new haptic feedback of your Legends GamePad!

To the right is a review video of the Legends Core Plus with Haptic (Rumble) feedback. This video does not discuss the above GamePad update process itself.
Troubleshooting GamePad
If you are having any difficulty connecting the GamePad with your Legends product, below are some things you can do that should correct the problem.
- I turn on the GamePad, but it doesn’t auto-connect (one Legends Device Paired with GamePad) – If you have one Legends product and have paired the GamePad to it but the device does not re-connect automatically after turning it on, check if there is more than one Legends GamePad showing in the Wireless Pairing list. If so, see Pair the Legends GamePad, to pair your Legends GamePad to your Legends Product. Then select any other GamePad that is not showing connected/red link icon (one at a time), press A and select the Disconnect button. Repeat for any GamePads listed that are not being used.
- I turn on the GamePad, but it doesn’t auto-connect (Multiple Legends Devices Paired to GamePad) – If you have multiple Legends products and have paired the GamePad to them, you may need to unpair the GamePad from the device you’re not using. To do that: See Wireless Pairing.
- I have an issue not described above – If you are having difficulty connecting, the GamePad may require re-pairing. No problem. I recommend removing power to the Legends Core and plugging it back in first. Then see Pair the Legends GamePad section to re-pair the GamePad to the Legends Core.
Settings Menu
In the following section, you’ll find most of the settings available on your Legends product documented. I anticipate adding more details to some sections that need expansion and a few are missing content. This will be documented more fully soon. I welcome your feedback, please feel free to comment in any of the above videos to let me know how it can be improved.

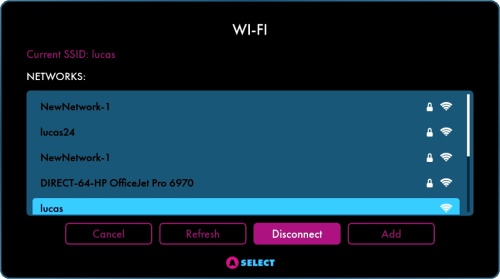
Wi-Fi
The Wi-Fi setting is used to connect to your 2.4Ghz or 5.0Ghz WiFi router. To connect to a network, highlight the correct network for your home network under the NETWORKS selection and press the A button. Then highlight the Connect/Disconnect button to connect or disconnect from the network. When prompted, enter your network passphrase.
Other options include:
- Refresh – will refresh the list of available SSID’s (wireless networks).
- Add – If the network is hidden, you can use the Add button to add a hidden SSID.
- Cancel – Select Cancel to cancel the WiFi connection dialog.

Sign In/Out
You use the Sign In option to log in to your ArcadeNet Account. Enter your Legends Id and password using the virtual keyboard for both fields. Logging in will provide access to BYOG (Bring Your Own Games) and ArcadeNet Games and applications. If you Sign Out, you will be unable to access these features.
Parental Controls
You can use the Parental Controls to create up to 4 sub-accounts under the parent’s ArcadeNet account. Each sub-account can have its own settings to enable/disable access to the main tabs and games. The parents account password is required to make changes to any of the sub-accounts.
Account Settings
The Account Settings can be used to change your ArcadeNet display name and/or change/set your ArcadeNet password.
Wireless Pairing
The Wireless Pairing option is used to pair a Bluetooth device such as a Legends GamePad, Gamer-series Arcade Control Panel or Bluetooth headset to your Legends device. For step-by-step instructions on how to Pair the Legends GamePad, see here.
To connect a Bluetooth device, make sure the device you wish to connect is in Pairing Mode. See the device manufacturers instructions on how to enter pairing mode for the device. Once in pairing mode, make sure the Wireless Pairing switch in the top-left is in the ON position. Locate the device to be paired in the Wireless Pairing list and highlight the device. Then press the A button on the device and select the Connect/Disconnect button.
Once the device has been paired (or unpaired), press B (Back) button to exit the option.
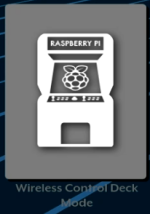
Wireless Control Deck Mode
This section will be documented at a later time.
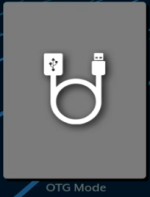
OTG Mode
For devices that support OTG Mode (i.e. Legends Pinball, Legends Ultimate and Legends Ultimate Mini), you can use the OTG Mode option to connect to an external device. That device may be a PC, Raspberry Pi, Super Console X or most any other device.
First connect the HDMI cable between the external device and the Legends device. Connect an OTG cable (USB Type-A) between the external device and the Legends device. Now power on the external device.
To switch the HDMI Input to the external device and allow viewing the video signal on the Legends Machine, see the following steps:
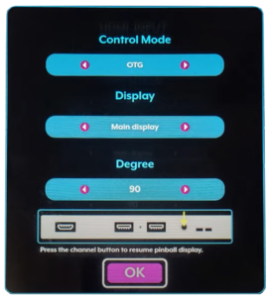
- Select the OTG Mode option (or press the Channel button), check that each of the settings are assigned as:
- Control Mode to OTG.
- Display set to Main display.
- Degree set to 90 (Legends Pinball Only).
- Then press/select the OK button
- The video signal from the external device should now show up on your Legends device.

Version
The Version option will identify the current installed firmware in the caption of the tile. To check for any firmware updates, press A on this tile to perform an update check.
To update the firmware:
- Login using your ArcadeNet account first.
- On the top tab bar, go to Settings → Version (x.y.z) and press the A button.
- If no update exists, press the B Button to exit.
- Otherwise, select the Download option.
- Once the download completes, select the Update option (this may take ~10-15 min. to apply the firmware update).
- The machine will restart and display the status on the display while updating, then it will reboot once more when the firmware update has completed.
- The update is now complete.
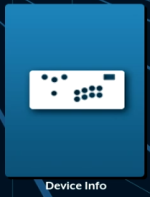
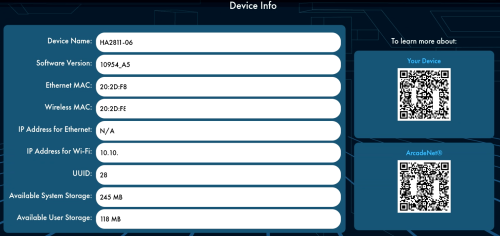
Device Info
The Device Info option will display information such as:
- Device Name – Name of your AtGames device.
- Software Version – The version of the Firmware currently installed on your AtGames device.
- Ethernet MAC – The MAC (unique) address of your Ethernet adapter on the AtGames device.
- Wireless MAC – The Wireless MAC (unique) address of the Wi-Fi adapter on the AtGames device.
- IP Address for Ethernet – When an Ethernet cable is attached, the IP address will be displayed here.
- IP Address for Wi-Fi – When connected over Wi-Fi, the IP address will be displayed here.
- UUID – The Unique identifier of your AtGames device.
- Available System Storage – The amount of storage available on your machine.
- Available User Storage – The amount of storage available to the currently logged in user.

Arcade Play Link (APL)
For devices that support Arcade Play Link (APL) such as the Legends Pinball, Legends Ultimate and Legends Ultimate Mini, you can use this option to connect to an external APL device.
Using APL with your Legends device, you can instantly upgrade it by connecting the device.

Privacy Policy
Allows reviewing the ArcadeNet Privacy Policy directly on the device.

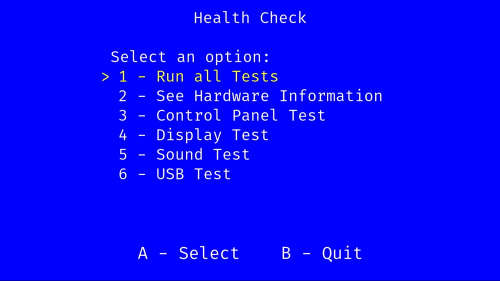
Health Check
If you are experiencing difficulties with your machine, the Health Check option will allow you to perform a diagnostics test. Selecting Option 1, Run all Tests, will check to make sure your machine is running well. Any issues identified will be highlighted in red once the test has been run.
Should any issues arise, contact AtGames support for next steps on resolving any problems: Official AtGames Legends Arcade Family Support Page.
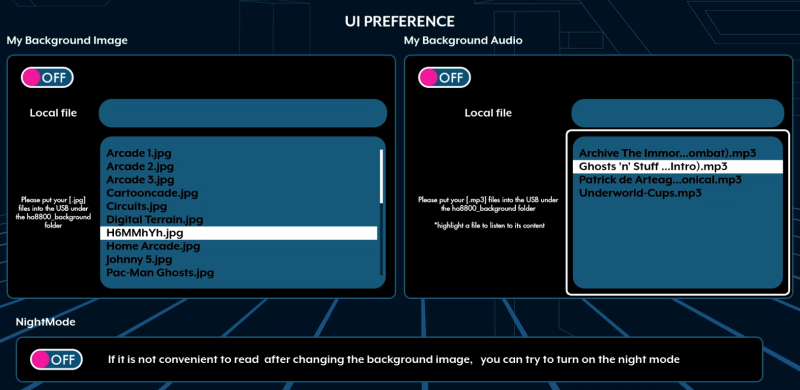
UI Preference
The UI Preference option allows assigning a different background image or audio file (in .mp3 format) that will be visible/audible while in the AtGames menu screens. In order to add your own images/.mp3 music files, you will need a USB stick connected to your AtGames device.
To use a single USB stick, you will need to format the USB stick with two partitions. If interested in how to do this, see the CoinOpsX Guide which describes the process step-by-step. If you choose not to install CoinOpsX, you can skip over the sections regarding copying files and running AddOnX.
- Background Image Files – Copy your .jpg files to the non-FDX partition in a folder called: \ha8800_background
- Background Audio Files – Copy your .mp3 files to the non-FDX partition in a folder called: \ha8800_background
- *NOTE: FDX is short for Flash Drive X
If you wish to install any additional Pinball volumes or applications, you will need to format the 16/32GB partition using Flash Drive X. For instructions on that, please see here.
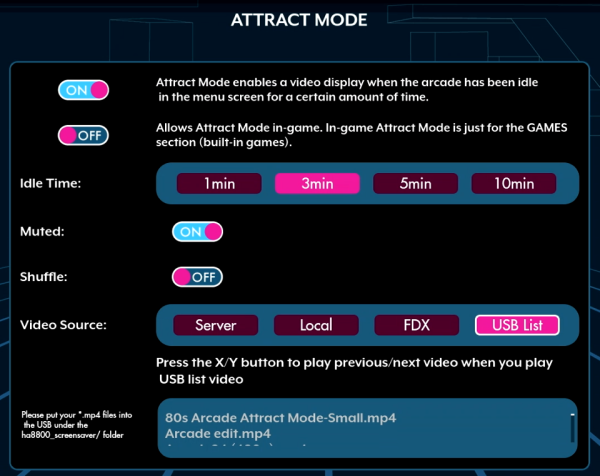
Attract Mode

The Attract Mode option allows a video to display when the machine has been idle in the menu screen for a specified amount of time. Below are the settings available:
- ON / OFF (1st switch) – Turns on/off the Attract Mode Feature.
- ON / OFF (2nd switch) – Allows Attract mode to appear while in-game but is used exclusively for the built-in games of the machine (not used by CoinOpsX).
- Idle Time – The amount of time that must elapse before Attract Mode begins.
- Muted (ON/OFF) – If you would like the audio to be muted, enable this switch. Otherwise, turn it on.
- Shuffle (ON/OFF) – If you would like to randomly shuffle the video files that you copy to the \ha8800_screensaver folder, turn this option ON. Otherwise, set it to OFF to play sequentially.
- Video Source – There are a number of options you can use for playing the .mp4 (video) files. Examples:
- Server – Uses the Attract Mode .mp4 file from the AtGames servers. You must be logged in to your AtGames account and connected to the internet for this to work.
- Local – Uses any .mp4 files located in the \ha8800_screensaver folder.
- FDX (Flash Drive X) – Uses any .mp4 Attract Mode video files that you downloaded from AppStoreX.
- USB List – Same as Local (above), but allows pressing the X/Y button to play the previous/next video.
Upload System Log
If you were asked by AtGames to Upload System Log for diagnosing an issue, you can use this option to submit a System Log Report.
Settings Lock
The Settings Lock will allow you to enable or disable access to the Settings tab. This is handy if you have small kids that like to get into your machine settings and change them. If the option is enabled, to disable it will require you to enter your ArcadeNet password.
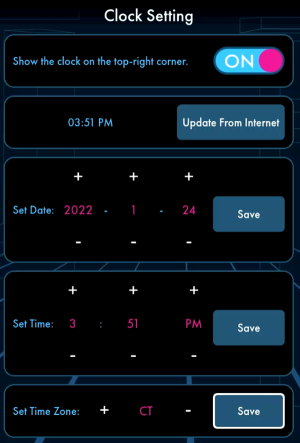
Clock
If you would like a Clock to appear in the upper-right corner that shows the current time, you can enable the clock setting. After switching the option Show the clock in the top-right corner, click the Update From Internet button to update the time. You may also need to move to the bottom of the dialog where it states Set Time Zone and change it to your time zone (CT=Central, PT=Pacific Time, MT=Mountain Time, etc.) Once the time zone has been set, click the Save button.

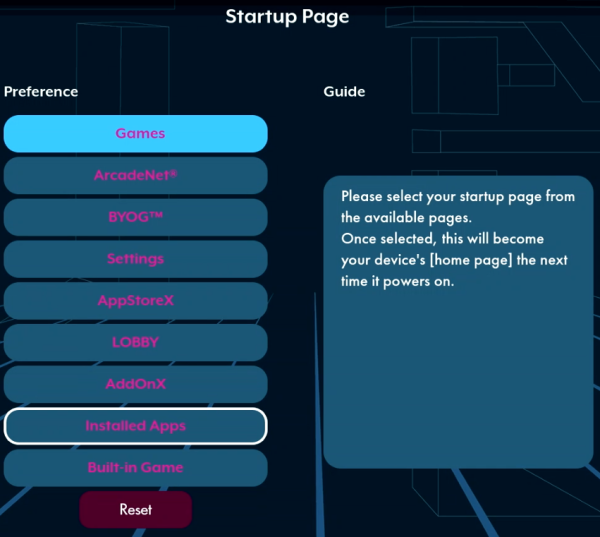
Startup Page
The Startup Page is a useful option if you prefer to change the default selection from the Games tab to another tab and/or application. For example, on the AtGames Legends Pinball you may opt for the startup application to be the Easy Mode application. You can make that assignment by, first of all installing Easy Mode, then selecting Installed Apps and selecting Easy Mode.
For the AtGames Legends Ultimate (Legends Mini, Core, etc.), you may prefer to jump directly into CoinOpsX when the machine is powered on. You can do this by selecting Installed Apps and select CoinOpsX. The next time you power-on your machine, it will launch the selected application – very handy!

Control Mirroring
Control Mirroring will be documented at a later time.
Data Management
Please use caution when using the Data Management feature. It allows you to Import/Export your user-data to/from a USB drive. There is also an option to Clean Up or erase all user data on the device. If you select Clean Up, it will reset the unit back to the factory default settings.

Live Streaming
One option you may not be familiar with is Live Streaming. If you login to your ArcadeNet account Settings you can enter your Live Streaming credentials to allow you to live stream to Facebook, Twitch or YouTube. After assigning your account credentials, you can select the Stream button under the platform you wish to stream to. While streaming, you’ll see a red indicator when the streaming begins.
During the stream, you can:
- Stop – Stops the live stream.
- Select “Y” to start live streaming time; StopWatch ON.
- Select “X” to stop live streaming time; StopWatch OFF.

Server Locations & Network Testing Kit
The Server Locations & Network Test Kit is helpful if you want to identify any latency (i.e. lag) in your internet connection. It will report the current Latency Time (in milliseconds) and Upload Speed (Mbps). It will also show a map representing the server you’re connected to and your device location.
This can be a handy tool for identifying problems with your network connection.
Light Gun Calibration

If you have connected a compatible Light Gun, this option can be used to calibrate the gun. Unfortunately, this is something I can’t test as I don’t currently own a light gun. Perhaps at some point I’ll get one and be able to add more details to this section.

Portrait/Landscape Mode
This option is available on the Legends Core, Legends Gamer Mini/Pro and allows you to alternate the connected monitor between Portrait (vertical) and Landscape (horizontal) modes. Portrait mode is ideal if you intend to play pinball games on your Legends product. While Landscape is ideal while playing many Arcade games (though, some also are ideal in Portrait Mode as well).
Controller Settings
When you launch the Controller Settings, you’ll first be prompted to select the controller. Under My Devices, select the correct controller (i.e. Legends GamePad, ShanWan, etc.) and press the A button. You can use a connected keyboard to navigate the button list. Select any button you wish to re-map, repeat for any additional buttons. Once complete, select the Save or Cancel button.
Flash Drive X
The following will step you through the Flash Drive X setup on your AtGames Legends product. You will first need a USB Flash Drive. You can use any 32GB (or larger) drive you prefer. I personally use the SAMSUNG FIT Plus 256GB USB 3.1 Flash Drive on my Legends Pinball, Legends Ultimate and Legends Mini primarily due to its low-profile form-factor and Samsung reliability with CoinOpsX. However, if you’re not planning on using CoinOpsX, I’d recommend a 32GB USB Flash Drive instead for storing your Pinball volumes and downloaded applications.
Below is how to prepare your USB Flash Drive:
- Insert the USB drive into the USB 3.0 port on your machine (the USB port that is blue in color).
- Watch the upper-right of the main display and make sure the USB stick is a solid image (not flashing).
- Launch the Flash Drive X tile.
- Once loaded, you’ll want to select the Format button (this only needs to be done once).
- After selecting Format, select Yes.
- When done, click on Dismiss.
- Now click the Mount button to activate the USB drive on the arcade platform.
- Click Yes to mount.
- When done, click on Dismiss.
- Back out of Flash Drive X.
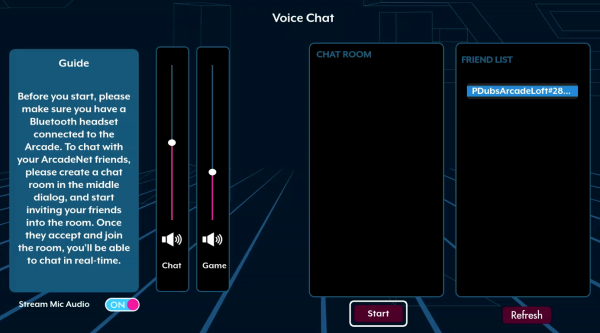
Voice Chat

To use the Voice Chat feature, you will first need to pair your Bluetooth wireless headset to the machine. See Wireless Pairing for details on how to do that, if not done already. Once paired, you can click the Start button to create a chat room. Once created, you can then invite your friends into the room. If they accept and join the room, you’ll be able to chat with them in real-time.

Game Pack
If there are new Game Packs available for download, clicking this option will allow you to download them.
Pinball Settings
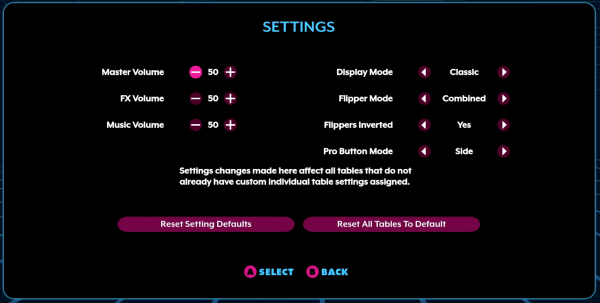
The Pinball Settings option allows you to adjust specific settings for any installed pinball tables. Depending on the device you’re using, the settings displayed may vary. You will be able to adjust setting such as :
- Master Volume
- FX Volume
- Music Volume
- Display Mode
- Flipper Mode
- Flippers Inverted
- Pro Button Mode
You also have the option to Reset Setting Defaults (default settings) or Reset All Tables to Default.
*NOTE: I will add more to this section at a later time for the Legends Pinball.
My Digital Locker
AtGames has improved how Subscriptions and Pinball Table volumes are delivered to your machine through the use of My Digital Locker. Once you’ve made a purchase from your ArcadeNet account, you can select AppStoreX within My Digital Locker and see any table volume licenses that have not been applied. You have the option of applying the license to the Machine or to your ArcadeNet account.
It’s debatable as to which option is best. I personally recommend applying the license to your ArcadeNet account. If you apply it to the machine and later get a new machine, you can’t transfer the purchased tables to the new machine. However, if you associated the license to your ArcadeNet account –you can. Totally up to you how you decide to apply your license.
Device UUID Reference
The following chart identifies the UUID prefix of each machine type. This is useful if you exceed the 3 device maximum on the Basic (Free) ArcadeNet account or 5 device maximum on the Standard ArcadeNet account. If you exceed the limit, perhaps by receiving a replacement board, selling a unit, etc. you can use this chart to help determine the device to remove from your ArcadeNet account.
For information on how to determine the device UUID of your machine, please see the Device Info section.
| UUID Prefix | Machine Type |
| HA9920 | Legends Pinball 4KP |
| HA8819 | Legends Pinball v1.0 |
| HA8820 | Legends Pinball v1.1 |
| HA8800 | Legends Ultimate v1.0 |
| HA8801 | Legends Ultimate v1.1 |
| HA8802 | Legends Ultimate v1.2 |
| HA2810 | Legends Gamer Pro |
| HA2811 | Legends Core |
| HA2812 | Legends Gamer Mini |
| HA8810 | Legends Ultimate Mini v1.0 |
| HA8811 | Legends Ultimate Mini v1.1 |
| HA2819 | Legends Core Max |
| HA8818 | Legends Pinball Micro v1.0 |
| HAB800 | Legends Connect |
Change Log
- 2022-12-19 – Removed APL video link which is no longer valid.
- 2022-09-20 – Updated UUID Reference with all the recent and soon-to-be released devices.
- 2022-06-05 – Added Legends Core Max to UUID Reference.
- 2022-01-27 – Minor updates.
- 2022-01-24 – Start to this guide.