Raspberry Pi 4 / 400
Last Update: 12/1/2024
This page is dedicated to projects related to the Raspberry Pi 4 Model B / 400, accessories, kits, tips and projects created by WTT! If you’re only interested in Retro Gaming on the Raspberry Pi, click here for our page dedicated to that subject.
Table of Contents
What is the Raspberry Pi 4 Model B?
The Raspberry Pi 4 Model B is the latest version of the Raspberry Pi released by the Raspberry Pi Foundation. The Pi4 was released on June 24th, 2019 and has lately been a bit difficult to find. This new version of the popular Raspberry Pi single-board-computer (SBC) comes with many new or enhanced capabilities, such as:
- A faster processor – 1.5GHz quad-core 64-bit ARM Cortex-A72 CPU
- Can be purchased with 1GB, 2GB or even 4GB of LPDDR4 SDRAM
- Full Gigabit Ethernet
- Dual-band 802.11ac wireless networking (Wi-fi)
- Bluetooth 5.0
- Two USB 3.0 ports (great for external HDD or other high-speed communications) and two USB 2.0 ports (great for keyboard, mouse, etc.)
- Dual monitor support with resolution support up to 4k
- VideoCore VI Graphics, which supports OpenGL ES 3.x
- 4kp60 hardware decode of HEVC video
- Compatibility with earlier Raspberry Pi products
The cost of the RPi model will depend on the RAM that you wish to have installed.
Our Projects
This section will contain videos, articles, etc. that WTT has created related to un-boxing, installation, setup and projects for the Raspberry Pi 4 Model B. More stuff coming soon, below is our current video lineup so check it out and don’t forget to subscribe for the latest!
Pi Dog Robot
The Pi Dog is an impressive AI Robot powered by a Raspberry Pi and allows manual control, direct programming and even ChatGPT. Pi Dog is loaded with features including: 12 servos, Camera, Ultrasonic Sensor, touch sensor, gyroscope, speaker and much more. Best of all, there is extensive documentation on the Sunfounder website to allow you to explore further here.
Items Shown
- Pi Dog (on Amazon)
- Pi Dog (on Sunfounder Website)
- Raspberry Pi 4 2GB (on Amazon)
- Gigastone Micro SD Card 128GB 5-pack (on Amazon)
Pironman mini PC Raspberry Pi 4 Case by Sunfounder
The Pironman is an aluminum Raspberry Pi 4 case that packs a lot of features, including: Pi case that looks like a mini PC, Tower cooler, .96″ OLED display with CPU/Temp/Disk usage/IP Address, RAM, M.2 SATA SSD, RGB Fan, 16 RGB LEDs, IR Receiver, GPIO Extender and more. In this video, we’ll unbox, setup and test out the Pironman.
Helpful Links
- Pironman [ Amazon | Sunfounder Website] – Where to find a Pironman Pi4 case.
- Samsung SSD 860 EVO 1TB M.2 SATA [Amazon] – M.2 SSD shown in this video.
- Pironman Documentation
- RPi Locator (find a Pi4)
PiCrawler Raspberry Pi 4 Quadruped Robot Kit
The PiCrawler is an impressive quadruped Robot by SunFounder. In this video, we’ll unbox, assemble and run through several examples to demonstrate what you can do with this kit. See links below to the impressive tutorials provided by SunFounder.
Items Shown
CrowPi L: Raspberry Pi Laptop (Assembly & Review)
In this video we’ll unbox, assemble and check out the Elecrow CrowPi L – a real Raspberry Pi 4 laptop for learning programming and electronics! Of course, you don’t have to use the CrowPi L for electronics, but it’s fun and there are 40 Letscode lessons and 56 Python lessons included. If you’ve always wanted to turn your Pi 4 into a laptop, the CrowPi L may be what you’re looking for.
Items Shown
- CrowPi L Raspberry Pi 4 Portable Laptop [Amazon]
- CrowPi L Base Shield [Amazon]
- Crowtail Raspberry Pi Kit/Sensor Kit [Amazon]
- CrowPi-L Raspberry Pi Laptop + CrowPi-L Base Shield + Raspberry Pi Starter Kit (Raspberry Pi NOT Included) [Amazon]
- Crowtail Starter Kit [Elecrow]
- CrowPi L Product page [Elecrow]
- Raspberry Pi 4 (4GB) [Often out of stock, click the Notify me button]
7″ Raspberry Pi Touch Screen case with SSD, Camera & Pi Power Mounts
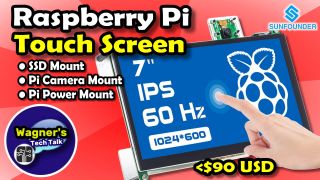
In this video, we’ll take a look at the Sun Founder Raspberry Pi 7″ Touch Screen kit (TS7-Pro) which allows adding an SSD drive, Pi Camera and Pi Power options. This is a great Pi Project project kit that provides access to the GPIO pins, x3 USB ports and can be expanded easily.
Items Shown
- SunFounder Raspberry 7″ Pi Touch Screen Kit (TS7-Pro)
- USB 3.0 SATA III Hard Drive Adapter Cable (Amazon)
- Western Digital 500GB WD Blue (Amazon)
- SunFounder Raspberry Pi Power
- x2 18650 Batteries (+Charger)
- SAMSUNG (MB-ME32GA/AM) 32GB 95MB/s microSD (Amazon)
- Raspberry Pi 4 Model B (Amazon – demand is high as is the price)
- Raspberry Pi Camera Module (Not recommended)
More Information
- Install Virtual Keyboard (OnBoard)
- PiPower Instructions
- Pi 4 / Pi 400 Only using Pi Network Bootloader (documentation)
Raspberry Pi Setup (No Computer needed): using the new Network Installer Bootloader
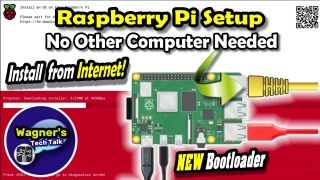
In this video, we’ll install the new Network Install (beta) bootloader to a Raspberry Pi 4. Once installed, you will be able to install an operating system to your Pi without having to image the microSD or SSD on your computer! The new bootloader supports the ability to download an operating system image from the internet and write it directly to your microSD or USB/SSD drive.
Official Documentation
- Network install beta test (announcement)
- Pi 4 / Pi 400 Only using Pi Network Bootloader (documentation)
- Issue reporting thread
The DeskPi Lite Full Setup + Review
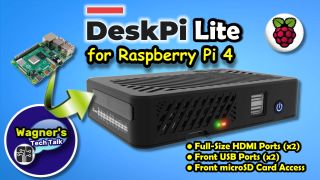
In this video we will checkout the DeskPi Lite Raspberry Pi 4 case. The DeskPi Lite is inexpensive, but has some impressive features such as: front-facing USB 2.0 ports, microSD slot and power button. In addition, it has full-size HDMI ports on the back of the case. The internal fan can be controlled in 3 different methods and are discussed in this video. We’ll also run a stress test, shutdown script and more.
Where to find the DeskPi Lite
- DeskPi website
- DeskPi Pi4 Lite case (no accessories)
- DeskPi Pi4 Lite case (32GB SD card & Power Supply)
- DeskPi Pi4 Lite case (32GB SD card, Power Supply & Pi4 4GB)
DeskPi Pro Guides / Info
- How-To information at the bottom of this page for (enable front USB 2.0 ports, hardware fan-enable and variable fan control): https://deskpi.com/collections/deskpi-lite/products/new-deskpi-lite-set-top-box-for-raspberry-pi-4
- Github page for information on setting up the Fan Control for multiple operating systems: https://github.com/DeskPi-Team/deskpi
- Enable front USB2.0 ports requires Raspberry Pi OS or Raspbian OS and enable dwc2 function. Modify /boot/config.txt file and adding following parameters: dtoverlay=dwc2,dr_mode=host (then, save and reboot the Raspberry Pi)
- A NEW Github page is under development by the DeskPi team for improved fan control, you can visit this link for details: https://github.com/DeskPi-Team/deskpi_v1
RetroFlag PiStation Raspberry Pi 4 Case with an LCD Display
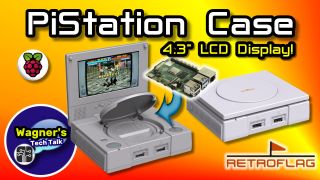
In this video we’ll Setup the Retroflag PiStation PS1 style case! This case by RetroFlag includes a 4.3″ LCD display and turns your Pi 4 into an awesome Retro Gaming option.
Items you may need:
- RetroFlag PiStation Case (with 4.3″ LCD Display)
- Retroflag 5v 3A USB-C Power supply
- Pi 4, Heatsinks & Fan (CanaKit)
- Gigastone 128GB 2-pack microSD cards
Raspberry Pi 4 Tablet: RasPad 3 by Sunfounder – Full Setup and Review!
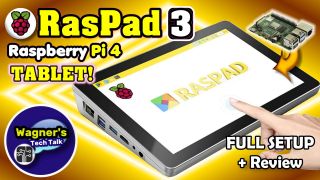
In this video we’ll take a look at the RasPad 3 10.1″ Raspberry Pi 4 Touchscreen Tablet! You can easily turn a Raspberry Pi 4 into a convenient and portable tablet and run any Raspberry Pi OS you prefer. In this video we’ll check it out with RasPad OS, Pi OS, TwisterOS, Ubuntu and RetroPie.
10.1″ Raspberry Pi4 (&3) Touchscreen All-in-One Display + Setup Guide
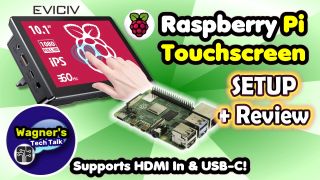
In this video we’ll take a look at the EVICIV 10.1″ Raspberry Pi Touchscreen which includes a rear housing for installing your Raspberry Pi 4/3. This unique device also supports HDMI Input to allow connecting other devices via USB-C or HDMI. You can use it with your PC, cellphone, gaming devices, etc. We’ll unbox, assemble and try out the unit with multiple devices too.
Setup Windows 11 on a Raspberry Pi 4 without a PC
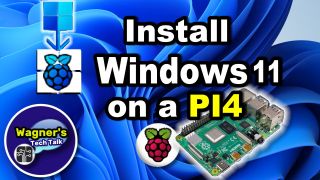
Today we will install Windows 11 to a Raspberry Pi 4 using the WoR Flasher. We will go through the install/setup of Windows 11 to a 1TB SSD installed entirely from the Raspberry Pi4. Once installed, we’ll briefly check out Windows 11 on the Pi 4.
DeskPi Pro V2 Case for Raspberry Pi 4 Setup: M.2 + 2.5″ SSD Support, Full Size HDMI & Ice Tower
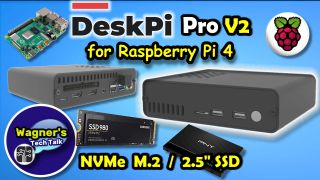
In this video we will checkout the DeskPi Pro Raspberry Pi 4 case. This amazing case keeps the Pi 4 cool using the Ice Tower Cooler+fan and can automatically adjust the fan speed as the CPU temperature rises. It also supports both M.2 and 2.5″ SSD drives, full-size HDMI ports, easy access to the microSD and two additional USB 2.0 ports on the front.
Where to find one
PINN lite on the Raspberry Pi 4: Install and boot Multiple OSes
In this video we will install PINN lite on a microSD and several operating systems to an SSD, including: PiOS, TwisterOS and Recalbox. The SSD will be installed into an Argon ONE M.2 case with a 1TB SSD drive.
- PINN lite download
- PINN lite documentation
- 7-zip (file archive/unarchive utility)
Items shown in this video
- Argon ONE M.2 Case for Raspberry Pi 4
- Samsung 860 EVO SSD 1TB – M.2 SATA
- Raspberry Pi Official Keyboard and Mouse
- Lepow 15.6 Inch Full HD 1080P USB Type-C Portable Display
Boot multiple OSes from an SSD with BerryBoot on a Raspberry Pi 4/400
In this video we will install Berryboot to a microSD and load x3 operating systems from a single 1TB SSD. We will be installing TwisterOS, Pi OS (formerly known as Raspbian) & ubuntu. We’ll discuss the setup/installation process, demonstrate each booting and review some additional features of Berryboot.
- BerryBoot Website / Download page
- Berryboot Images / Download page
Items shown in this video
- CanaKit Raspberry Pi 4 Basic Kit (8GB RAM)
- SanDisk 1TB Extreme Portable External SSD
- Raspberry Pi Official Keyboard and Mouse
- Lepow 15.6 Inch Full HD 1080P USB Type-C Portable Display
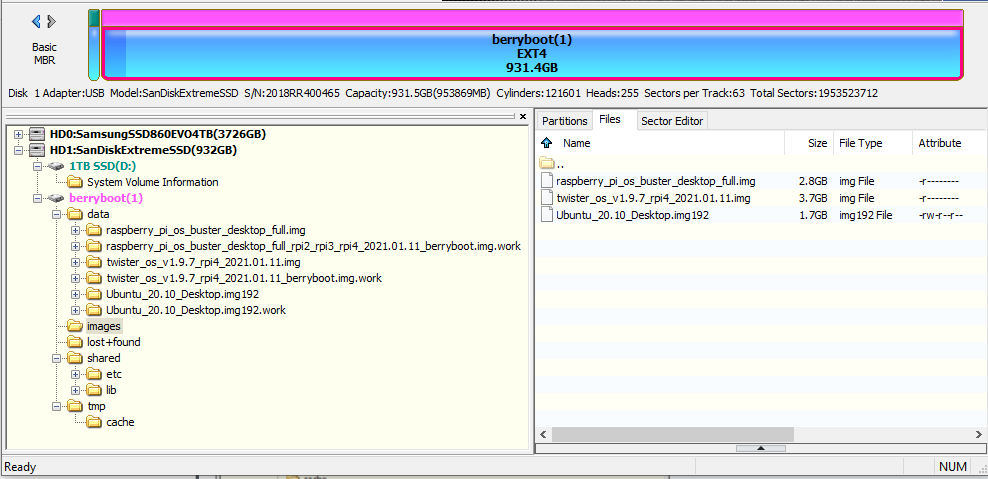
SSD Structure
After imaging the SSD with all the OSes shown in this video, this is what the SSD structure of the EXT4 berryboot partition looked like. Notice there is a /data subfolder that contains subdirectories for the images as well as a .work subfolder. The original images are collected in the /images subfolder. This is all in an effort to answer any questions regarding the structure of the SSD. The utility used to show the structure of the disk is DiskGenius.
Experimental
In this section you’ll find some notes I’m taking in preparation for a future video on how to convert an existing .img file to one that uses the SquashFS which can be loaded into BerryBoot. As mentioned, none of this is proven at this point to work. I’ll update once I know more. At this point, just taking notes and making them available. Additional info. may be found on the BerryBoot website here.
- In Add /Remove Software in PiOS, install kpartx. That is, enter into the search and click the checkbox and install it.
- Download BerryConverter .zip file.
- Create a subfolder on the Desktop, perhaps called test.
- Extract the archive into the new test subfolder.
- Copy the image to convert to the same subfolder.
- Open a terminal by right-clicking the test folder in a Terminal.
- Enter the command sudo apt-get install -y squashfs-tools
- Open the README.md file and copy/paste/execute the command: chmod 755 berryboot_conv.sh (makes it executable)
- Type python3 berryconv_gui.py to open the GUI conversion utility.
- Select the image to be converted, a sample converted file name will be created based on that. You can change the name or edit it.
- If you prefer not to use the GUI, you can type the command: ./berryboot_conv .sh <name_of_image_to_convert> <name_of_converted_image>
- Copy the converted image to a USB stick, Network share, etc. and install to BerryBoot.
Successes thus far
- Currently testing… So far, not working. The resulting file was 4k 🙁
Retroflag NESPi4 SSD Boot: Quick-Start Guide
In this video we’ll Setup the Retroflag NESPi 4 case to boot off the SSD drive! We’ll assemble the cartridge, install RetroPie, flash the NESPi SSD firmware and a little surprise added for fun. Without using the steps in this video, you may find the SSD will boot, albeit quite slowly. In my tests, it took ~3 min. from power-on until the Emulation Station screen appeared. After updating the firmware as shown here, boot time was around 40 seconds.
You can find much more information on the NESPI4 Setup Guide page, including : NESPi 4 Assembly video, Safe Shutdown scripts, 3D printed case, labels and more
CanaKit Raspberry Pi 4 Extreme Kit – Aluminum Edition (8GB) : Unbox, Setup & Test
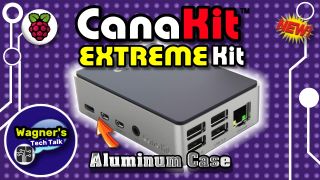
In this video we’ll take a look at the all new CanaKit Raspberry Pi 4 Extreme kit Aluminum case with 8GB (of RAM). We will unbox, assemble, setup PiOS and run some cooling tests!
Retroflag Raspberry Pi 4 NESPi 4 Case Setup: The Complete Setup Guide
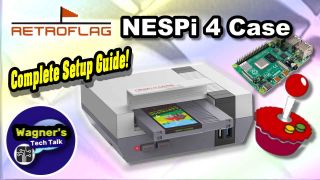
In this video we’ll unbox, assemble and setup the Retroflag Raspberry Pi 4 NESPi 4 case. This impressive case combines a retro NES-style look with the power of the Raspberry Pi 4. This video will step you through the complete setup process from opening the box, assembling the case, installing an SSD (for our games) and the safe shutdown script.
Items Shown in this video
- RETROFLAG Raspberry Pi 4 Case NESPi 4 (Amazon)
- Lepow 15.6 Inch Full HD 1080P USB Type-C Portable Display (Amazon)
- USB 3.0 SATA III Hard Drive Adapter Cable (Amazon)
- Kingston 240GB A400 SATA 3 2.5″ Internal SSD (Amazon)
- Raspberry Pi Official Keyboard and Mouse Value Pack (Amazon)
Raspberry Pi 400 Teardown and Tips: GPIO, SSD Boot, Battery Pack +more
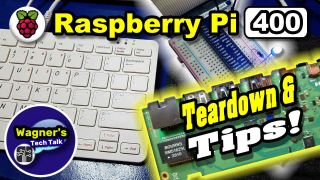
In this video we’ll take a very close look at the new Pi 400, so close we’ll even open it up and take a peek inside. We’ll also discuss a number of different ways you might want to use your Pi 400 and give you a quick glance of some new things coming to the channel.
Items shown in this video
- Pi 400 Computer Kit (Canakit)
- Pi 400 (Only)
- Super Starter Kit for Raspberry Pi 4 B 3 B+ 400 (Cobbler / GPIO Expansion) Amazon
- EAFU Portable Charger/10000mAh LED Display with, Dual 3A High Speed Outputs (Amazon)
- Coiled Micro HDMI to Mini HDMI Cable (Amazon)
- USB 3.0 SATA III Hard Drive Adapter Cable (Amazon)
- Kingston 240GB A400 SATA 3 2.5″ Internal SSD SA400S37 (Amazon)
Raspberry Pi 400 Computer Kit: Unboxing, Pi 400 Setup & Review
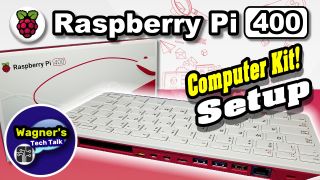
In this video we’ll take a look at the new Raspberry Pi 400 Computer Kit, unbox it, set it up and go through a few use-cases! This impressive device is essentially a Raspberry Pi 4 computer built-in to a keyboard form-factor. The computer is very light-weight, all ports go out the back of the unit and has everything you need to get started out of the box -sans a monitor.
Fenix OS for the Raspberry Pi 4 : multiple Desktops and Environments!
In this video, we are going to check out Fenix OS for the Raspberry Pi 4! This impressive operating system allows you to run multiple desktop environments on the Raspberry Pi 4. For example, there is a Windows 7, MacOS, Windows 95, XP, Unity/Ubuntu and Windows 10 themed desktop.
Helpful Links
Modern Retro Computer (MRC) using the Vilros Raspberry Pi 4 Desktop Kit – A Modern Retro Console

In this video, we are going to build a Modern Retro Console (MRC) using the Vilros Raspberry Pi 4 Complete Desktop Kit! This cool case for your Raspberry Pi is much more than a case, it turns the Raspberry Pi into a Retro-like Computer Console. It resembles the Commodore 64 in some ways, but has a full keyboard, track-pad and power of a Raspberry Pi 4 Model B.
Visit the Modern Retro Console (MRC) page here for more details.
Argon One Raspberry Pi 4 case Setup – for any Pi4 Model B (2,4 or 8GB) – best Pi 4 case I’ve used!

In this video we will checkout the Argon One Raspberry Pi 4 case. This impressive case provides both passive and active cooling and can automatically adjust the fan speed as the CPU temperature rises. The timing when the fans kick-in are adjustable using their configuration script. In addition, I’ll also show you a new utility called Commander Pi. We’ll use this tool to easily overclock the CPU, then stress it to a point where the fan kicks-in on the Argon One.
For more Argon One Tips, including how to set it up in RetroPie please see the Argon One Tips page.
Items shown in this video
- Argon One: Premium case (Manufacturer page, Amazon link 1, Amazon link 2)
- Logitech MK270 Wireless Keyboard and Mouse Combo
- AUZAI Portable Monitor – 15.6-Inch USB-C Portable Display, 1080P Full HD IPS Panel
Twister OS for your Raspberry Pi 4: Both Windows 10 & OSX look on your Pi 4! Setup and Demo
In this video we’ll take a look at TwisterOS! If you prefer a Windows 10-ish or Mac OS-ish look on your Raspberry Pi 4, then you definitely want to check out Twister OS. Twister OS incorporates Raspbian X Nighthawk and iRaspbian in one convenient image. This image was created by Pi Labs, check them out on YouTube!
8GB Raspberry Pi 4 Starter MAX Kit by CanaKit – 8GB on your Pi 4!
In this video we’ll take a look at the all new CanaKit 8GB (of RAM) Raspberry Pi 4 Starter MAX Kit! We will unbox, assemble and load up the RAM with a slew of applications to really test the system.
Items shown in this video
- Pi 4 8GB Starter MAX Kit – 64 GB (*NOTE: if they are out of stock on the 8GB, this will ONLY show the 4GB kit). Here is another option which includes a 128GB microSD.
- Raspberry Pi Official Keyboard and Mouse Value Pack
- AUZAI Portable Monitor – 15.6-Inch USB-C Portable Display, 1080P Full HD IPS Panel
RetroPie 4.6 Setup on a Raspberry Pi 4 – Complete walk-through in under 15 minutes + Game-play!
In this video, we’ll setup the OFFICIAL image of RetroPie 4.6 on a Raspberry Pi 4! At the time this video was created, it was released as a public beta but these instructions should work just fine for any non-beta releases. Click here for our page dedicated to Raspberry Pi 4 gaming – lots more on this page!
Vilros Raspberry Pi 4 Gaming Kit plus Setup of Lakka and Supreme RetroPie PRO

In this video, we’ll check out the Vilros Raspberry Pi 4 Retro Gaming kit and fully set it up. We will then install the recommended Lakka distribution, setup one of the controllers as well as connect to our WiFi network, then copy a few games. After that, we’ll check out a more impressive Raspberry Pi 4 image by the Supreme Team and configure that too.
More details and instructions may be found on the Raspberry Pi 4 Gaming page.
Openmediavault 5.0 beta on a Raspberry Pi 4: Install, Setup and Configure RSync with two shares
In this video, we’ll install openmediavault 5 (beta) on the new Raspberry Pi 4 Model B. We’ll add an 8-bay Mediasonic USB 3.0 external enclosure and setup RSync to synchronize data between two of the drives to provide some data security should one of the drives fail. We’ll also copy a ~1GB file to a share on the OMV Server and RSync it over to the backup drive. Openmediavault 5 beta does not support RAID over USB 3.0 due to reliability issues and given this software is beta, it’s not recommended for productive use.
Complimentary Tutorial for OMV 5 Beta Setup
Items shown in this video (Amazon Links)
- CanaKit Raspberry Pi 4 (4GB RAM Starter Kit)
- Mediasonic H82-SU3S2 ProBox 8 Bay External Hard Drive Enclosure (USB 3.0)
- 15.6 Inch Portable Touchscreen Monitor IPS LCD 1920x1080P
- Raspberry Pi Official Keyboard and Mouse Value Pack
CanaKit Starter Kit for the Raspberry Pi 4 4GB with Heat Sink+Fan install & Test!
In this video we’ll take a look at the CanaKit for the Raspberry Pi 4 4GB Starter Kit (RPi4). We will unbox, assemble and compare the cooling of the heat-sinks-only vs. heat-sinks+fan. Be sure to watch the video until the end to see the results!
Where to buy
A 15.6″ Portable Touch Screen Monitor for your Raspberry Pi 4!

The JohnWill 15.6 inch Portable IPS Touchscreen Monitor will allow you to easily use touch screen functionality with the NEW Raspberry Pi 4, 3b+ or your Laptop. Great travelling companion for road warriors that want to have a dual-screen setup wherever they go! You can also use it with Game Consoles such as the XBoxOne, PS4, etc. or even with phones and tablets. In this video, we’ll check it out using a number of devices. It’s a little on the pricey side but depending on your needs, it may be worth every penny.
Links to items shown in this video
- JOHNWILL 15.6 Inch Portable Touchscreen Monitor
- Isotect 3 in 1 HDMI Adapter Cable
- VCE (2 Pack) HDMI Female to Female Adapter
Raspberry Pi 4 Desktop Kit: Overview, Setup & RPi4 Review! Raspberry pi 4 model B
I purchased the Raspberry Pi 4 Computer Desktop Kit the same day it was announced. I spent some time working with it and want to share those experiences with you to help determine if it’s a good fit for your needs. Also, to help you through some of the setup issues that I encountered which will likely be resolved soon.
Where to Order
You can pick up your RPi4b from the following links below.
- CanaKit Raspberry Pi 4 (4GB RAM Starter Kit) – (WTT Recommendation) this kit has most everything you need including the RPi4b with 4GB RAM, 32GB microSD card, USB-C Power Supply, heat sinks, micro HDMI to HDMI cable (6ft.). Not included are: keyboard, mouse and monitor.
CanaKit Raspberry Pi 4 Basic Starter Kit with Official Case (1GB RAM) – this is the lowest price model with a RPi4b with 1GB of RAM, Official USB-C Power Supply, Official RPi case, microHDMI to HDMI cbale (6ft.) and heat sinks. Keep in mind, the RAM is not up-gradable so if you buy this kit you’re stuck with 1GB of RAM. Not included are: keyboard, mouse and monitor. - Raspberry Pi 4 Computer Desktop Kit – this kit includes the following: Raspberry Pi 4 Model B with 1.5GHz 64-bit quad-core ARMv8 CPU, 4 GB LPDDR2 RAM, Official USB-C Power Supply (5-foot cable), Official Raspberry Pi White/Red Case, Official Raspberry Pi Keyboard and Mouse, Official Micro HDMI to HDMI Cable (3-foot cable), MicroSD Card w/NOOBS & Official Raspberry Pi Beginner’s Guide. *NOTE – no heat-sinks nor fan are included (get them separately or pick another option – you will need them). Not included : Monitor.
Troubleshooting
Problem 1: If you receive an error when updating the Recommended Software that states: “Error updating package data – E: Repository ‘http://raspian.raspberrypi.org/raspian buster InRelease’ changed its ‘Suite’ value from ‘testing’ to ‘stable’ here a solution:
- Open the shell/command line prompt from the task bar.
- Type: sudo apt update -y (press ENTER)
- Type: sudo apt-get update (press ENTER)
- Type: sudo apt-get upgrade (press ENTER)
- Press ENTER, press ‘y’ if prompted.
- Once complete, you can click the Raspberry icon and select Shutdown/Reboot or simply type: sudo reboot (press ENTER).
You should now be able to update the Recommended Software.
Problem 2: The Raspberry Pi 4 shows a thermometer icon in the upper-right.
There are a couple solutions: If your Raspberry Pi 4 does not currently have any heat-sinks installed, you will want to buy a set. They are typically very inexpensive. However, even this won’t be enough. You’re going to need a case which utilizes active cooling (i.e. a fan). Alternatively, you could purchase a replacement case which includes heat sinks and a fan. We reviewed the CanaKit Raspberry Pi 4 Starter Kit and it is a great option as it includes the heat sinks, fan, case and more. You can find the video above or simply click here. The video covers this kit in enough detail to know exactly why it’s a WTT Recommendation.
Problem 3: Raspberry Pi 4 can’t search WiFi and there are 2 red crosses on the WiFi icon.
Possible Solution: During setup, if you change the country to something other than the default (UK) for your country, it may have difficulties translating the correct WiFi protocols. Instead, during setup, use the Default Location and see if this corrects the problem.
Change Log
- 2024-12-01 – Added Pi Dog video.
- 2023-03-25 – Added Pironman video.
- 2022-09-24 – Added PiCrawler video.
- 2022-08-18 – Added CrowPi L video.
- 2022-05-27 – Added the SunFounder 7″ Pi Touch Screen case
- 2022-04-07 – Added the new Network Install Bootloader for Raspberry Pi 4/400 Setup.
- 2022-03-09 – Added the DeskPi Lite case review.
- 2021-09-19 – Added Windows 11 on a Raspberry Pi 4
- 2021-09-05– Added Desk Pi Pro V2 Case
- 2021-08-05 – Minor updates.
- 2021-05-01 – Added PINN Lite video